Overview
AppsAnywhere provides a range of Apps, which can be automatically licensed by AppsAnywhere upon launch. Please see the Pre-Packaged Apps SLA for further information.
License information is configured within AppsAnywhere using corresponding license templates, which define the required key / value pairs for software license activation.
Compatible applications are downloaded from the AppsAnywhere Packaging Service and can be automatically licensed using existing software license details.
The relevant licensing information for these apps can be configured using pre-defined templates within AppsAnywhere.
A license template can then be applied to one or many Delivery Methods.
IMPORTANT
Please refer to Automated App License Templates for more information on the expected data formats.
Auto App Licensing - Quick Setup Guide
This is a quick setup guide to using Automated App Licensing. This can be used as a checklist or reminder on how to setup and configure Automated App Licensing - there is more information below if required.
-
Download the required STP from the AppsAnywhere Packaging Service, upload it to AppsAnywhere and configure a Cloudpaging Delivery Method the same as any other Cloudpaged application
-
Within your AppsAnywhere, locate the matching App License Template* and configure it with the appropriate information (the information MUST BE in the format as shown https://docs.appsanywhere.com/appsanywhere/3.4/automated-app-license-templates) - Configuring an App License
-
Add the App License Template to the App Delivery Method - Applying an App License to an App
-
Provision the App to your target audience (best practice would dictate that you first provision to a test group, before provisioning to your live environment)
*There is a matching License Template for every Automated App License STP and sometimes for each version - make sure that you pick the correct License Template for the correct Automated App License STP and version! If the License Template does not show in your AppsAnywhere, try Updating the List of Templates
Downloading an Auto License STP
-
Login to the AppsAnywhere Packaging Service using Zendesk credentials
-
Use the Filter by type option and select AAL
-
Locate the application need
-
Use Actions → Download App option to download the STP file
-
Upload the application in AppsAnywhere by following https://docs.appsanywhere.com/appsanywhere/managing-applications .
Updating the List of Templates
AppsAnywhere provides a repository of templates for all Auto App Licensed apps via the AppsAnywhere Packaging Service. To ensure your AppsAnywhere is up-to-date with the latest templates, the list of templates can be dynamically updated.
Updating the list of Templates is a manual process which can be performed at any time by following these steps.
-
Log into AppsAnywhere as a System Admin user
-
Click on Return to Admin to access the AppsAnywhere admin portal
-
Navigate to Settings
-
Click on App License Templates
-
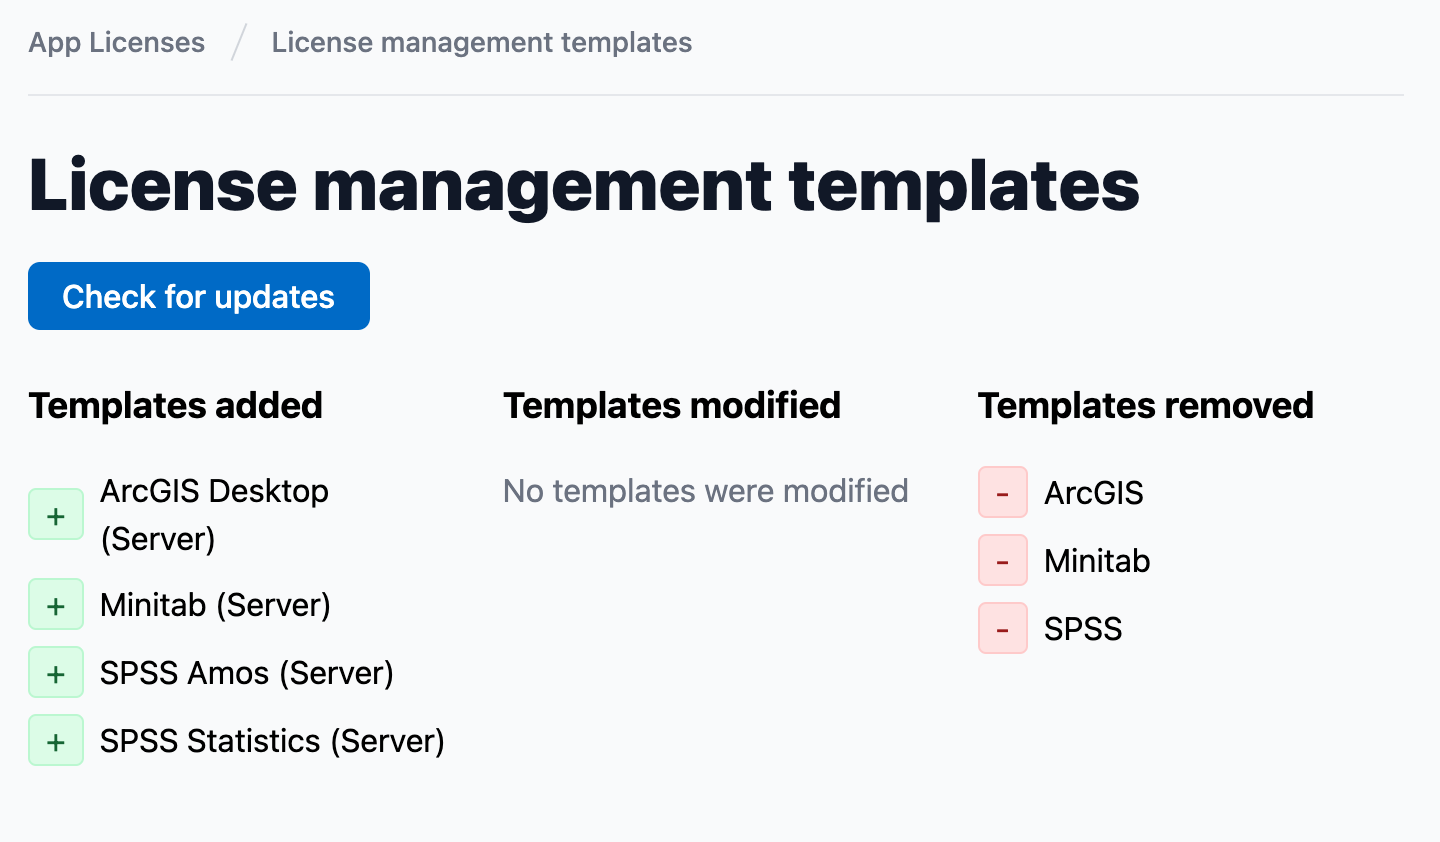
Click on the Check for updates button to retrieve any updates and apply them to the Templates available in AppsAnywhere
A table will show any Templates which have been added, updated or removed.
Although Templates are named after specific apps, it only provides a format for licensing data, and will only work with compatible applications provided by AppsAnywhere.
From the template an App License must be created containing the specific application license details.
Configuring an App License
To use Automated App Licensing a license must be configured containing organization specific license details e.g.:
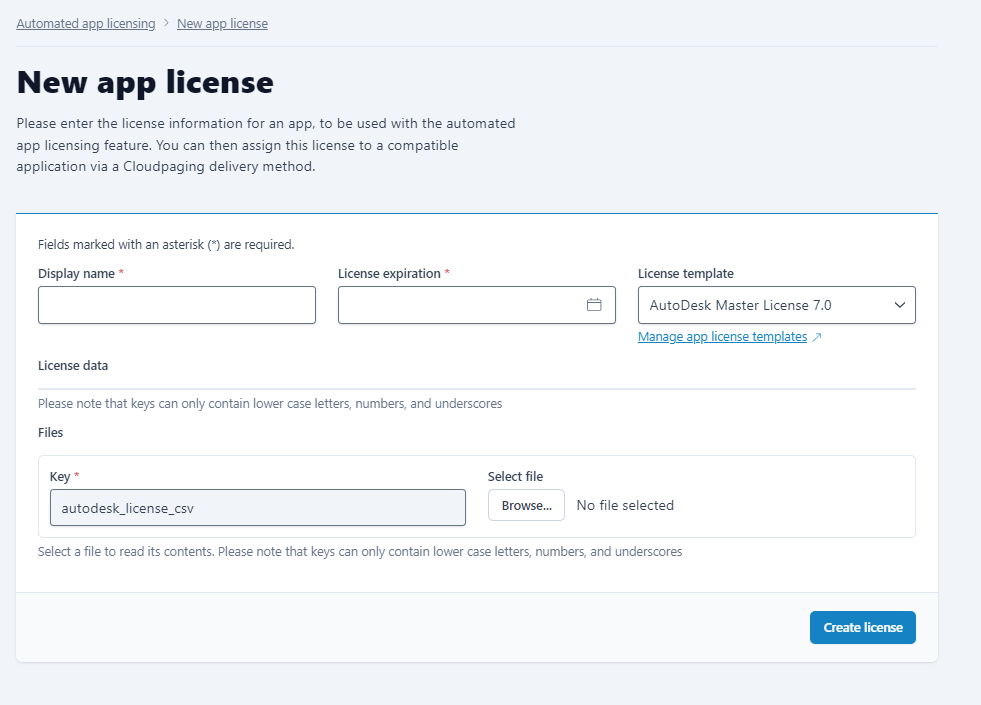
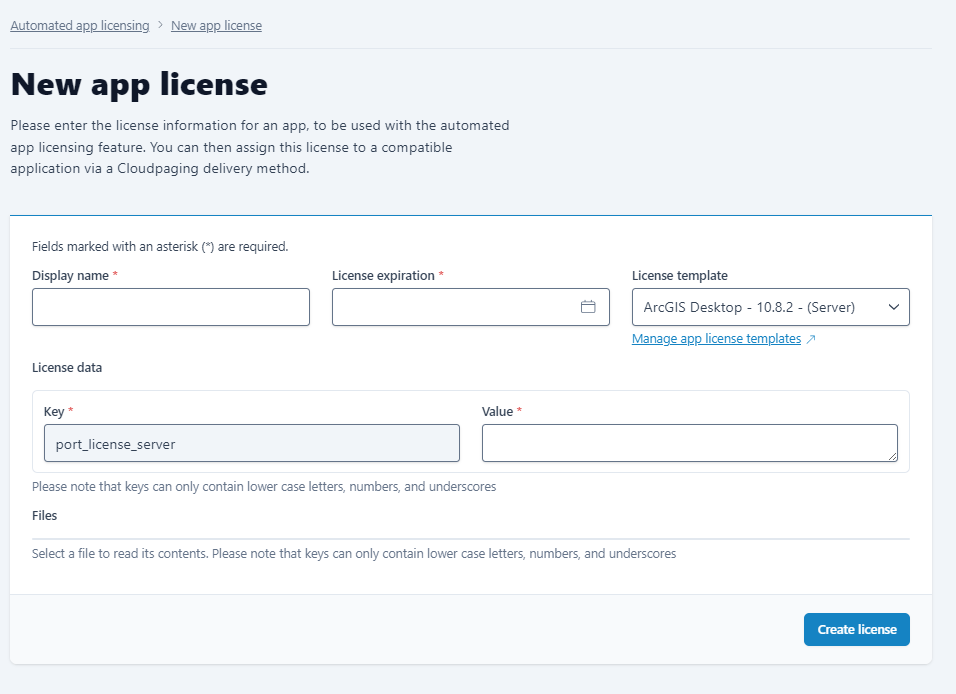
The License template field allows selection of a pre-defined template for a particular app. The template enforces a particular format for the license data, and therefore selecting one of these licenses will 'lock' the fields under license data (or files) to the required fields for the app template chosen.
IMPORTANT
Please refer to Automated App License Templates for more information on the expected license data formats.
To create a new Automated App License:
-
Log into AppsAnywhere as an Admin user
-
Click on Return to Admin to access the AppsAnywhere admin portal
-
On the sidebar on the left of the page, locate the Manage Automated App Licensing section. A list of any App Licenses which have already been added will be displayed.
-
To add a new App License, click the Add new license button
-
Enter the details for the App License to be added
Updating an App License
-
Log into AppsAnywhere as an Admin user
-
Click on Return to Admin to access the AppsAnywhere admin portal
-
On the sidebar on the left of the page, locate the Manage Automated App Licensing section. This page will display a list of App Licenses which have already been added.
-
To edit an App License simply click on the license to be edited in the list.
-
Once changes have been applied to the App License, click Update license to save
App licenses are only applied on the very first launch of a Cloudpaged app. Editing an app license will not affect users who already have an app virtualized in Cloudpaging Player.
To apply a new a license for an app that is already in use, it is necessary to create a new Cloudpaged Delivery Method and to configure an upgrade.
Applying an App License to an App
Once App Licenses have been created, the next step is to apply the license.
An App License can be associated to any number of Apps.
App Licenses can only be applied to AppsAnywhere Library or Cloudpaging Delivery Methods.
-
Log into AppsAnywhere as an admin user
-
Click on Return to Admin to access the AppsAnywhere admin portal
-
On the sidebar on the left of the page, click the Manage Applications button
-
Navigate to the App and Delivery Method that the license will be applied to
-
Select Edit for the App that contains the Delivery Method
-
Navigate to the Delivery Methods tab
-
Select the Delivery Method that to apply the license against
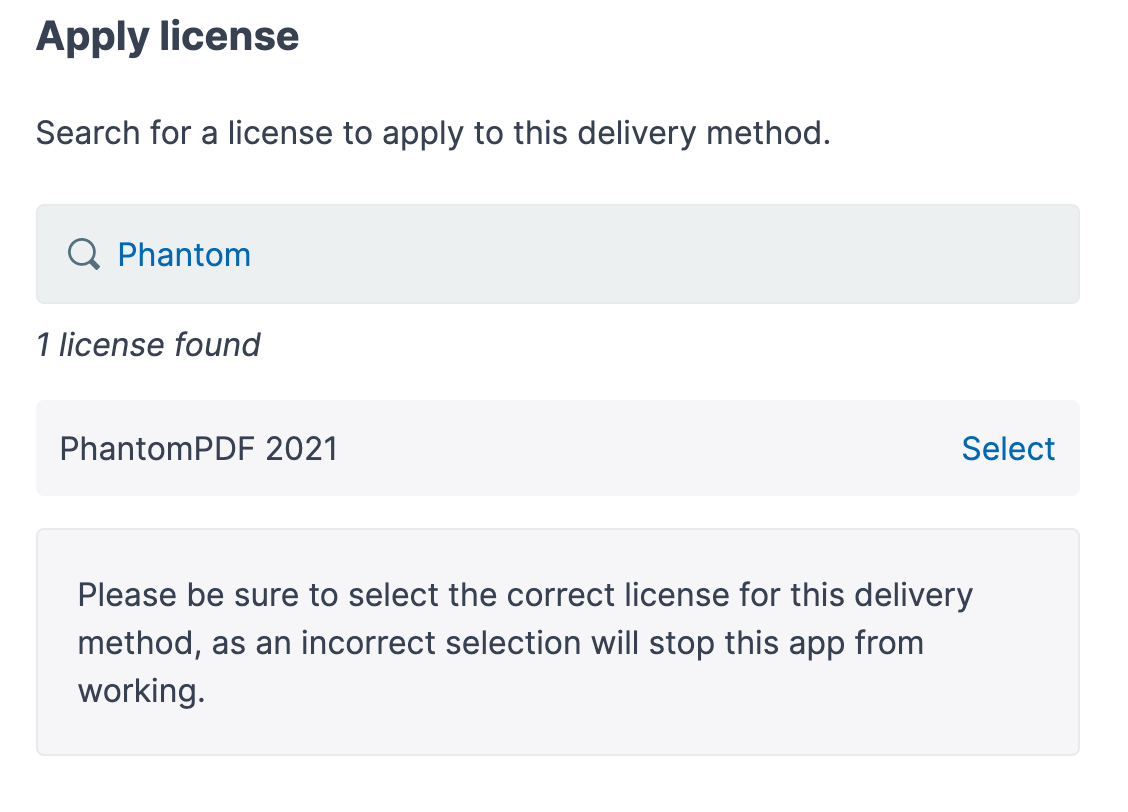
The Delivery Method contains an Apply License section. In this section, you can search for an App License to apply and click the select button to apply it.
The App License applied to a Delivery Method can be changed or removed entirely by following the same process, and clicking remove on the previously applied App License
The list of Delivery Methods to which an App License is currently associated can be viewed from the Manage Automated App Licensing section, when editing an App License.
On that page, select the linked Delivery Method to jump directly to the Delivery Method edit form.
Deleting an App License
Removing an App License from an App will cause new launches of that App to fail, until a new license is applied with the required key values.
-
Navigate to the Manage Automated App Licensing section
-
Log into AppsAnywhere as an admin user
-
Click on Return to Admin to access the AppsAnywhere admin portal
-
On the sidebar on the left of the page, locate the Manage Automated App Licensing section. This page will display a list of App Licenses that have already been added.
-
Click the Edit license button next to the App License to be removed.
-
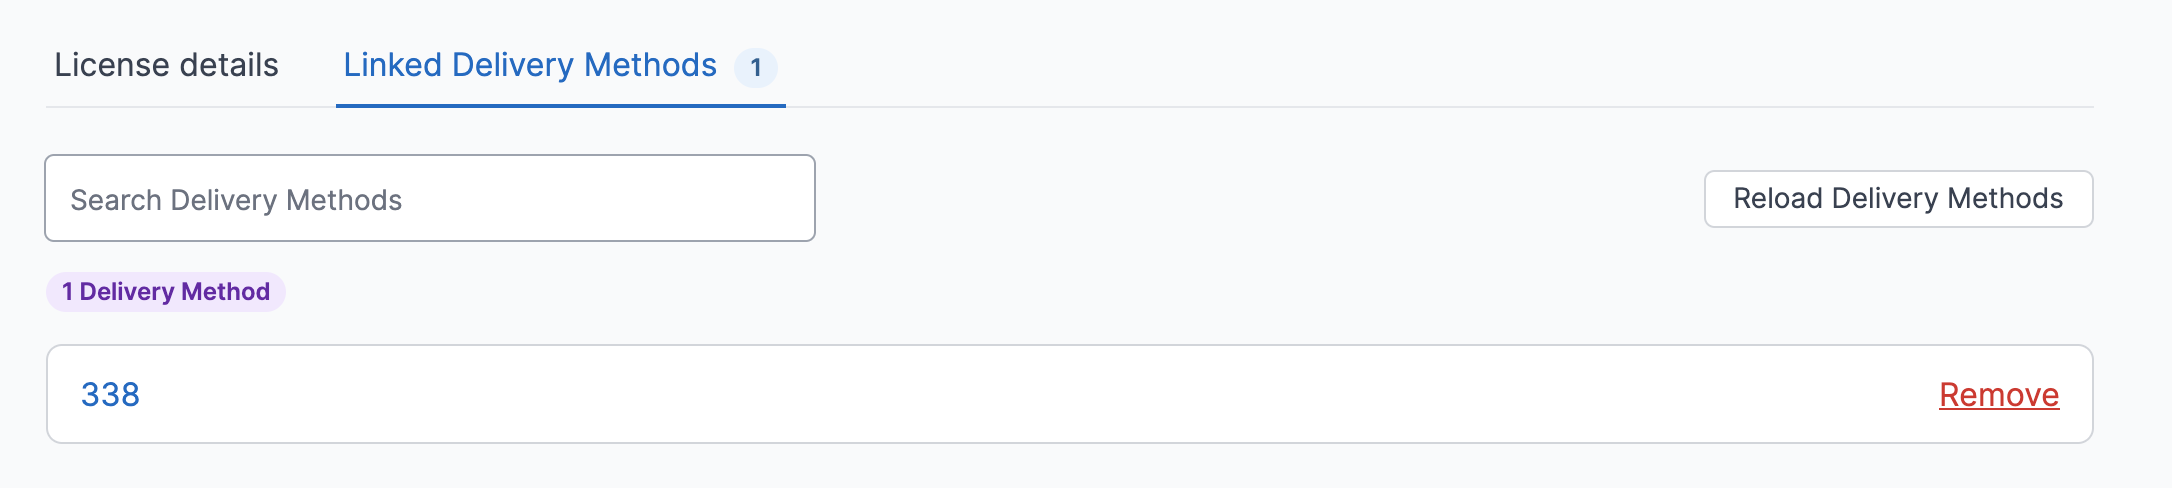
An App License that is linked to Delivery Methods cannot be removed. Any associations to Delivery Methods can be viewed in the Linked Delivery Methods tab at the top of the form.
-
If the App License is linked to a Delivery Method, click Remove for each Delivery Method to remove the association.
-
Click the Delete App License button at the bottom of the License details form to remove the App License.