Building a RemoteApp Instance
Overview
A lot of our customers are looking to deliver Windows applications to non-Windows devices and many are also looking for ways to deliver applications that are running in a controlled environment to un-controlled, or remote, devices. VDI is often the solution to both of those problems and Microsoft's RemoteApp is a great way to make a start in that area. At AppsAnywhere, we use RemoteApp heavily as part of our demos to demonstrate the power of VDI and running apps across different platforms. In this article, we take you through how we set up a basic RemoteApp environment and in the next article, we show you how easy it is to link RemoteApp with AppsAnywhere.
Before you begin
In order to set up a RemoteApp environment, you will need to have a couple of things in place. These are:
A machine with a fresh install of Windows Server. We are using 2012 R2 in this article but feel free to use whatever flavour you like.
Your machine should be joined to your domain. It doesn't have to be, but it makes things a whole lot simpler.
You need to be logged in as admin. If you are joined to the domain, then log in as domain admin.
Once you have those three things sorted, you are ready to go!
Setting up RemoteApp
The following process is what the AppsAnywhere team use to configure a single-server demo environment for RemoteApp. These notes are meant to assist a complete novice get up and running with their first RemoteApp server but do not reflect any best practice for using RemoteApp in a production environment.
Refer to Microsoft documentation on Remote Desktop Services for further information.
Launch the Add Roles and Features Wizard
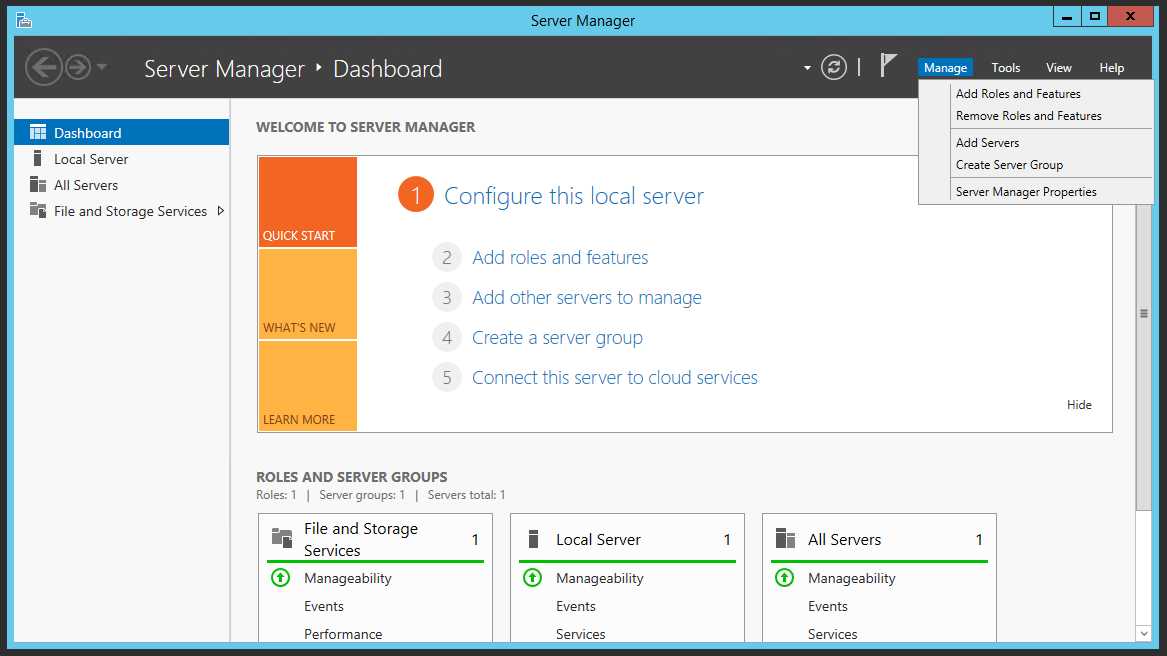
In order to start the process of setting up RemoteApp, you need to add the Remote Desktop Services role to the server. This is done through the Add Roles and Features wizard.
Open up Server Manager
Click on Manage
Select Add Roles and Features
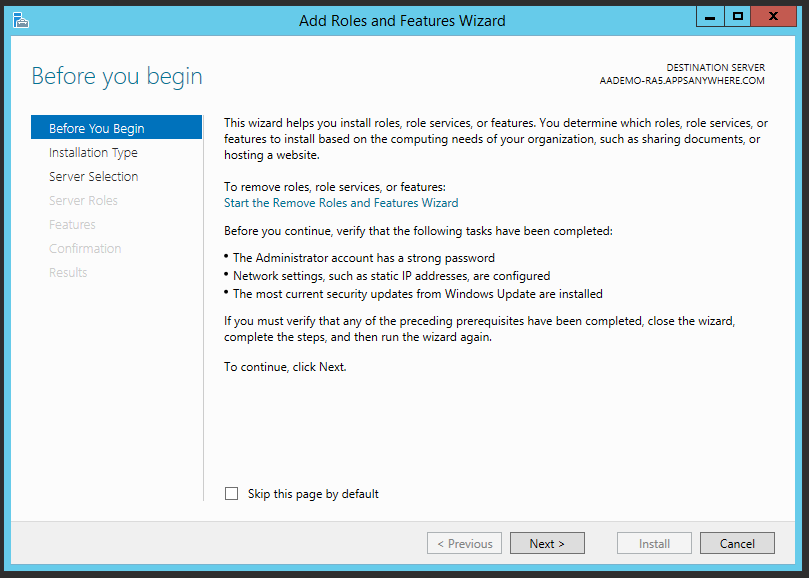
Make your way through the wizard
When the wizard opens, you will be presented with an information screen. Be sure to read this screen carefully and be certain that installing this role onto your server will not affect any other services provided by that machine before continuing.
Click Next
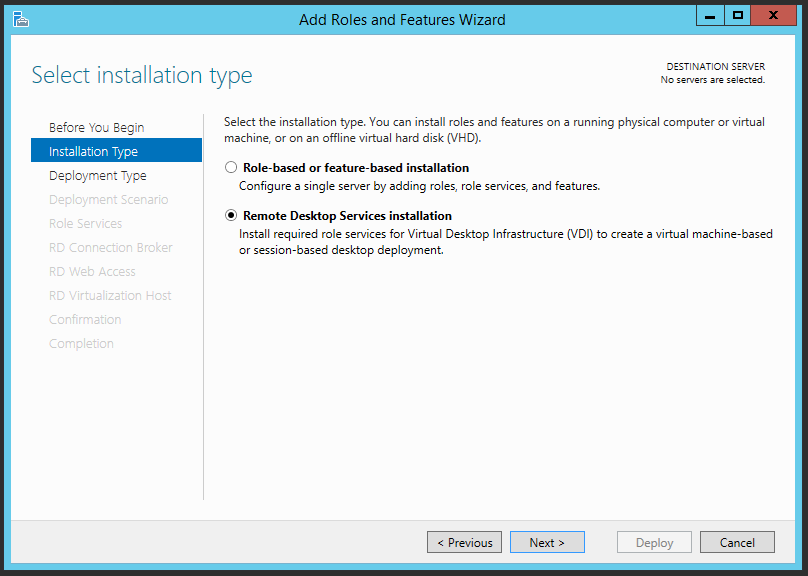
Select the installation type
Remote Desktop Services is a bit of a special case when it comes to adding the role to the server and so has a category of its own, separate to the usual list of available roles and features.
Check sure Remote Desktop Services Installation
Click Next
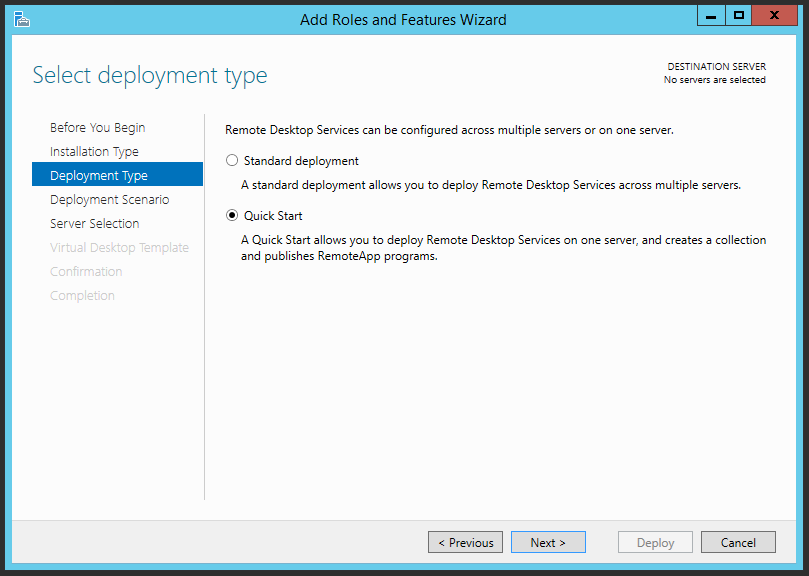
Select the deployment type
On this screen, you select whether you want to install a single-server deployment or set up a multi-server environment with all of the various components required for RemoteApp split across different machines. For the purpose of this example, we use the Quick Start option, with all components residing on the same box. Be sure to select the option that best suits your requirements.
Select Quick Start
Click Next
For more information on the Standard Deployment option, take a look at this technet blog entry
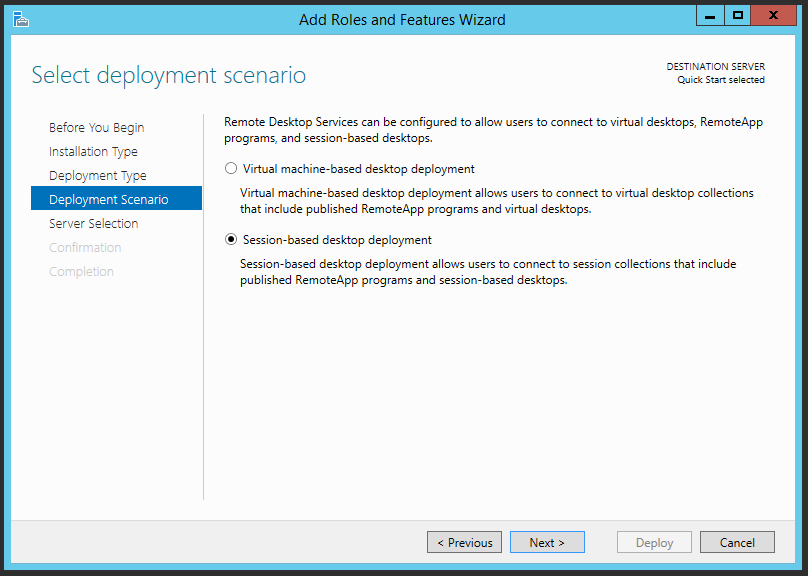
Choose VDI or session-based deployment
RemoteApp can utilize VMs running in a Hyper-V infrastructure in order to run the session that the user is connecting to. For simplicity however, we choose to use session-based desktop deployment as this is much more self-contained, which better suits the requirement of our demo system.
Choose Session-based desktop deployment
Click Next
For more information on Virtual machine-based desktop deployment, take a look at this technet article
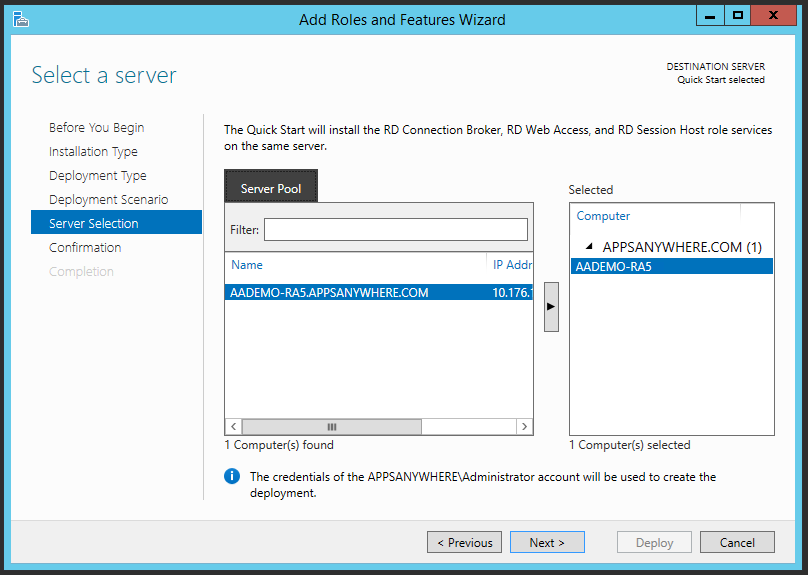
Choose the server to install to
At this point you select which server you are wanting to install the selected services on. In our example this is a simple choice as we are only working with the server we are currently connected to.
Make sure the selected server is correct
Click Next
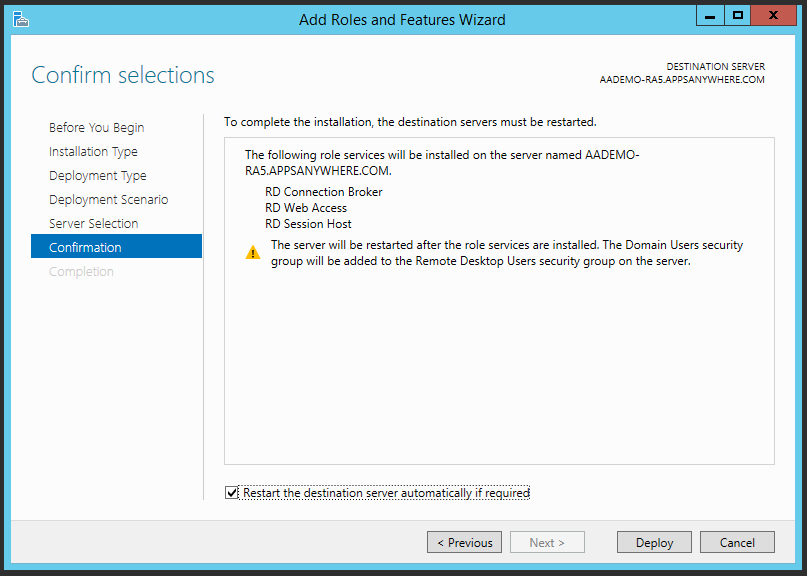
Review the details
This final screen just confirms the details of the servers that will be affected and the roles that will be installed on each (or in our case, just the one). Ensure the details are correct and then continue.
Tick Restart the destination server automatically if required
Click Deploy
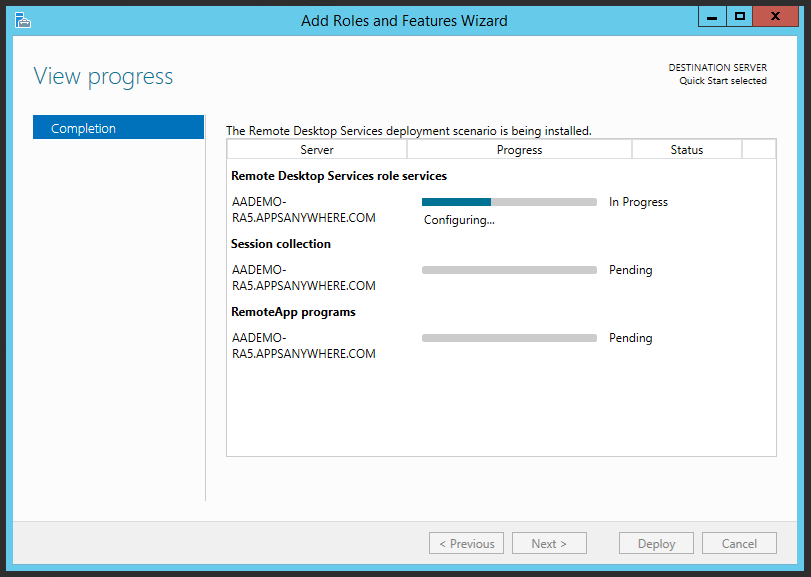
Sit back and wait for the installation to complete
As an I.T. enthusiast you will be well versed in the art of watching progress bars slowly fill up. Adopt your favorite waiting position while the installation progresses.
If you get bored, try typing 'google pacman' into Google...

Re-connect to the server
The installation process involves at least one re-start, so you may need to re-connect to the server. Once you re-connect you will see that the process has resumed where it left off before the restart.
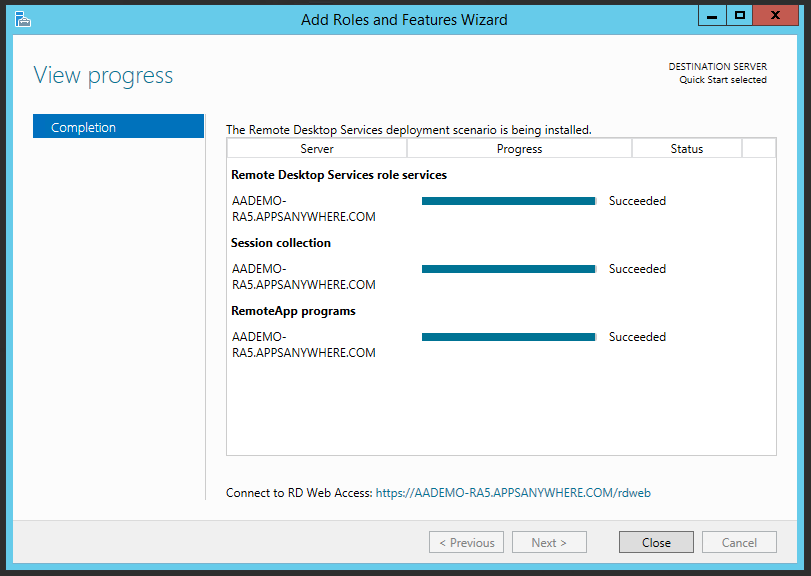
Installation Complete!
Eventually, you will see the following screen, indicating that the installation is complete.
Make a note of your rdweb URL (it will come in handy later)
Close the Add Roles and Features Wizard.
That's it! Take a look at the next article that will take you through Linking your RemoteApp server to AppsAnywhere
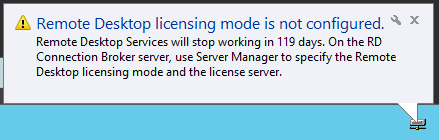
Licensing Concerns
By default, a newly installed RemoteApp server will come with a 119-day grace period on the licensing. If you are running a proof-of-concept of RemoteApp then this should be more than sufficient time to run an evaluation. If you intend to use the system for longer however, you will need to hold (or purchase) the appropriate licenses and specify a licensing server for your RemoteApp Session Hosts to connect to.
Once setup is complete, you will see the following friendly reminder that this is yet to be completed: