
Citrix Netscaler / ADC
Overview
The following configuration and instructions are provided as a guide. The information should be reviewed before being applied, and referenced against any existing Citrix Netscaler / ADC configuration currently in use.
Please refer to your load balancer vendor for support and further information, e.g. Citrix ADC documentation.
AppsAnywhere
The following Server, Monitor, Service Group and Virtual Server configurations can be used with AppsAnywhere.
Add Servers
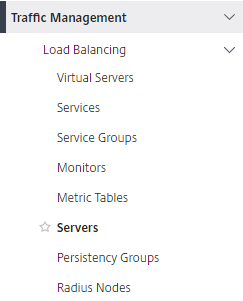
To add the AppsAnywhere server details so they can be used with a virtual server and service group, login to the Citrix Netscaler / ADC interface and select Servers from the Traffic Management -> Load Balancing section:
Click Add to define an entry for your AppsAnywhere server. This process will need to be completed for each individual server:

Specify the required name and IP address of your AppsAnywhere server and click Create to add the entry:

For example:

Add a monitor
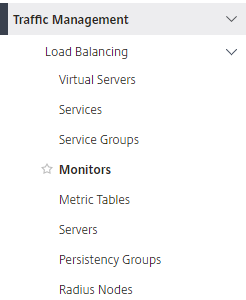
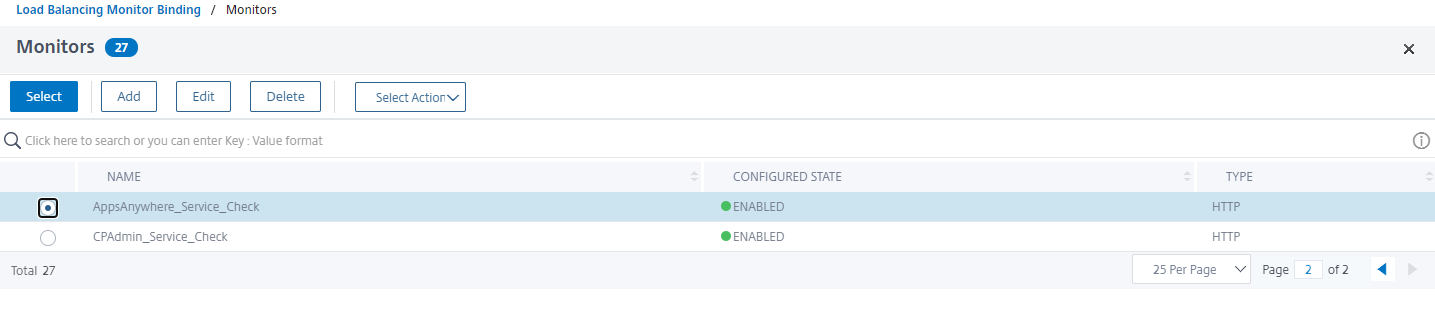
To add a service monitor, select Monitors from the Traffic Management -> Load Balancing section:
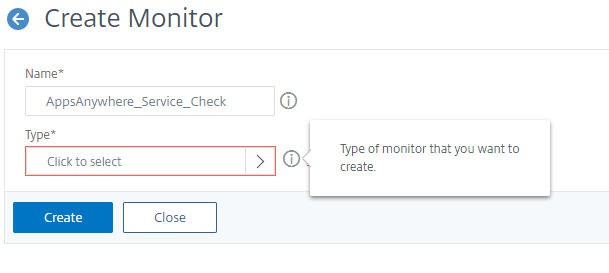
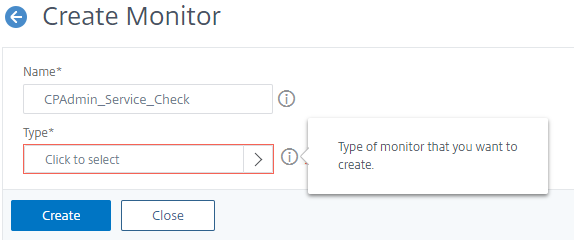
Click Add to create a new monitor.

Specify a name for the monitor and click the “>” icon to select the monitor type.
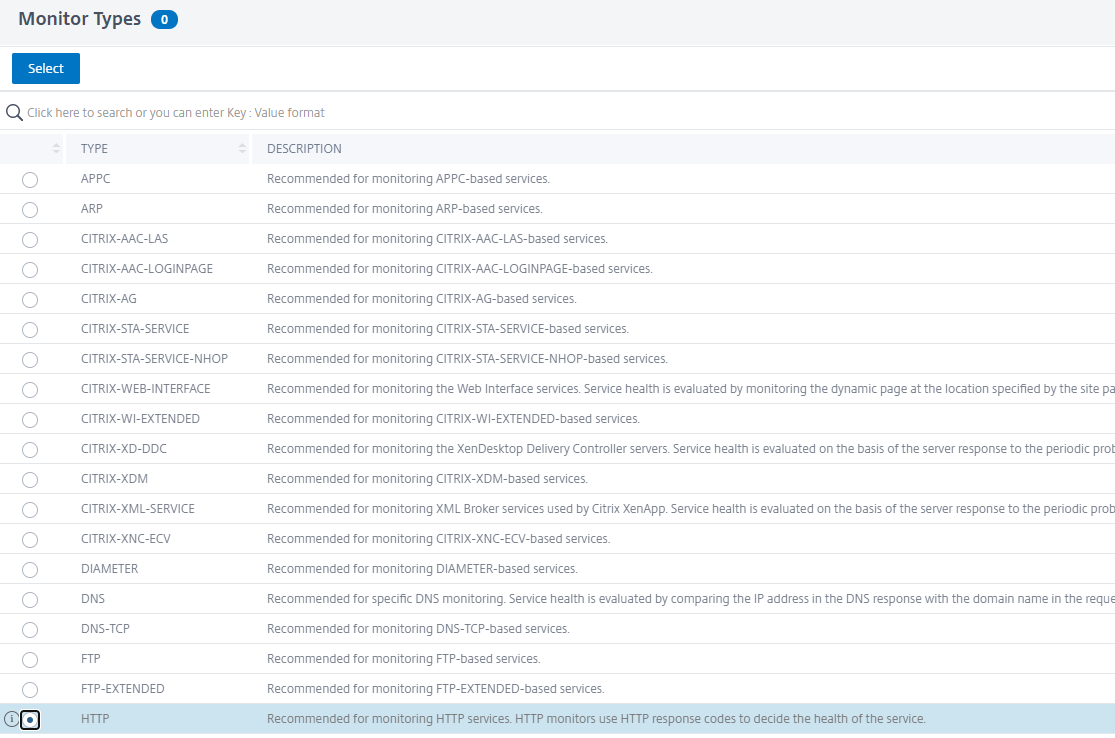
Choose HTTP and click Select.
Set
Interval = 30 seconds
Response Time-Out = 10 seconds
Change the HTTP Request value to "HEAD /healthcheck" .
Enable the Secure option.
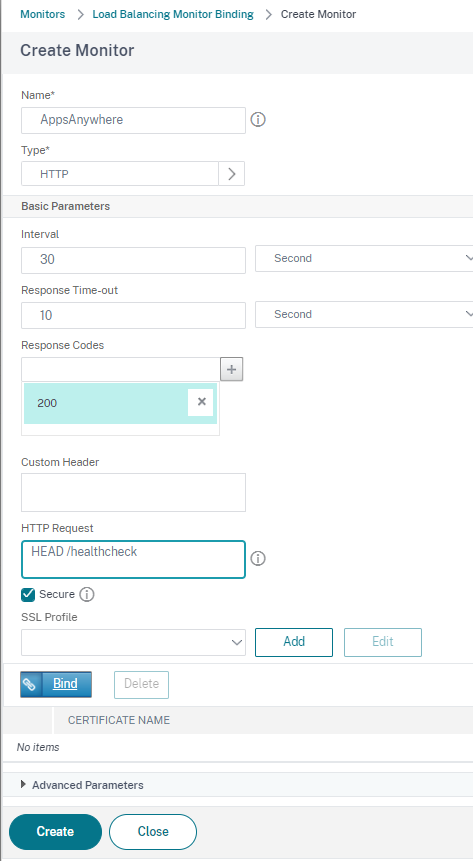
Click Create to add the monitor.
Other options such as check intervals and timeouts can be adjusted if required.
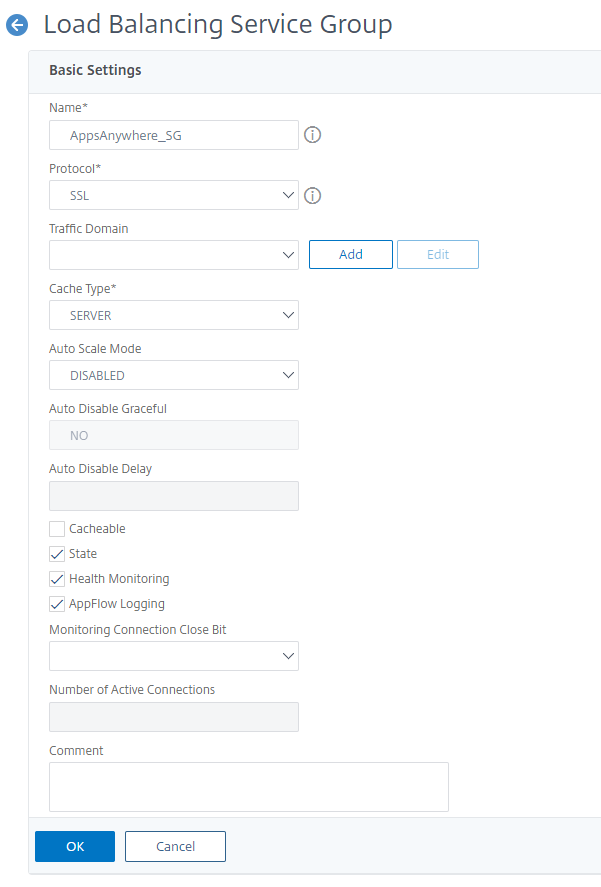
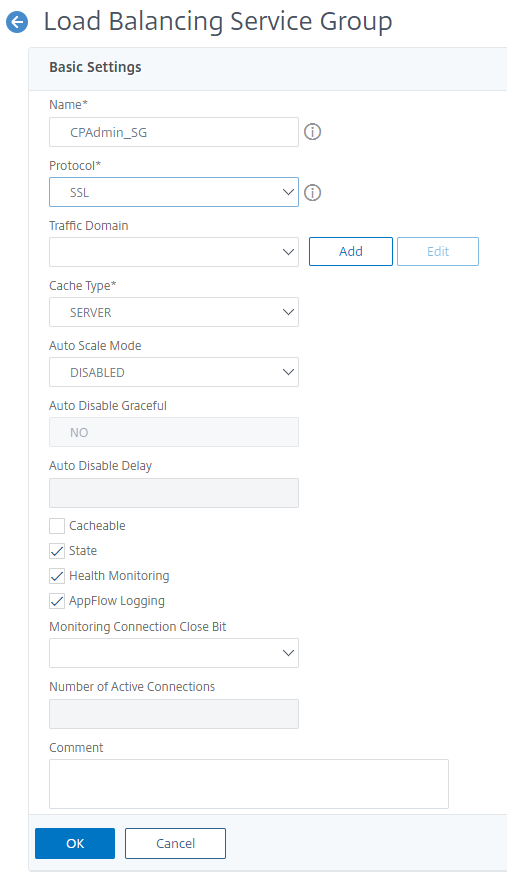
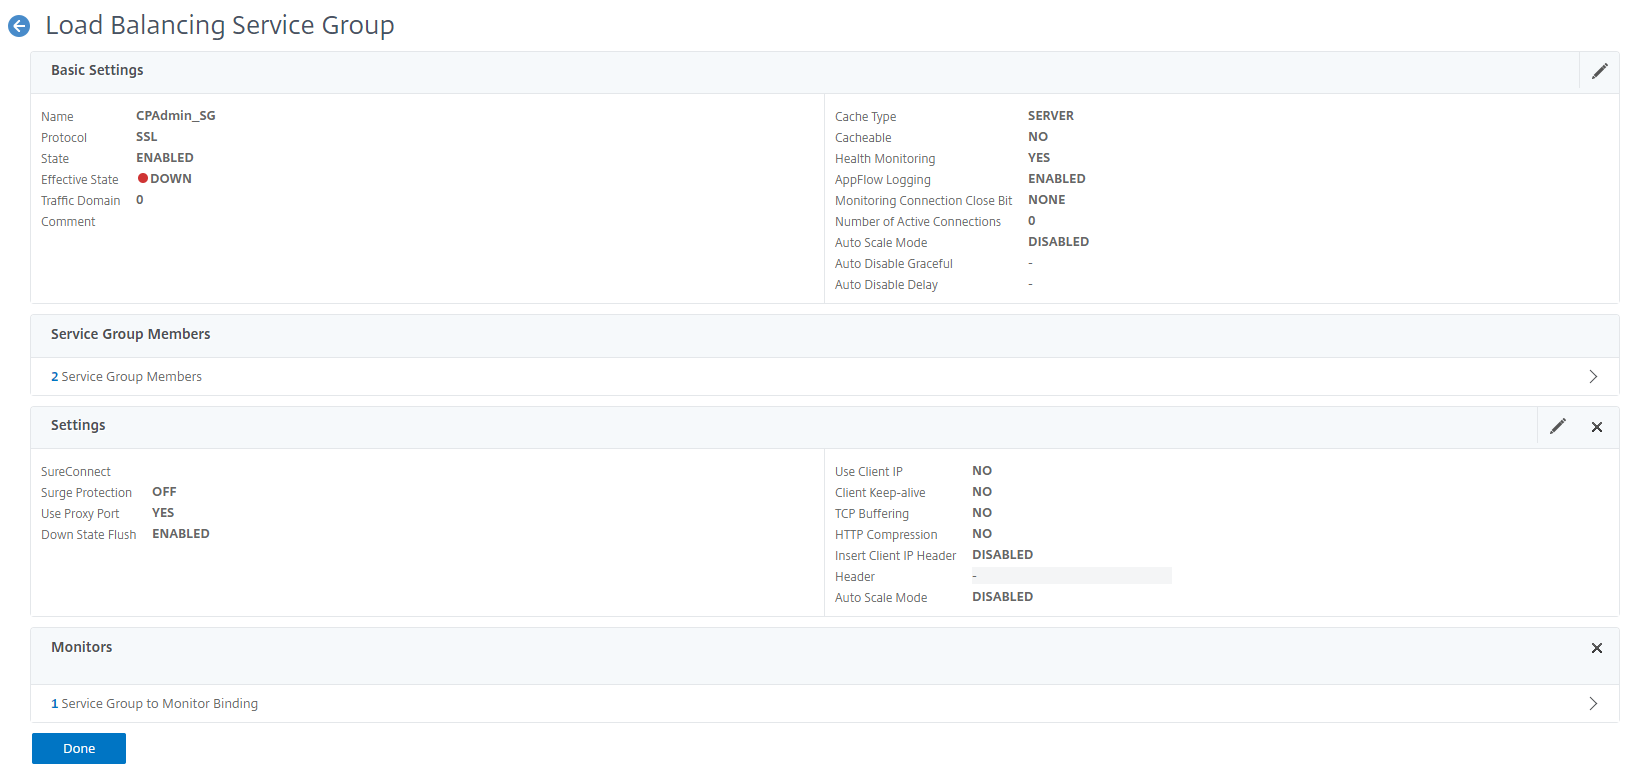
Create a Service Group
To create a service group containing the AppsAnywhere Server, select Service Groups from the Traffic Management -> Load Balancing section:
Click Add to create a new Service Group:

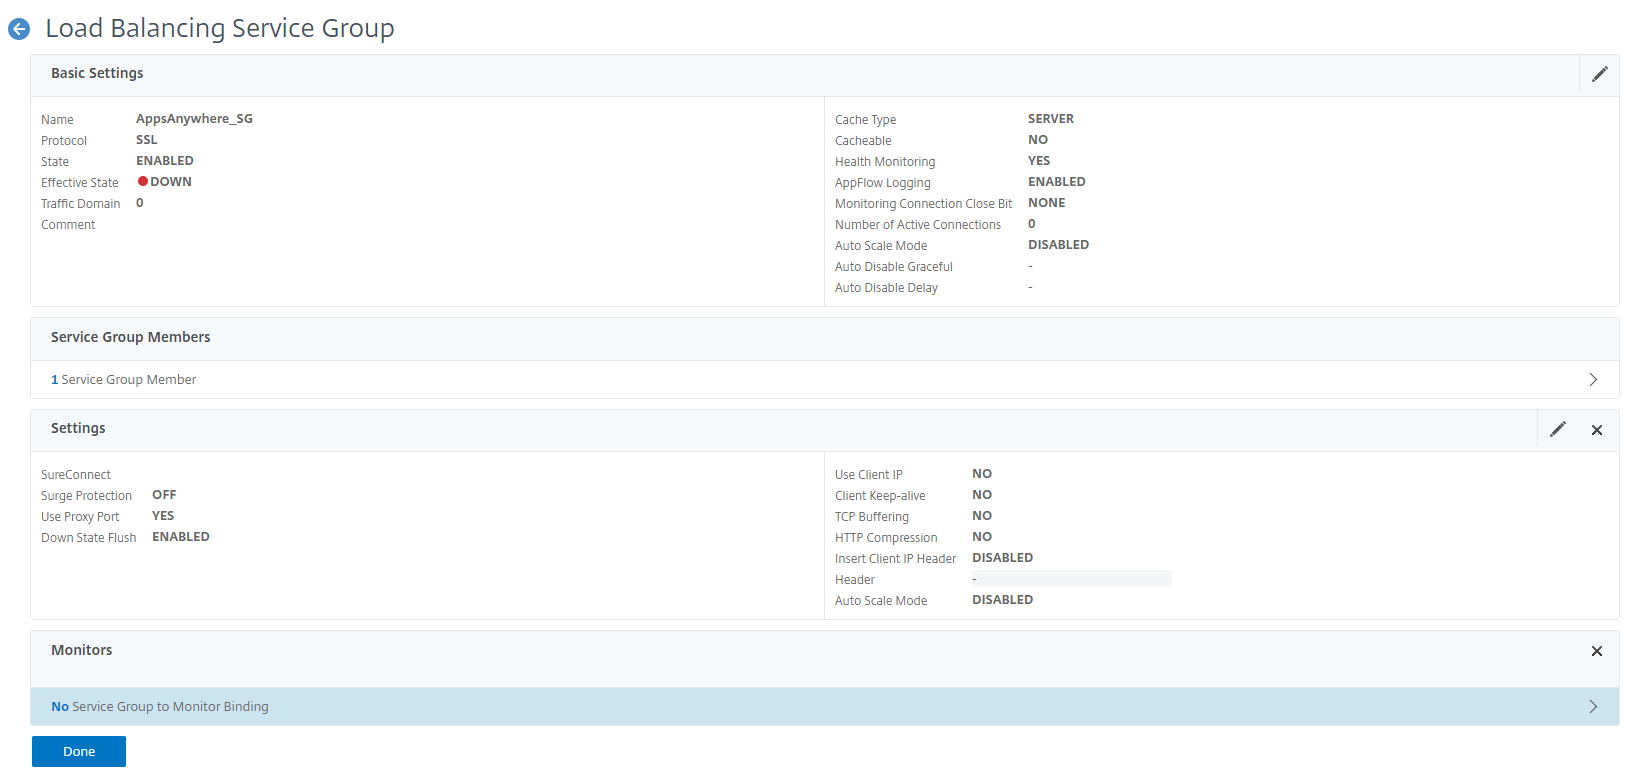
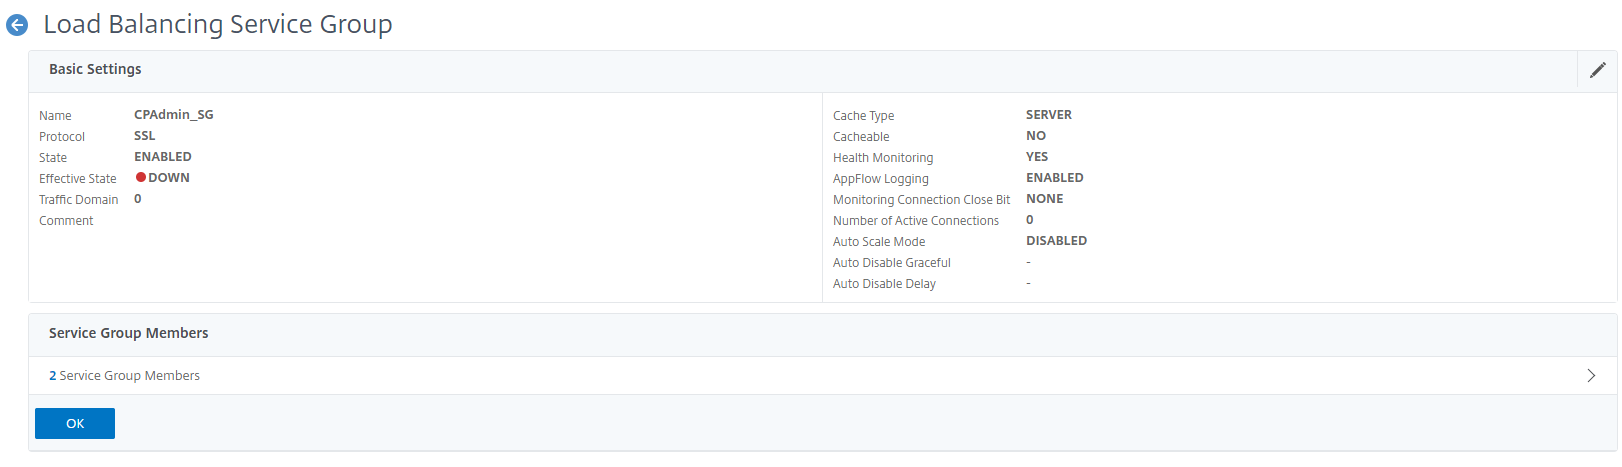
Specify the Name or the Service Group and select SSL from the protocol list. Click OK to continue.
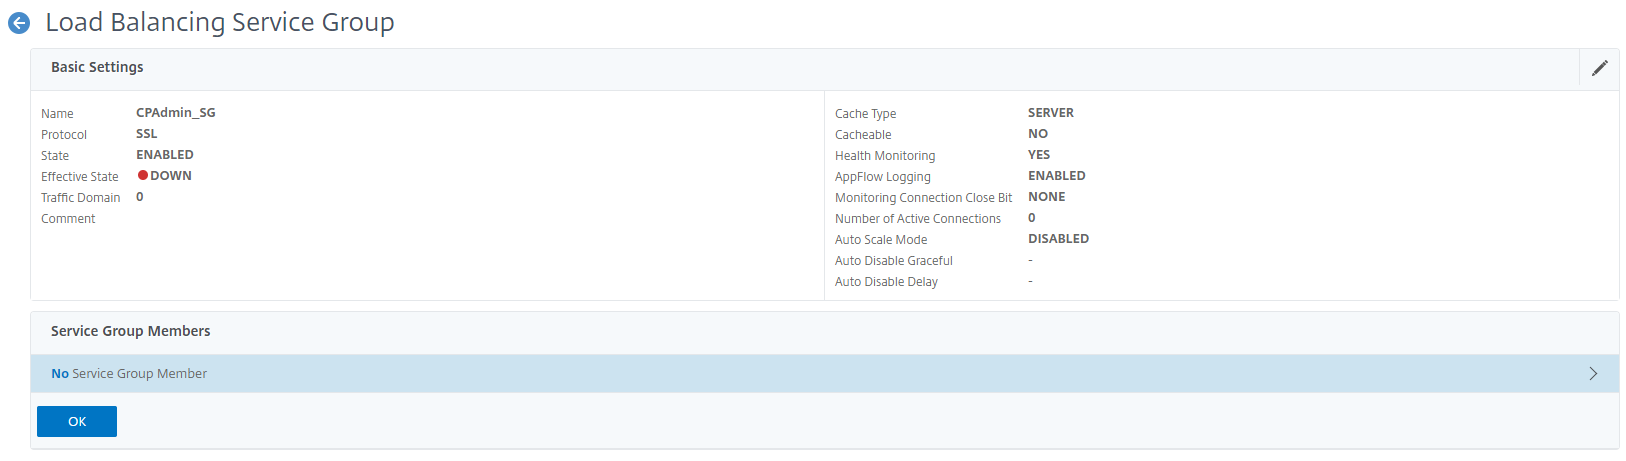
Click the No Service Group Member item under the Service Group Members section:
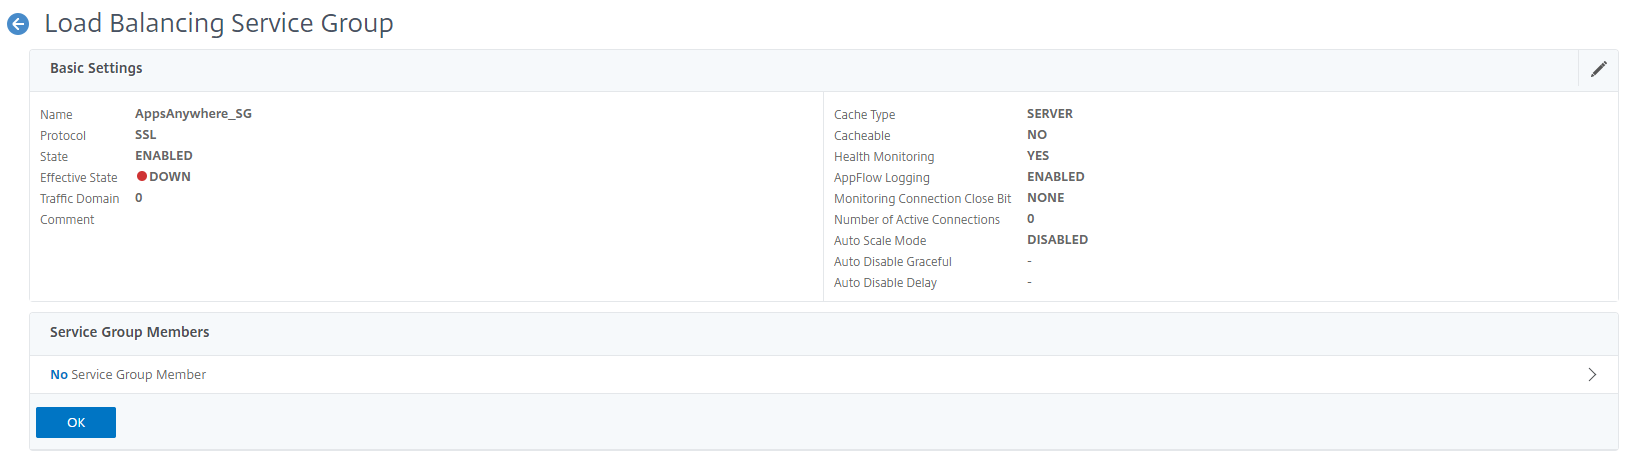
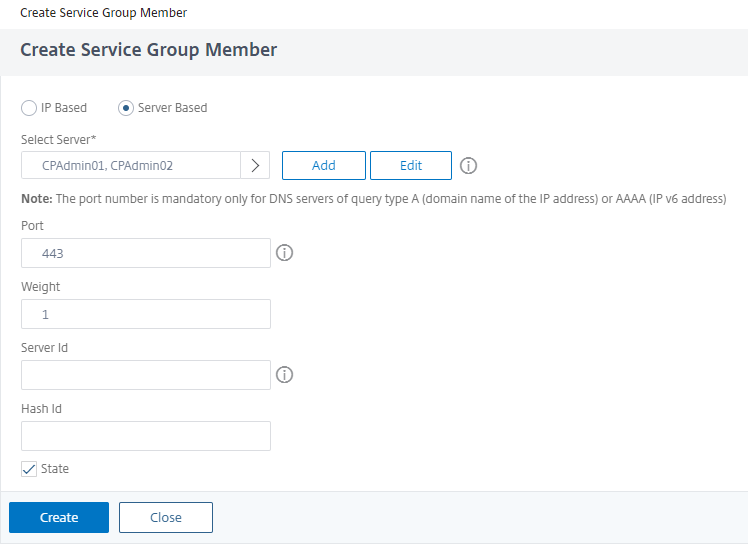
Select the Server Based option on the Create Service Group Member page:
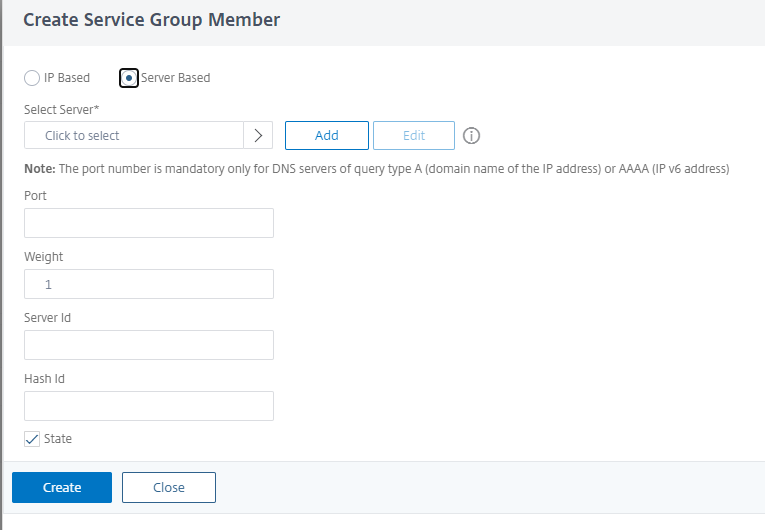
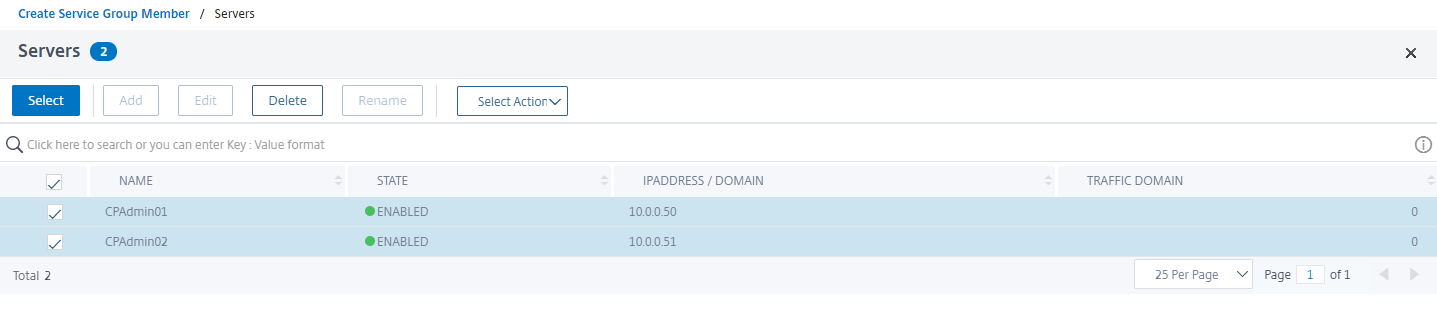
Click the “>” icon next to the Select Server option, select your existing AppsAnywhere Servers and click Select to continue :

Enter 443 in the Port number field and click Create to continue:

Click OK under the Service Group Members section to continue:

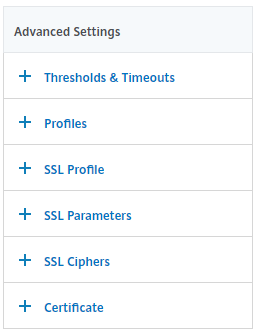
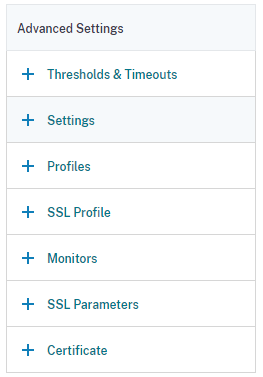
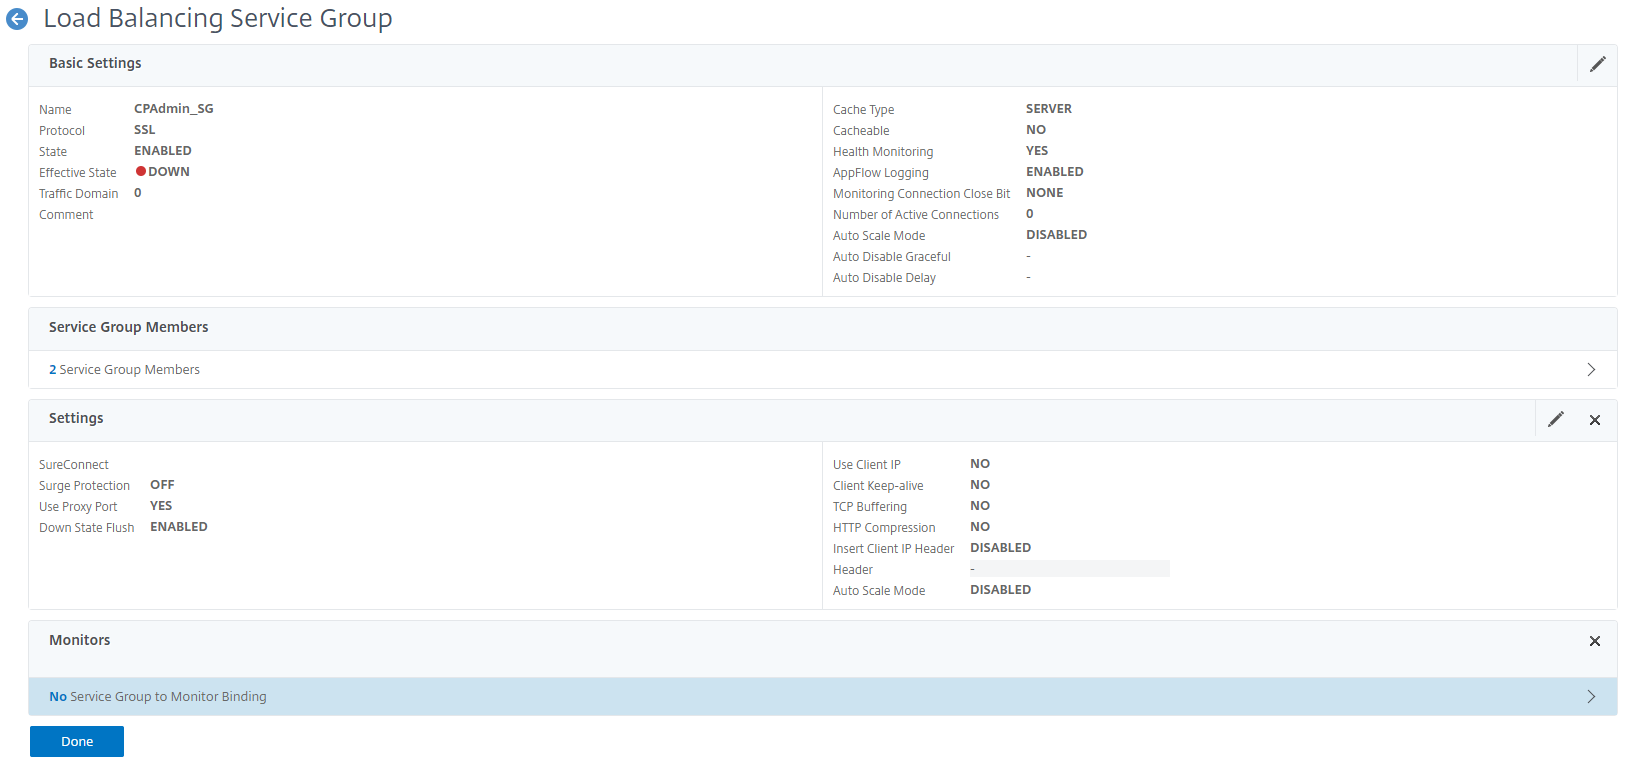
Select Monitors from the Advanced Settings menu on the right-hand side of the page:
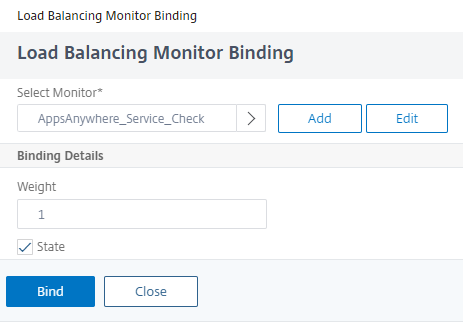
Click the No Service Group to Monitor Binding item under the Monitors section:
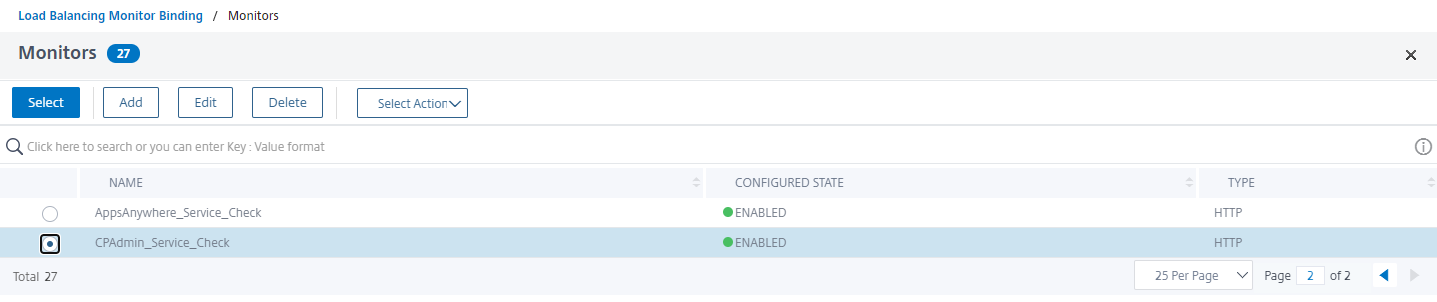
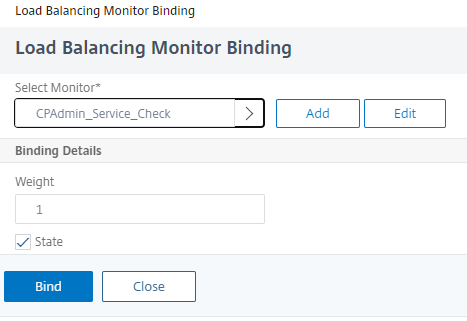
Click the “>” icon next to the Select Monitor option, select the Monitoring service created in the previous step and click Select to continue :
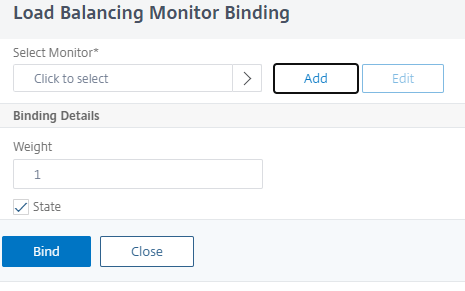
Click Bind to continue:
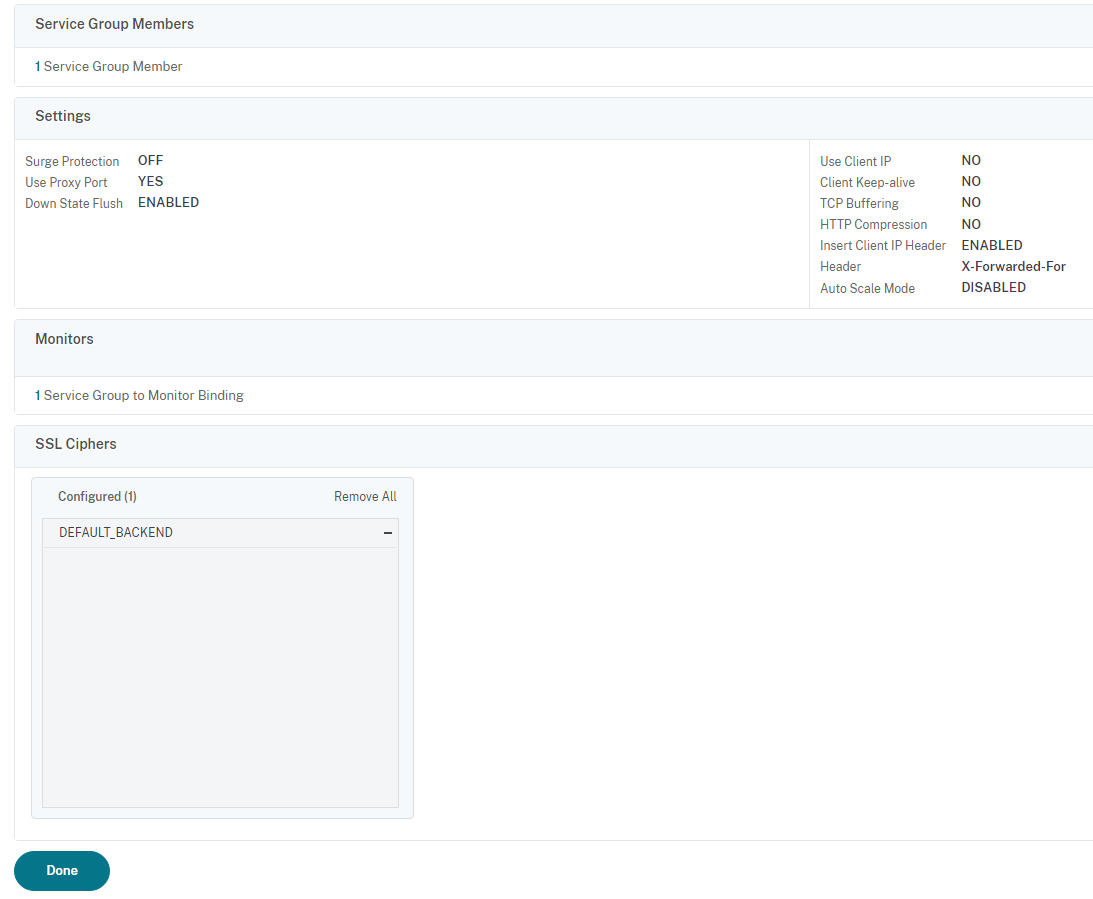
Click the the Settings Advanced Settings option
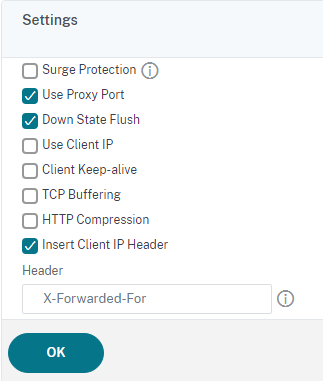
Enable the Insert Client IP Header and type in the X-Forwarded-For string for the Header text box and click OK
Click Done at the bottom of the page to complete the process.
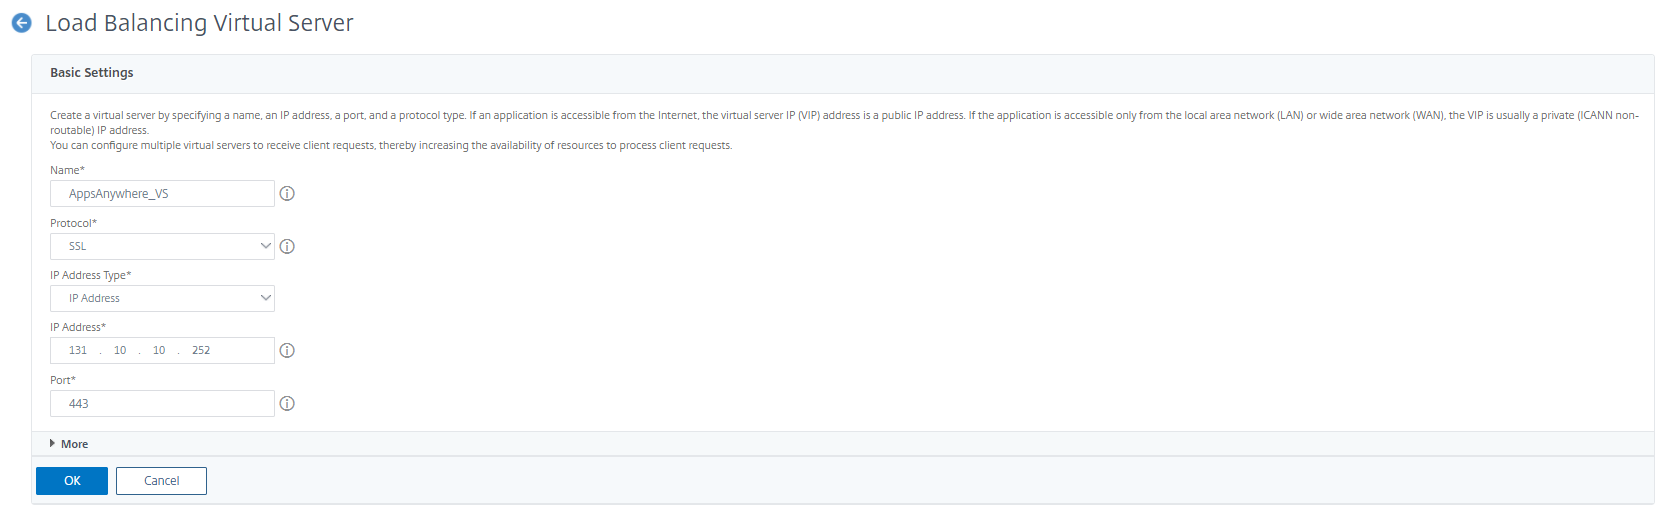
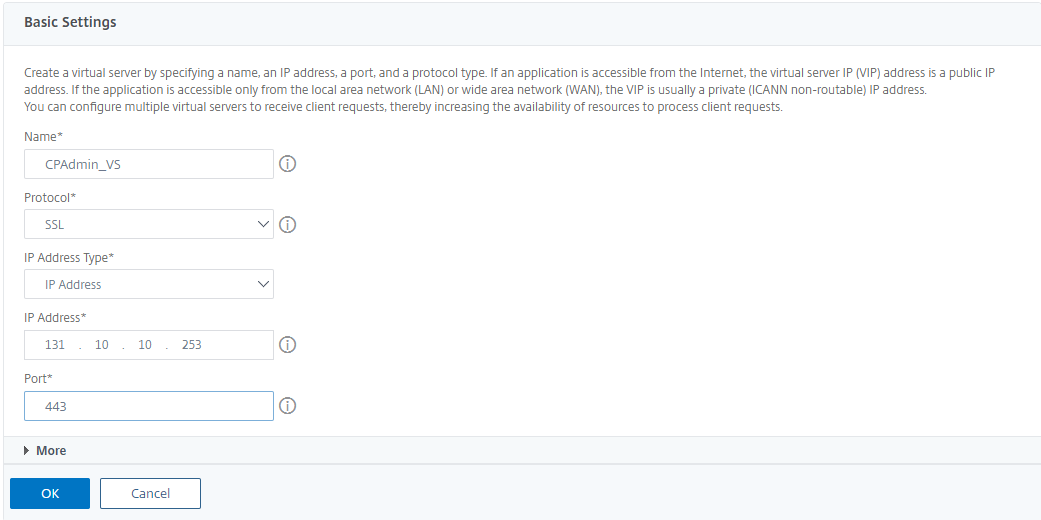
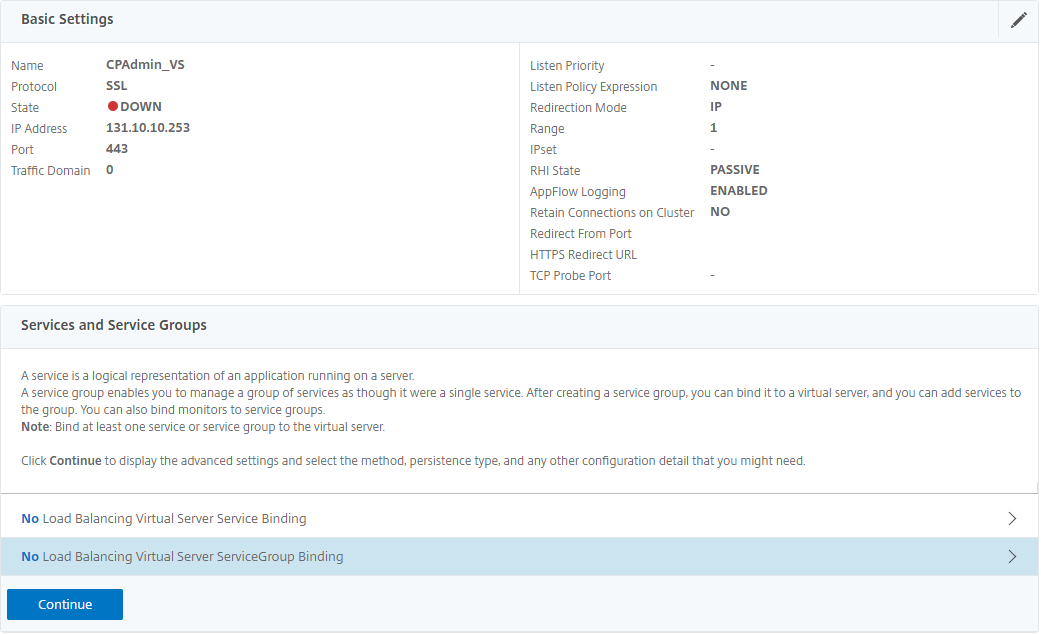
Create a Virtual Server
To create a Virtual Server, select Virtual Servers from the Traffic Management -> Load Balancing section:
Click Add to create a new Virtual Server:

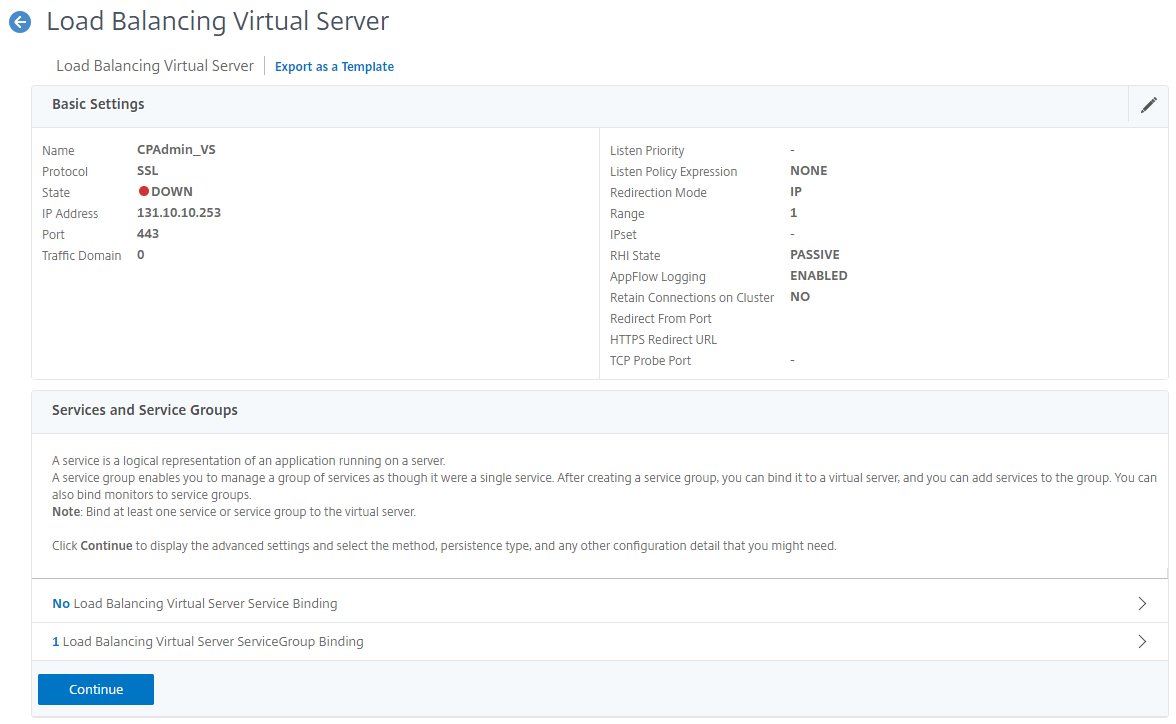
Specify the Name or the Virtual Server, select SSL from the protocol list and specify the IP Address the Virtual Server will listen on. Click OK to continue.
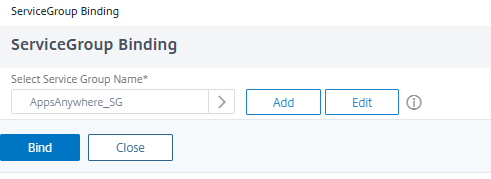
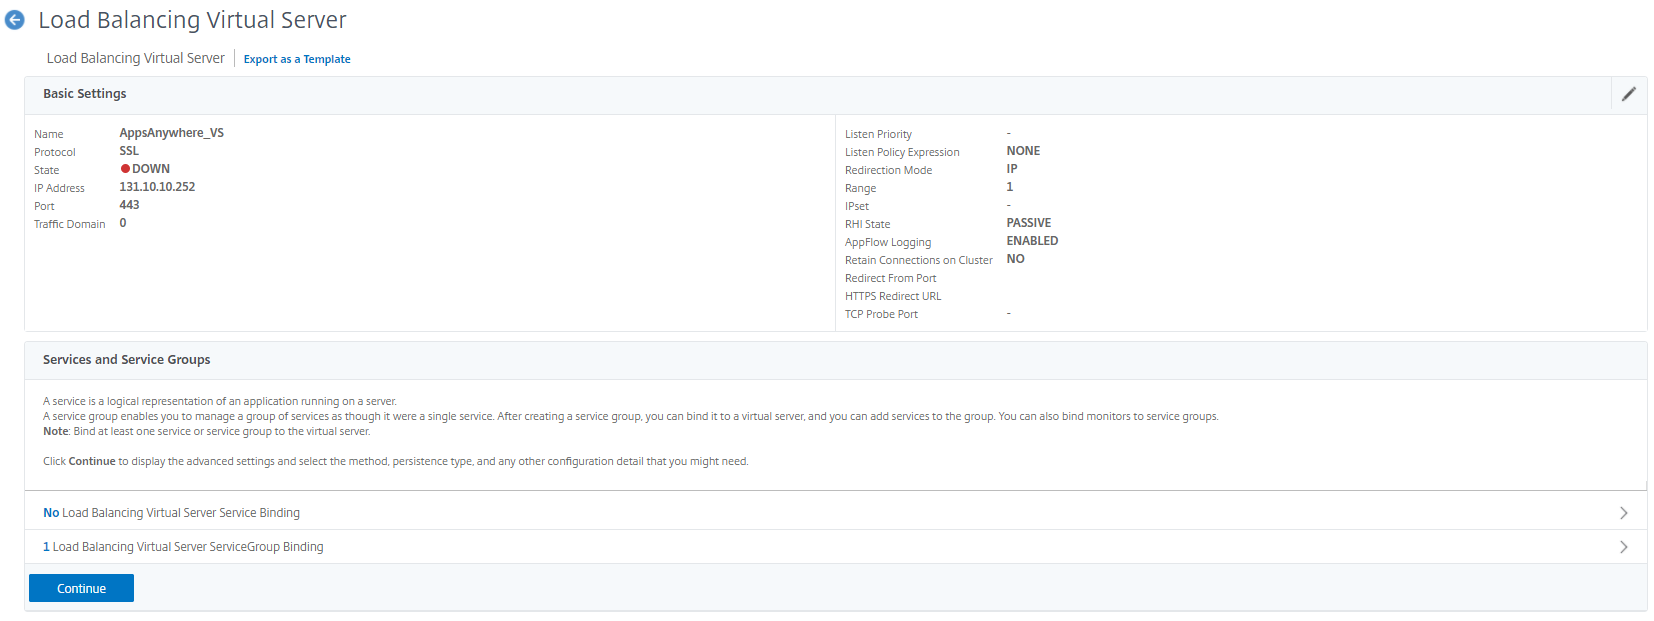
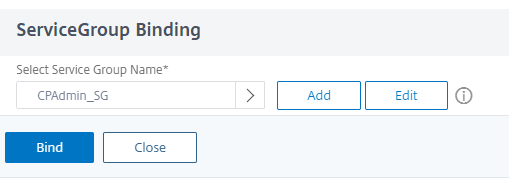
Click the No Load Balancing Virtual Server ServiceGroup Binding item under the Services and Service Groups section:
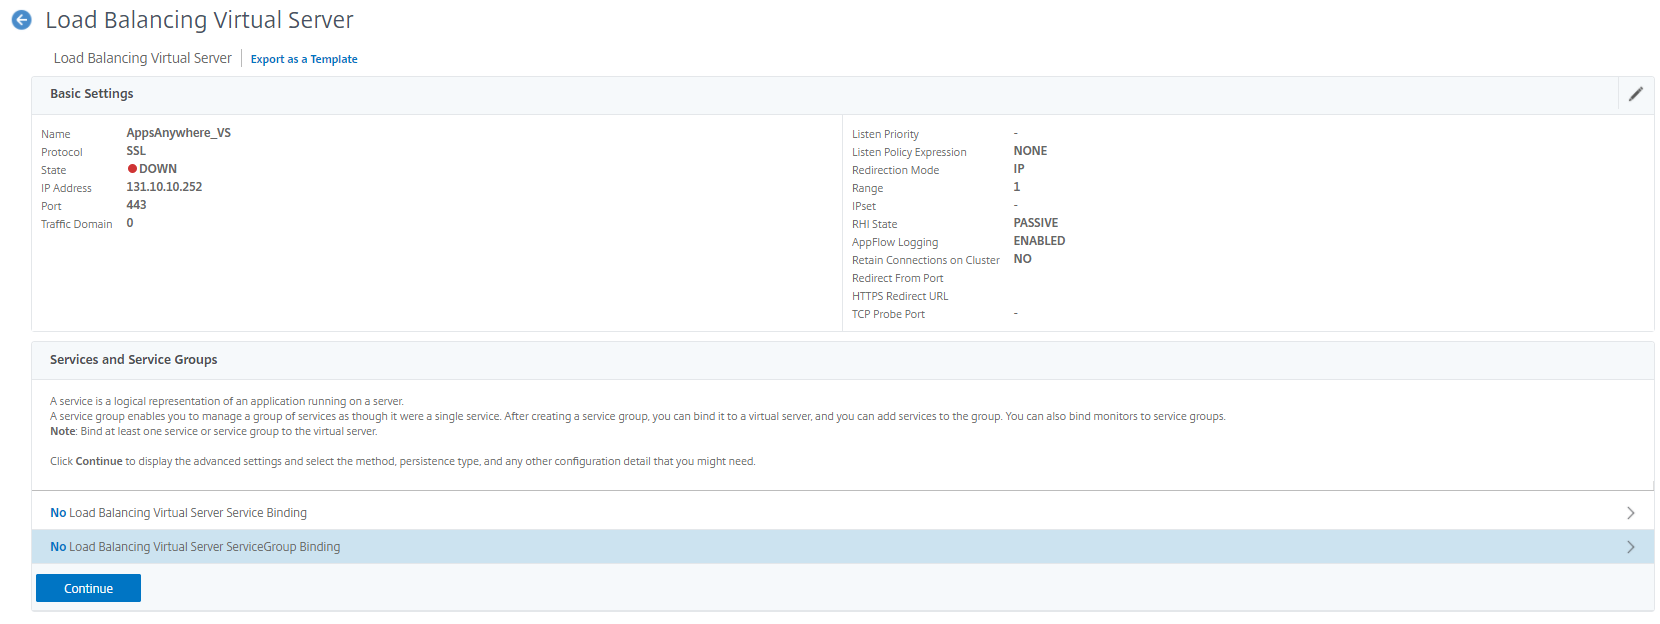
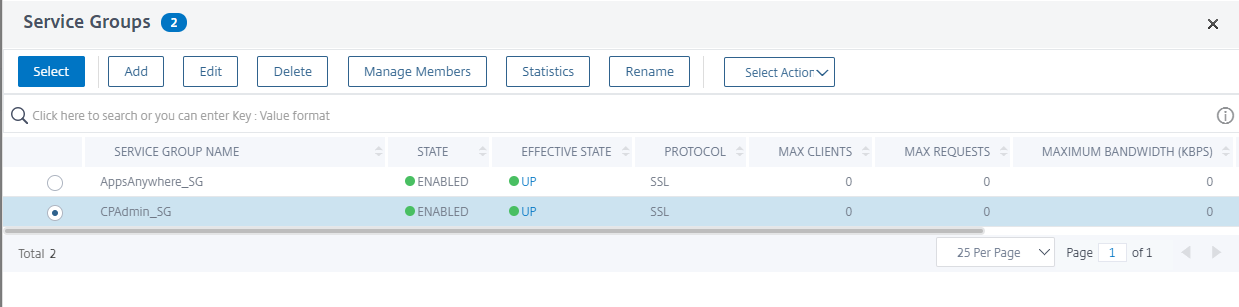
Click the “>” icon next to the Select Service Group Name option, select your existing Service Group and click Select to continue :
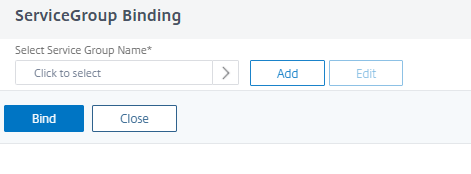

Click Bind to continue:
Click Continue to proceed:
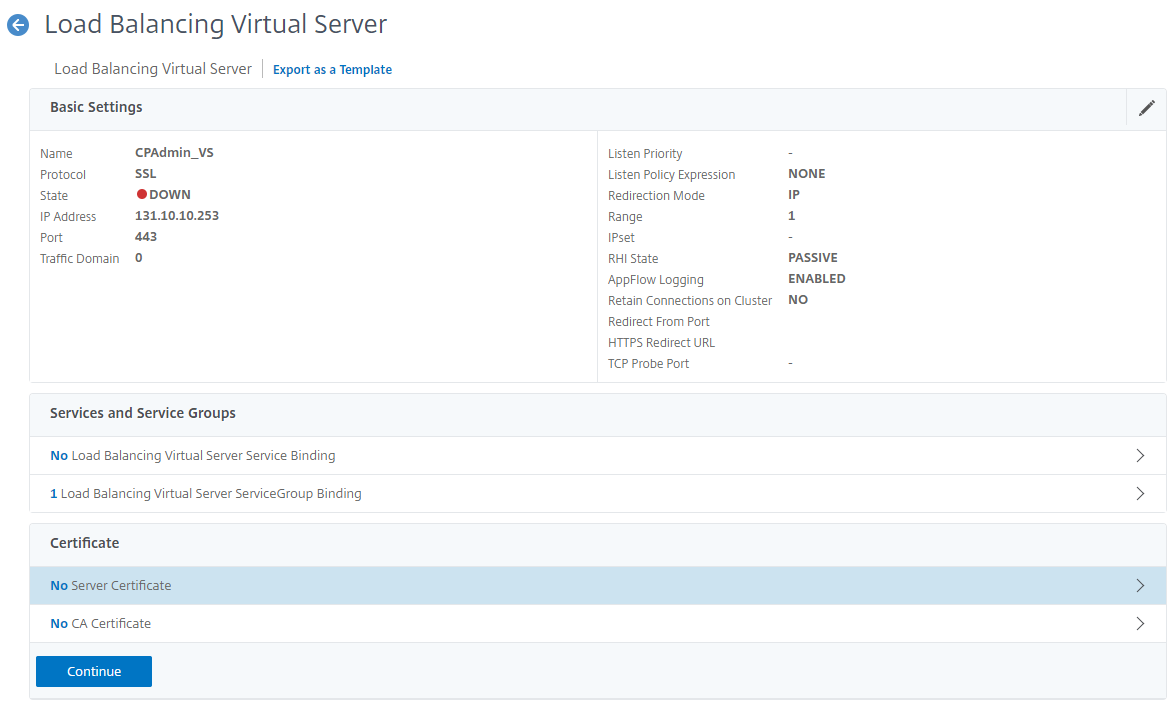
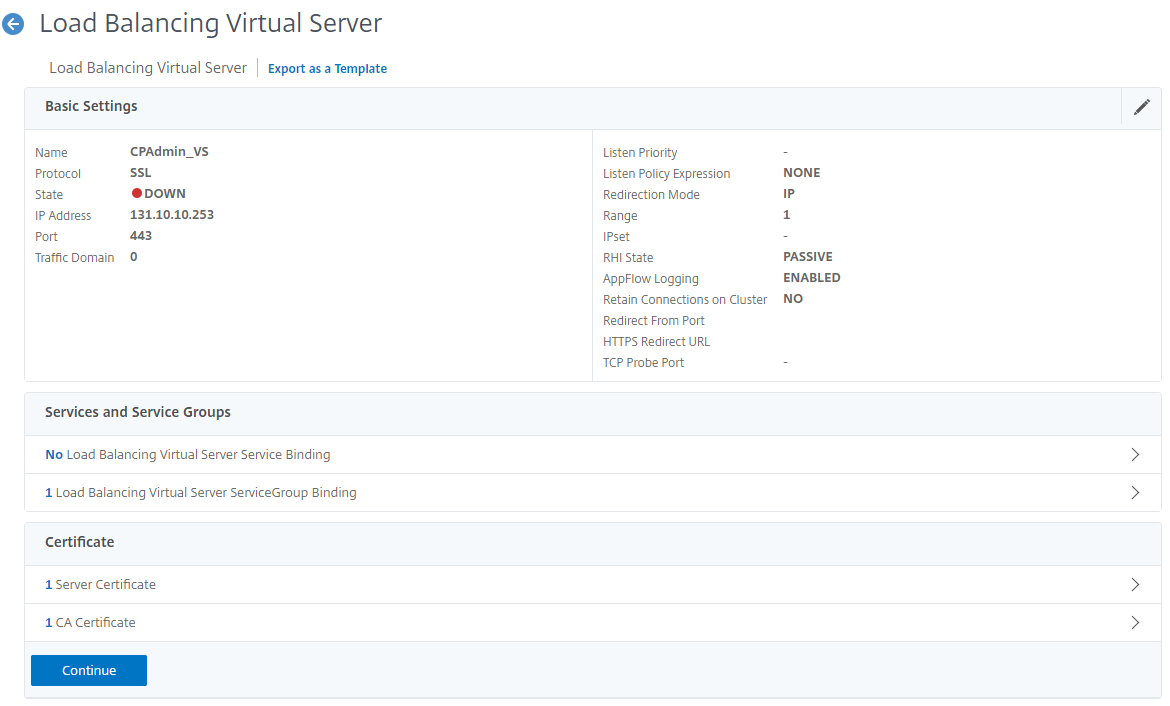
Add a certificate
Click the No Server Certificate entry under the Certificate section:
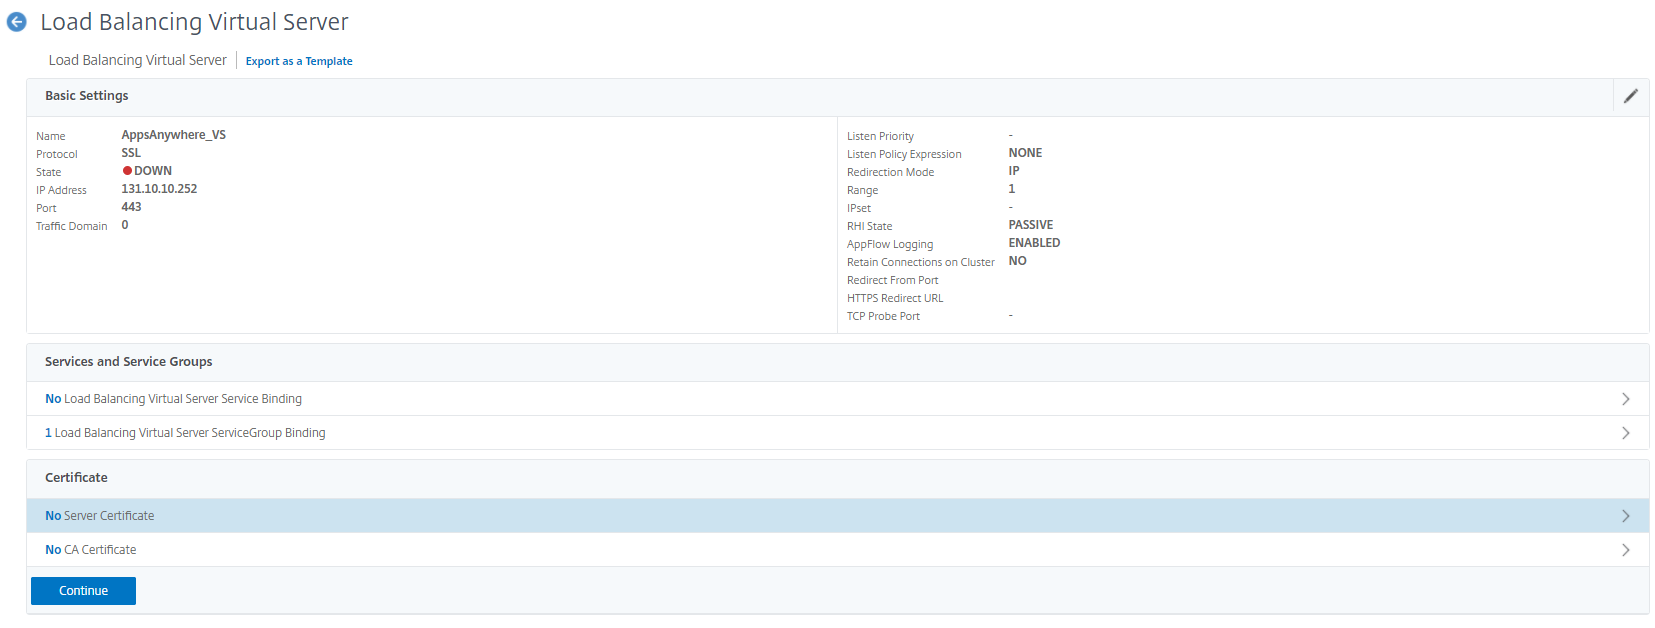
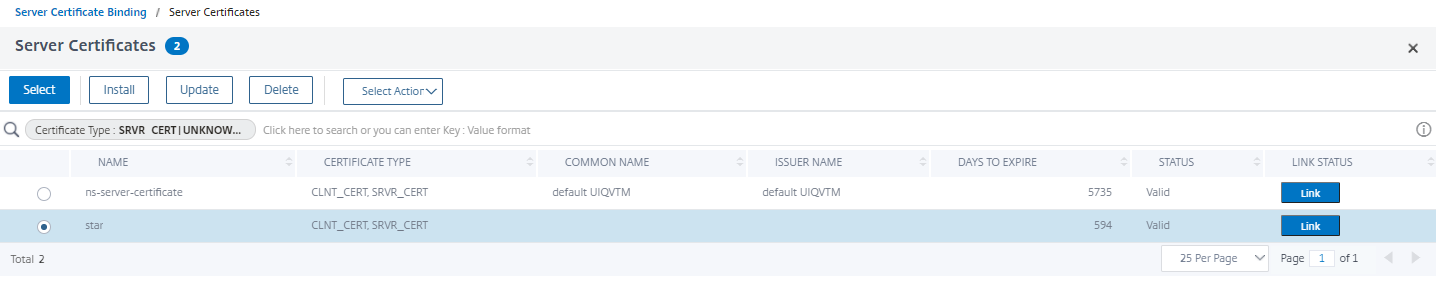
Click the “>” icon next to the Select Server Certificate option, select your existing Server Certificate and click Select to continue :
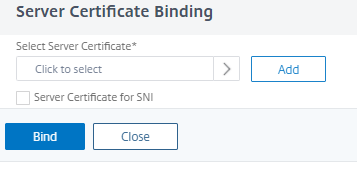
Click Bind to continue:

Click Continue:
Configure No Caching
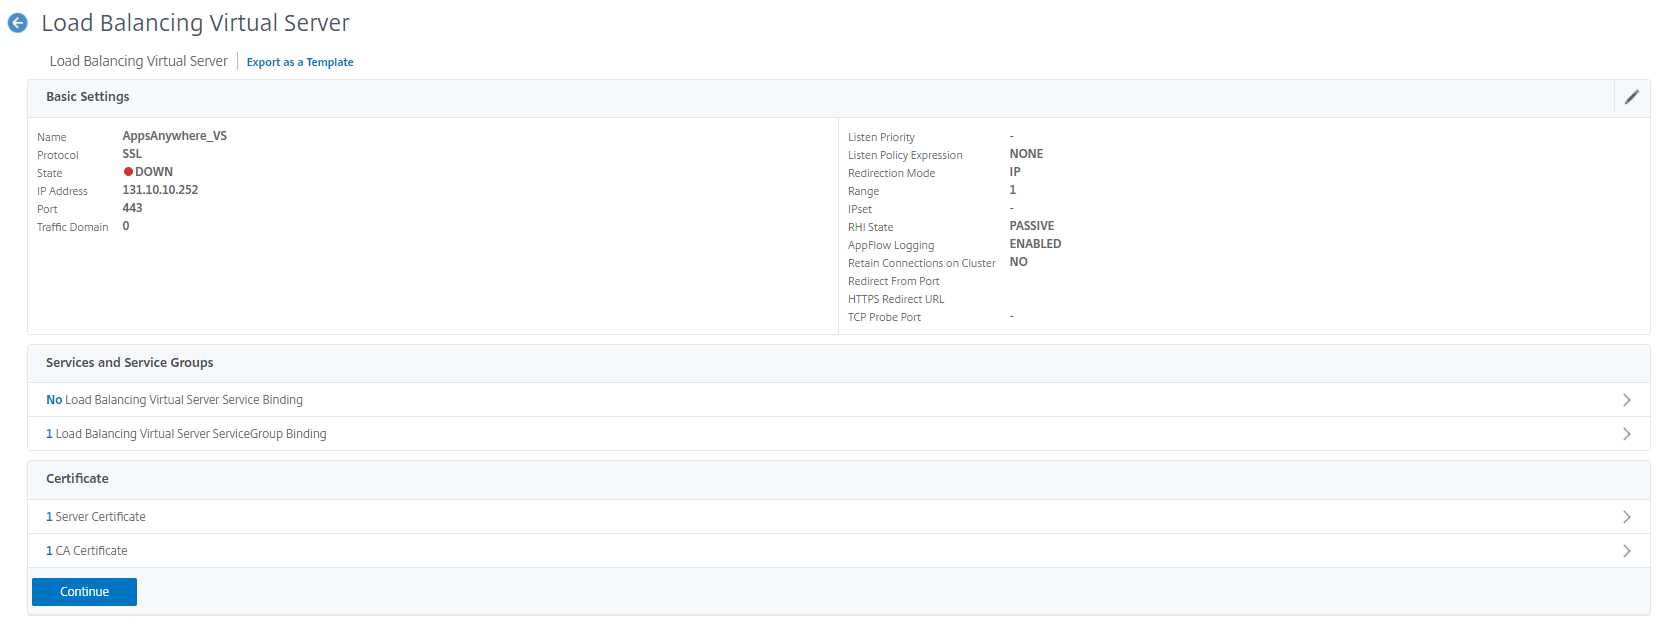
Navigate to Load Balancing > Virtual Servers and select the AppsAnywhere entry
Click the + to add a Policy
Create a new Cache policy
Choose Policy = Cache
Choose Type = Request
Click Continue
Click Add under Policy Binding
Set
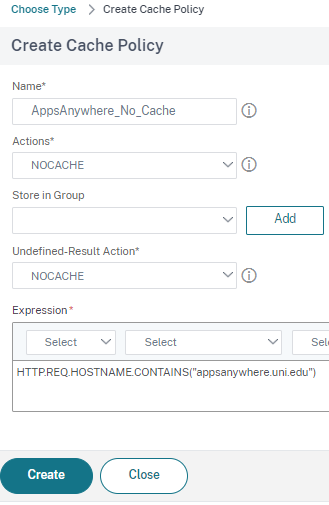
Name = AppsAnywhere_No_Cache
Action = NOCACHE
Undefined-Result Action = NOCACHE
Expression =
HTTP.REQ.HOSTNAME.CONTAINS("appsanywhere.uni.edu")Replace appsanywhere.uni.edu with the AppsAnywhere DNS
Click Create
Click Bind
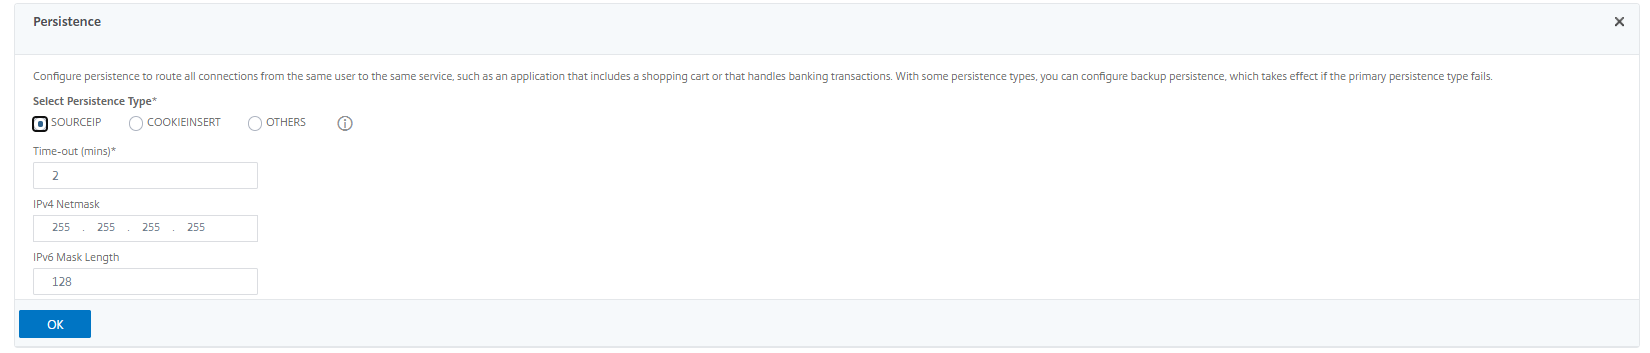
Configure Persistence
Select Persistence from the Advanced Settings menu on the right-hand side of the page:
Select SOURCEIP under the Select Persistence Type section, click OK to continue:
Click Done at the end of the page to complete the Virtual Server creation:

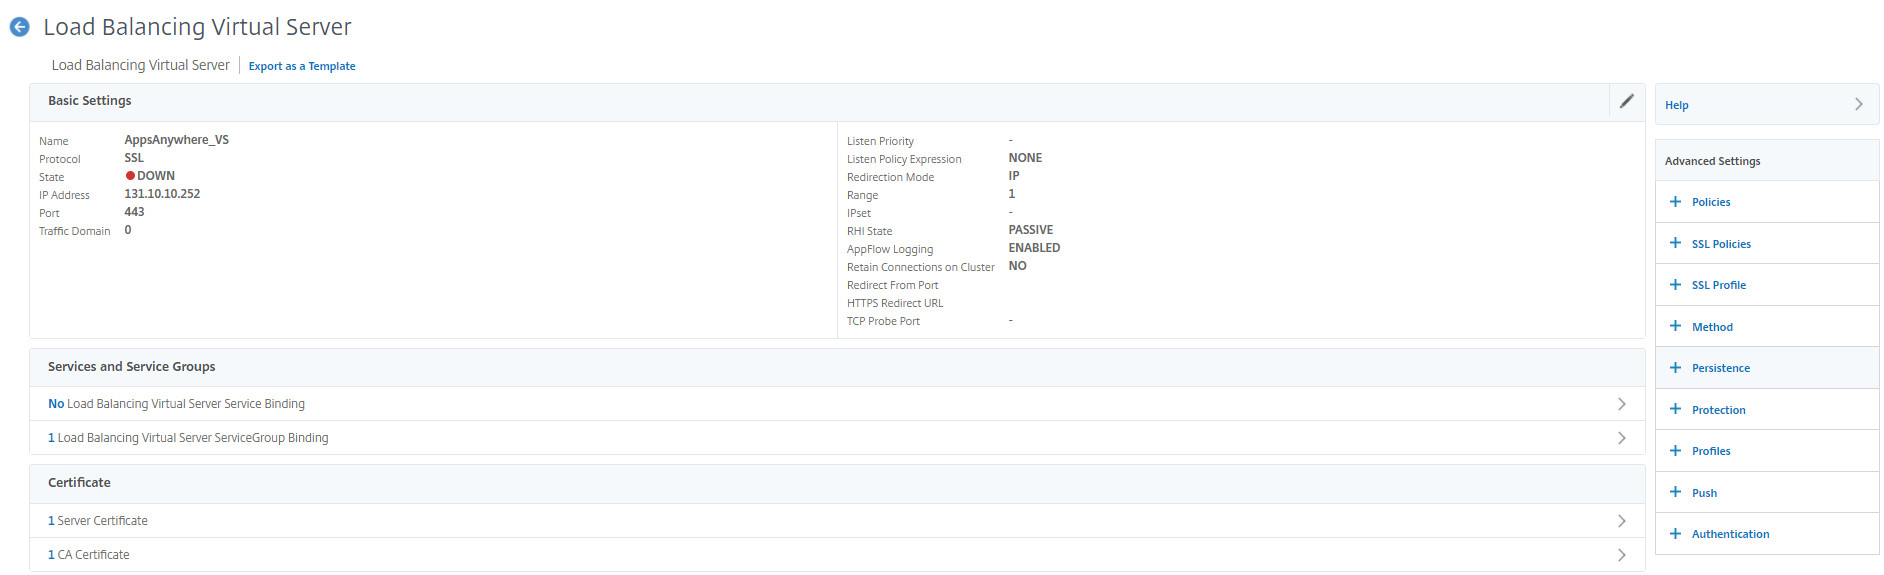
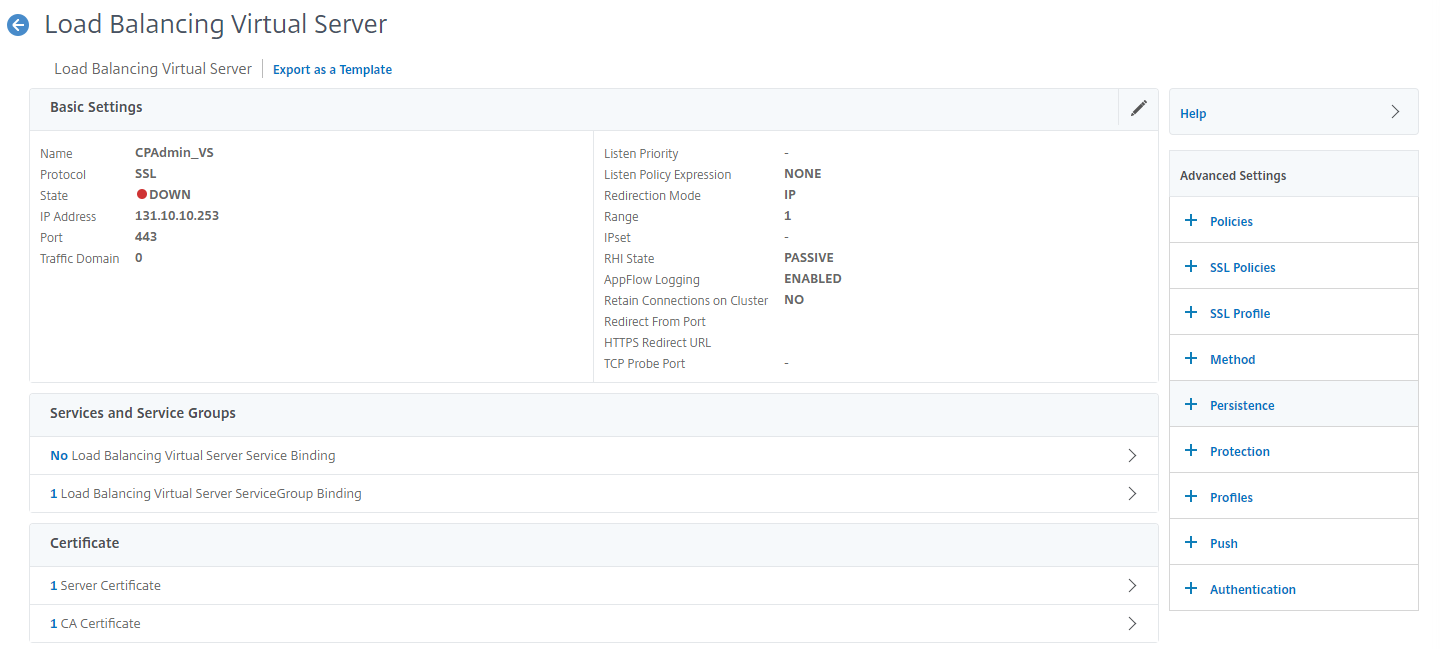
The new Virtual Server will now appear in the Virtual Servers list:

Cloudpaging Admin/License Servers
The following Server, Monitor, Service Group and Virtual Server configurations can be used with the Numecent Cloudpaging Admin/License servers.
Add Servers
To add the Cloudpaging Admin/License server details so they can be used with a virtual server and service group, login to the Citrix Netscaler / ADC interface and select Servers from the Traffic Management -> Load Balancing section:
Click Add to define an entry for your Cloudpaging Admin/License server. This process will need to be completed for each individual server:
Specify the required name and IP address of your Cloudpaging Admin/License server and click Create to add the entry:

For example:

Add a monitor
To add a service monitor, select Monitors from the Traffic Management -> Load Balancing section:
Click Add to create a new monitor.
Specify a name for the monitor and click the “>” icon to select the monitor type.
Choose HTTP and click Select.
Set
Interval = 30 seconds
Response Time-Out = 10 seconds
Change the HTTP Request value to "HEAD /jukeboxserver/do/license/token/renew.tok?msid=ping" .
Enable the Secure option.
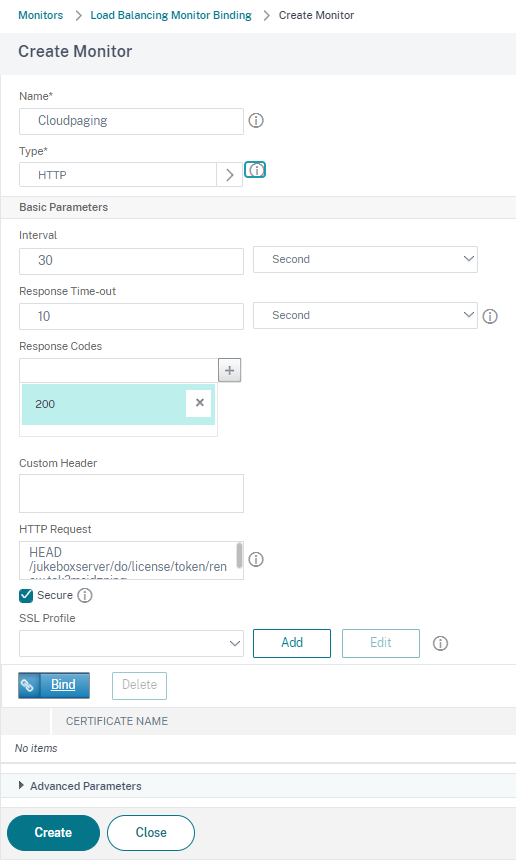
Click Create to add the monitor.
Other options such as check intervals and timeouts can be adjusted if required.
Create a Service Group
To create a service group containing the Cloudpaging Admin/License server, select Service Groups from the Traffic Management -> Load Balancing section:
Click Add to create a new Service Group:
Specify the Name or the Service Group and select SSL from the protocol list. Click OK to continue.
Click the No Service Group Member item under the Service Group Members section:
Select the Server Based option on the Create Service Group Member page:
Click the “>” icon next to the Select Server option, select your existing Cloudpaging Admin/License servers and click Select to continue :
Enter 443 in the Port number field and click Create to continue:
Click OK under the Service Group Members section to continue:
Select Monitors from the Advanced Settings menu on the right-hand side of the page:

Click the No Service Group to Monitor Binding item under the Monitors section:
Click the “>” icon next to the Select Monitor option, select the Monitoring service created in the previous step and click Select to continue :
Click Bind to continue:
Click Done at the bottom of the page to complete the process:
Create a Virtual Server
To create a Virtual Server, select Virtual Servers from the Traffic Management -> Load Balancing section:
Click Add to create a new Virtual Server:
Specify the Name or the Virtual Server, select SSL from the protocol list and specify the IP Address the Virtual Server will listen on. Click OK to continue.
Click the No Load Balancing Virtual Server ServiceGroup Binding item under the Services and Service Groups section:
Click the “>” icon next to the Select Service Group Name option, select your existing Service Group and click Select to continue:
Click Bind to continue:
Click Continue to proceed:
Add a Certificate
Click the No Server Certificate entry under the Certificate section:
Click the “>” icon next to the Select Server Certificate option, select your existing Server Certificate and click Select to continue :
Click Bind to continue:
Click Continue:
Configure Persistence
Select Persistence from the Advanced Settings menu on the right-hand side of the page:
Select SOURCEIP under the Select Persistence Type section, click OK to continue:
Click Done at the end of the page to complete the Virtual Server creation:

The new Virtual Server will not appears in the Virtual Servers list:

Parallels RAS Gateway Servers
The following Server, Monitor, Service Group and Virtual Server configurations can be used with the Parallels RAS Gateway servers.
Add Servers
To add the Parallels RAS Gateway server details so they can be used with a virtual server and service group, login to the Citrix Netscaler / ADC interface and select Servers from the Traffic Management -> Load Balancing section:
Click Add to defined an entry for your Parallels RAS Gateway server. This process will need to be completed for each individual server:
Specify the required name and IP address of your Parallels RAS Gateway server and click Create to add the entry:
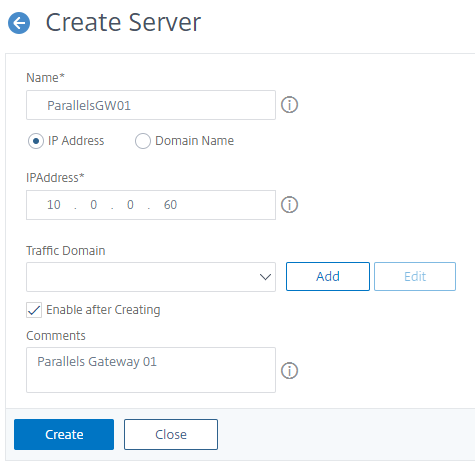
For example:

Add a monitor
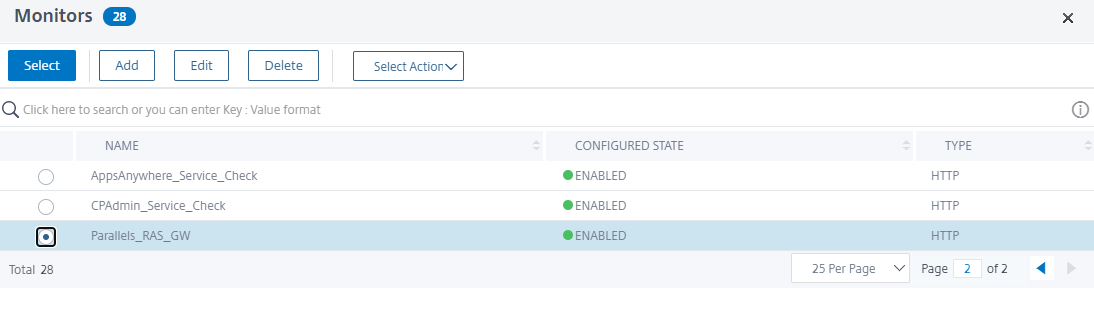
To add a service monitor, select Monitors from the Traffic Management -> Load Balancing section:
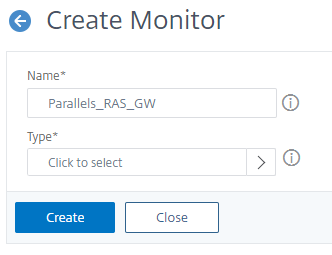
Click Add to create a new monitor.
Specify a name for the monitor and click the “>” icon to select the monitor type.
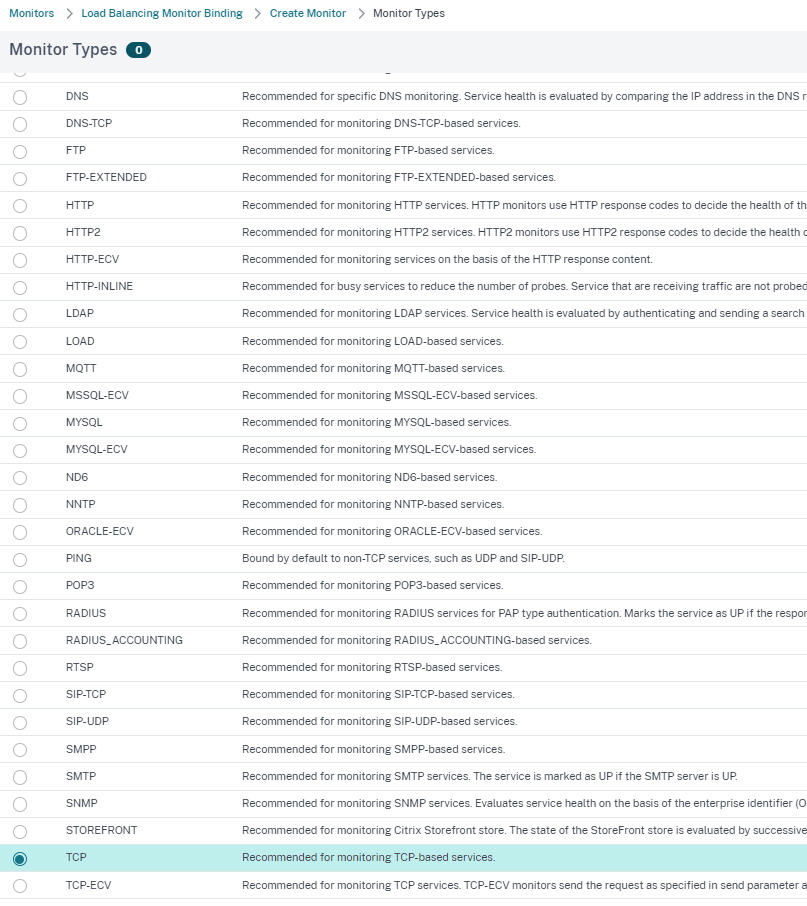
Choose TCP and click Select.
Set
Interval = 30 seconds
Response Time-Out = 10 seconds
Enable the Secure option.
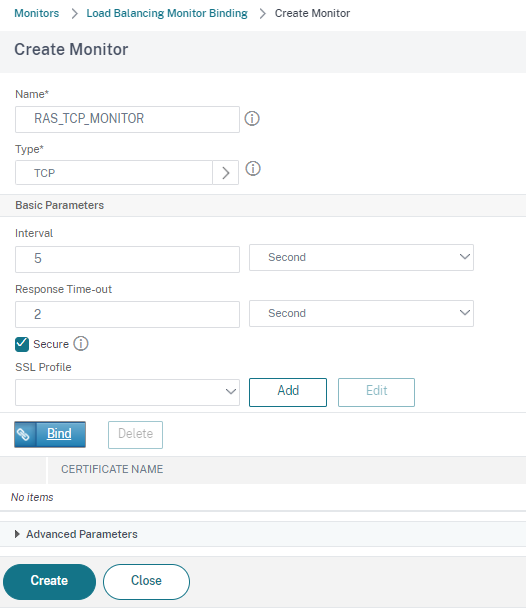
Click Create to add the monitor.
Other options can be adjusted if required.
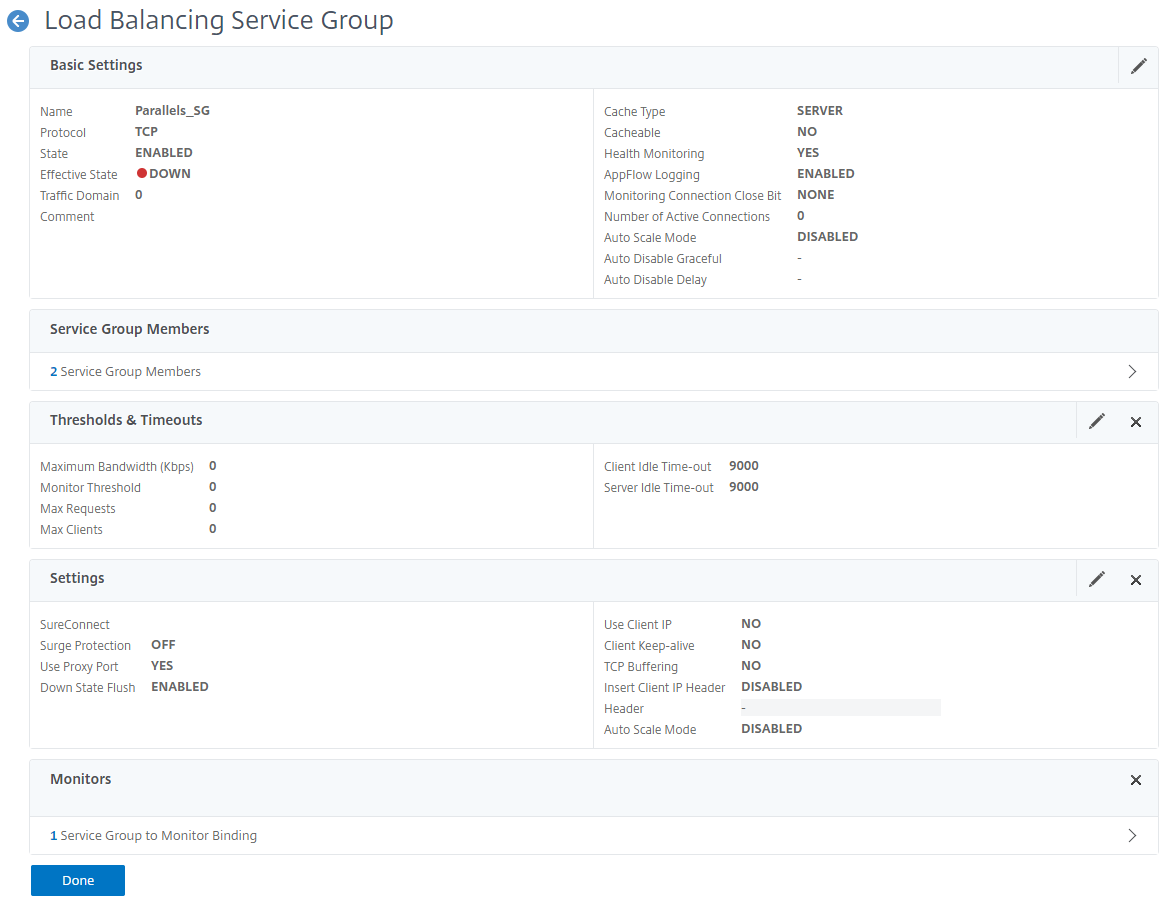
Create a Service Group
To create a service group containing the Parallels RAS Gateway servers, select Service Groups from the Traffic Management -> Load Balancing section:
Click Add to create a new Service Group:
Specify the Name or the Service Group and select TCP from the protocol list. Click OK to continue.
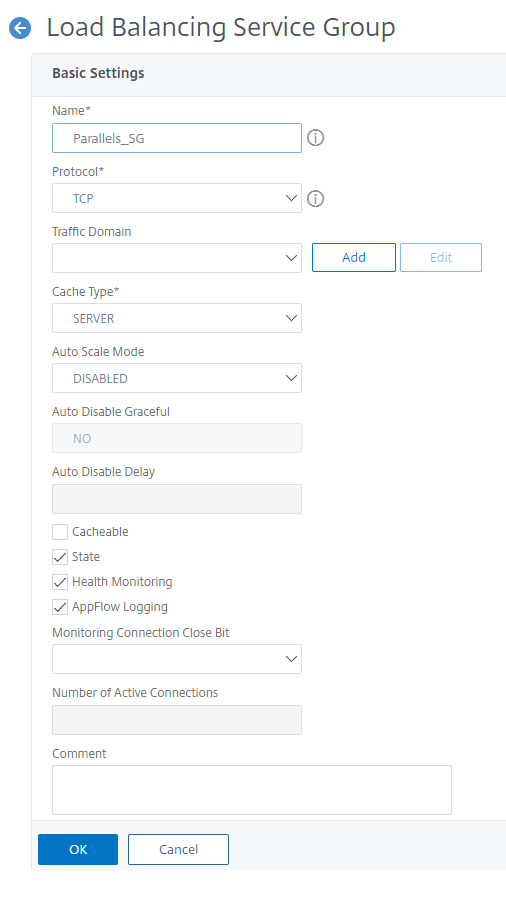
Click the No Service Group Member item under the Service Group Members section:
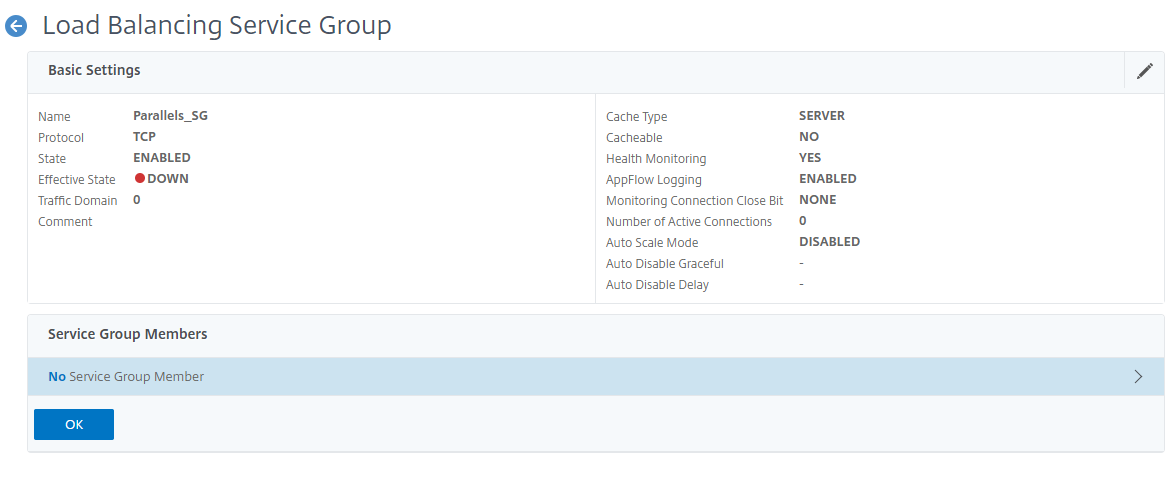
Select the Server Based option on the Create Service Group Member page:
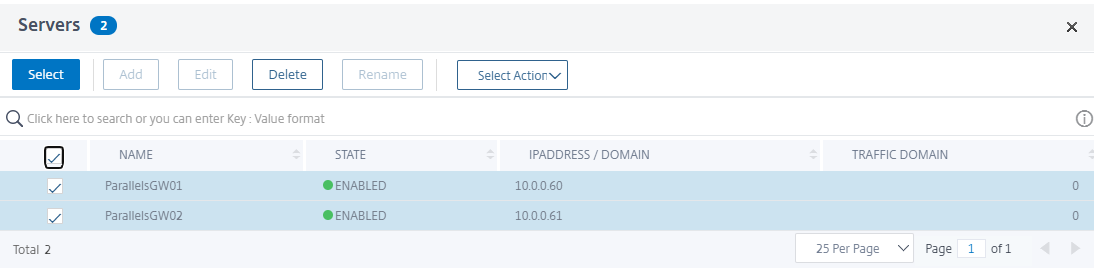
Click the “>” icon next to the Select Server option, select your existing Parallels RAS Gateway servers and click Select to continue:
Enter 443 in the Port number field and click Create to continue:
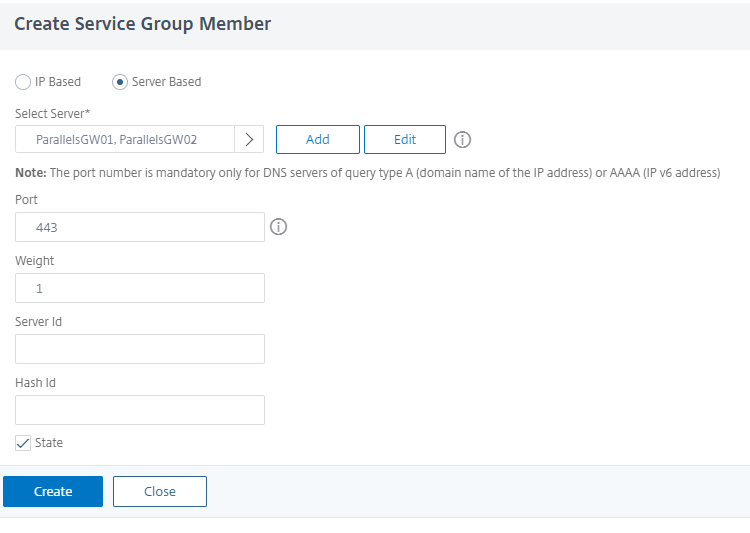
Click OK under the Service Group Members section to continue:
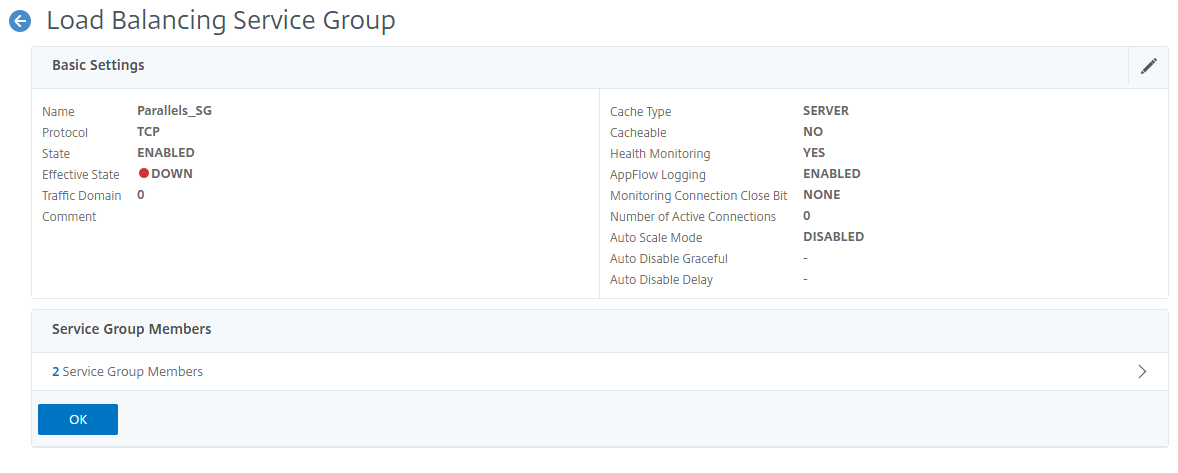
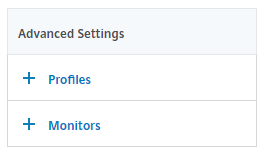
Select Monitors from the Advanced Settings menu on the right-hand side of the page:
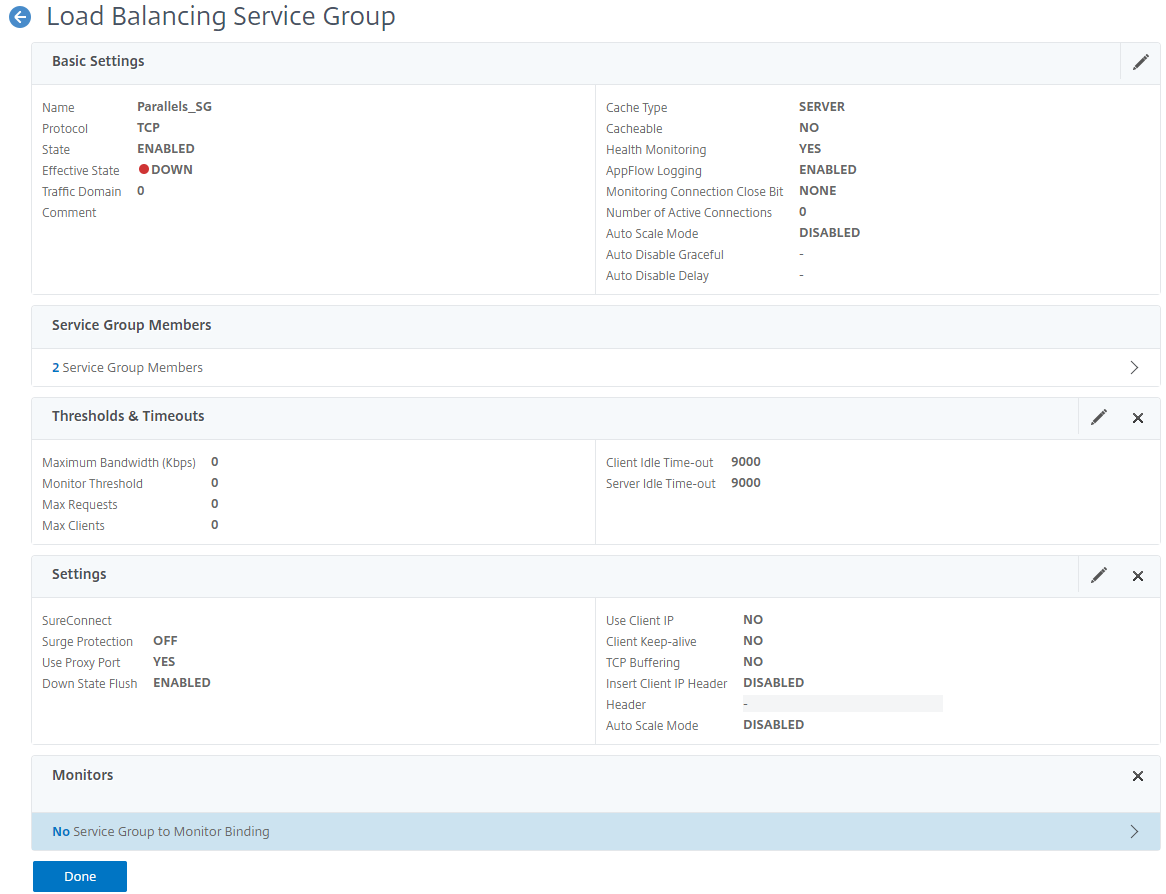
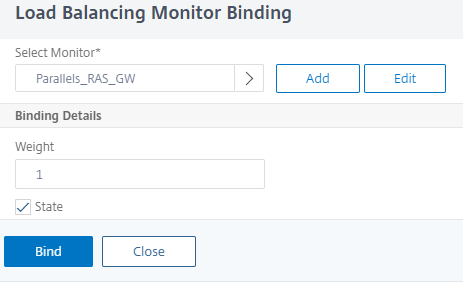
Click the No Service Group to Monitor Binding item under the Monitors section:
Click the “>” icon next to the Select Monitor option, select the Monitoring service created in the previous step and click Select to continue:
Click Bind to continue:
Click Done at the bottom of the page to complete the process:
Create a Virtual Server
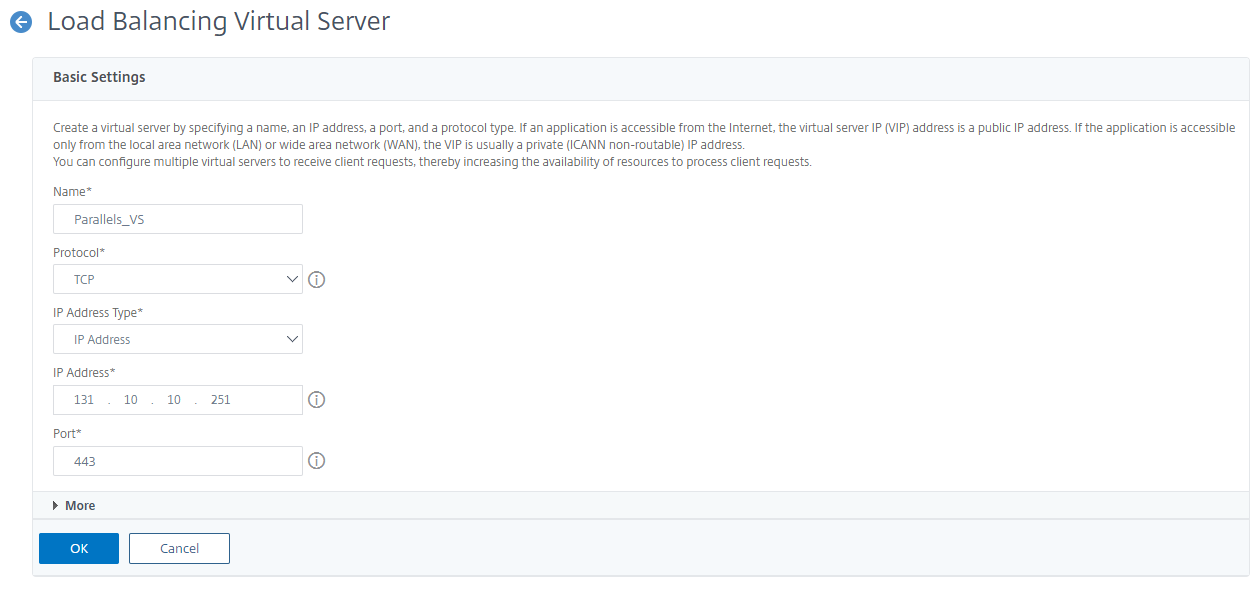
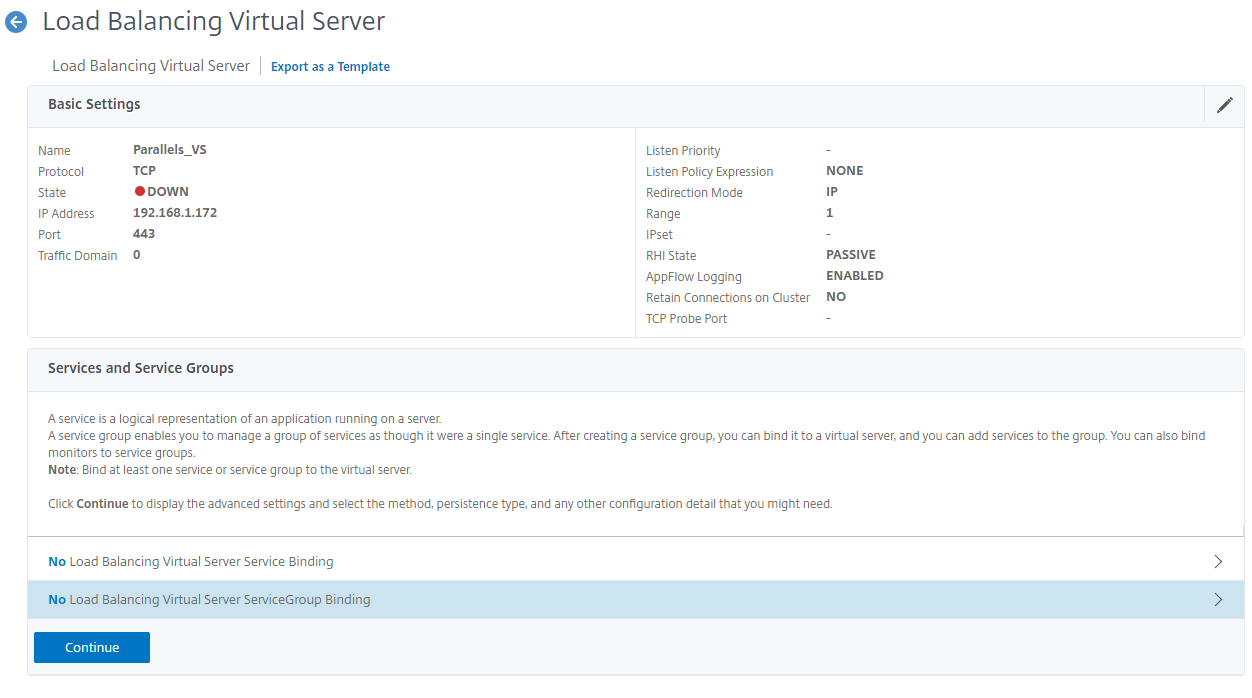
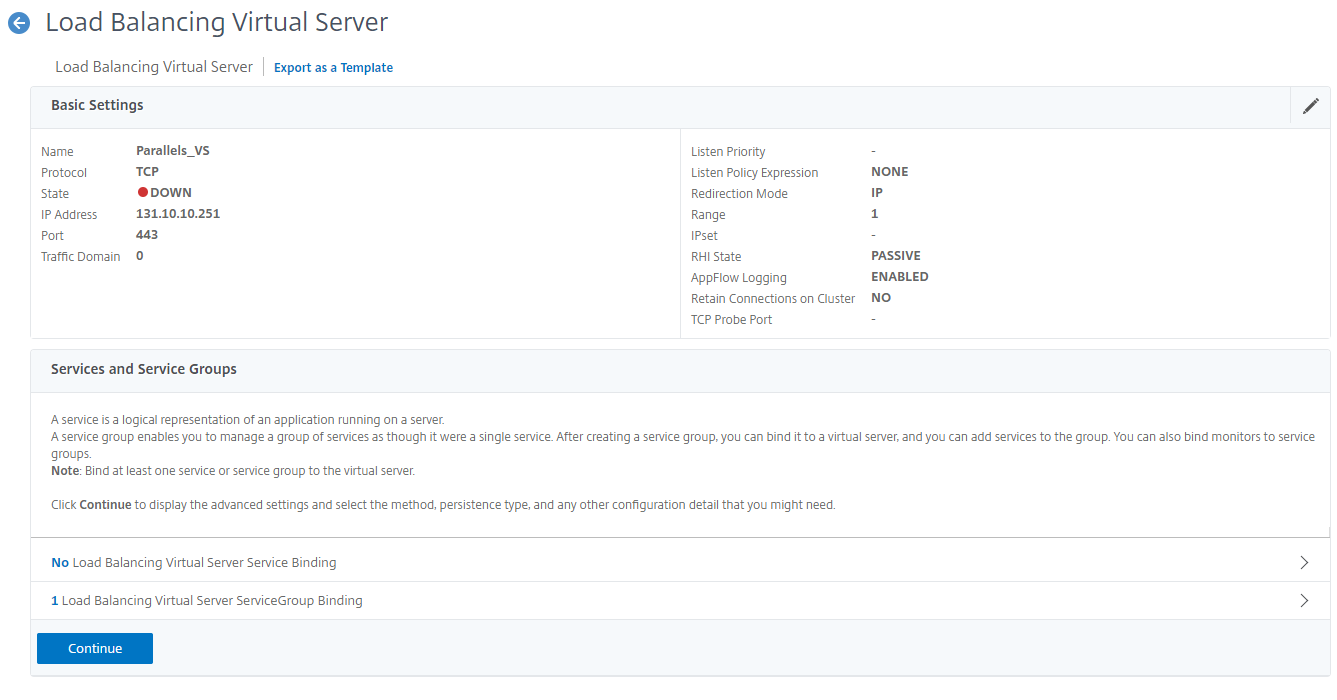
To create a Virtual Server, select Virtual Servers from the Traffic Management -> Load Balancing section:
Click Add to create a new Virtual Server:
Specify the Name or the Virtual Server, select TCP from the protocol list, specify the IP Address the Virtual Server will listen on and enter 443 as the port number. Click OK to continue.
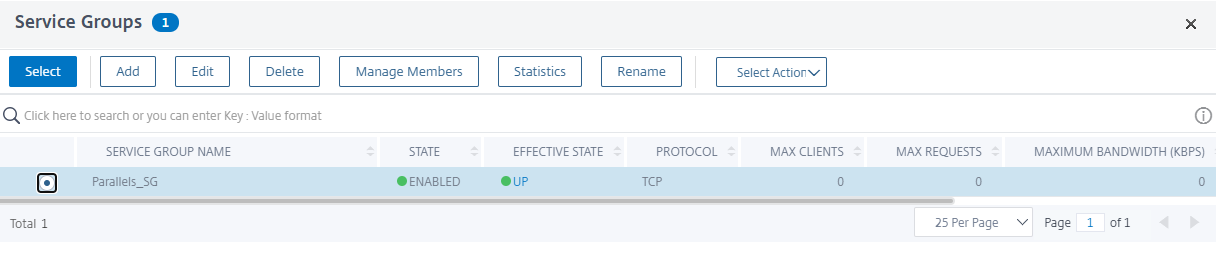
Click the No Load Balancing Virtual Server ServiceGroup Binding item under the Services and Service Groups section:
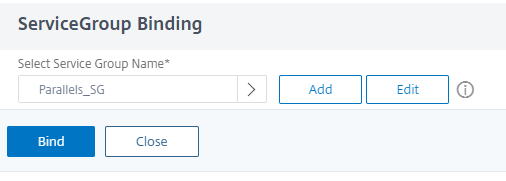
Click the “>” icon next to the Select Service Group Name option, select your existing Service Group and click Select to continue :
Click Bind to continue:
Click Continue to proceed:
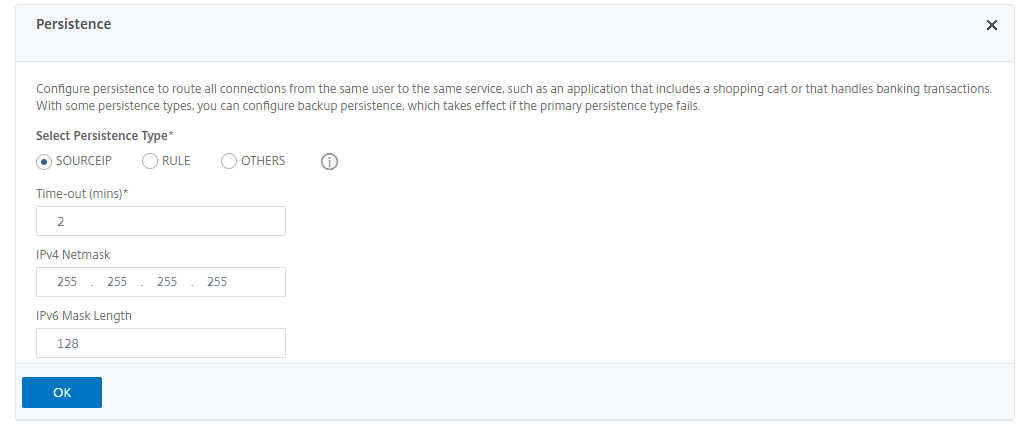
Configure Persistence
Select Persistence from the Advanced Settings menu on the right-hand side of the page:
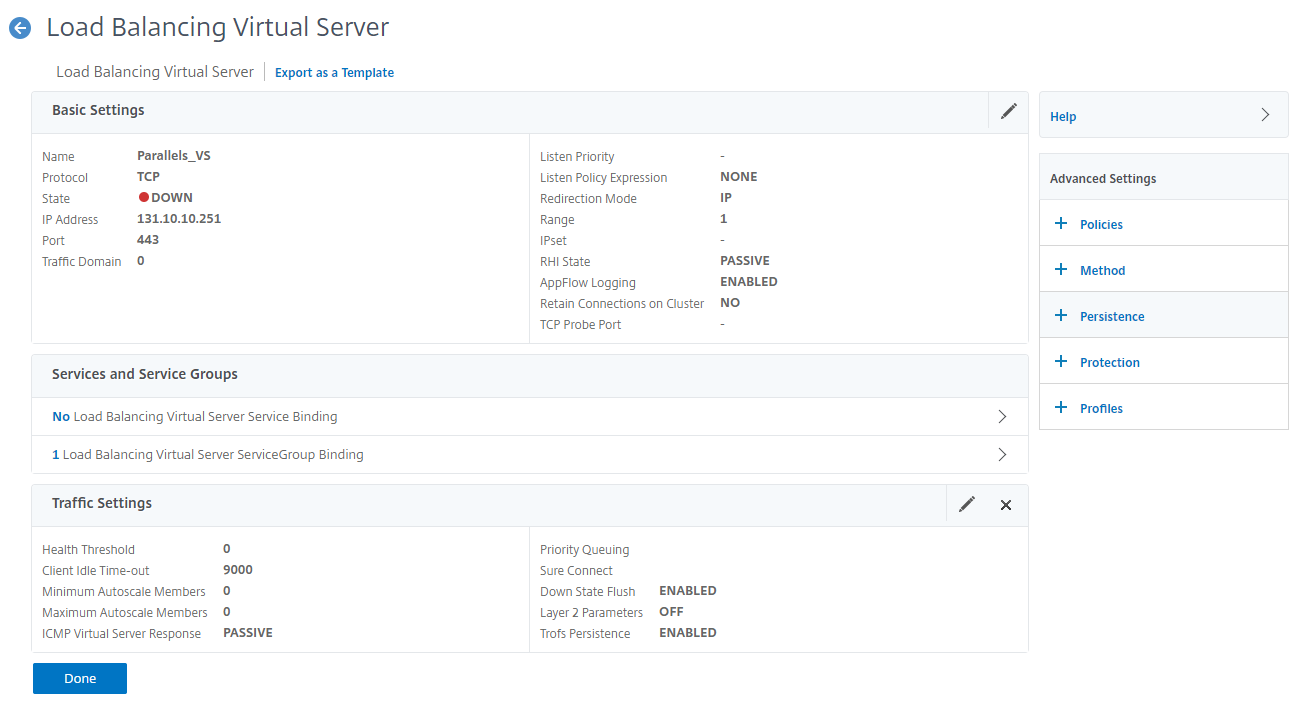
Select SOURCEIP under the Select Persistence Type section, click OK to continue:
Click Done at the end of the page to complete the Virtual Server creation:
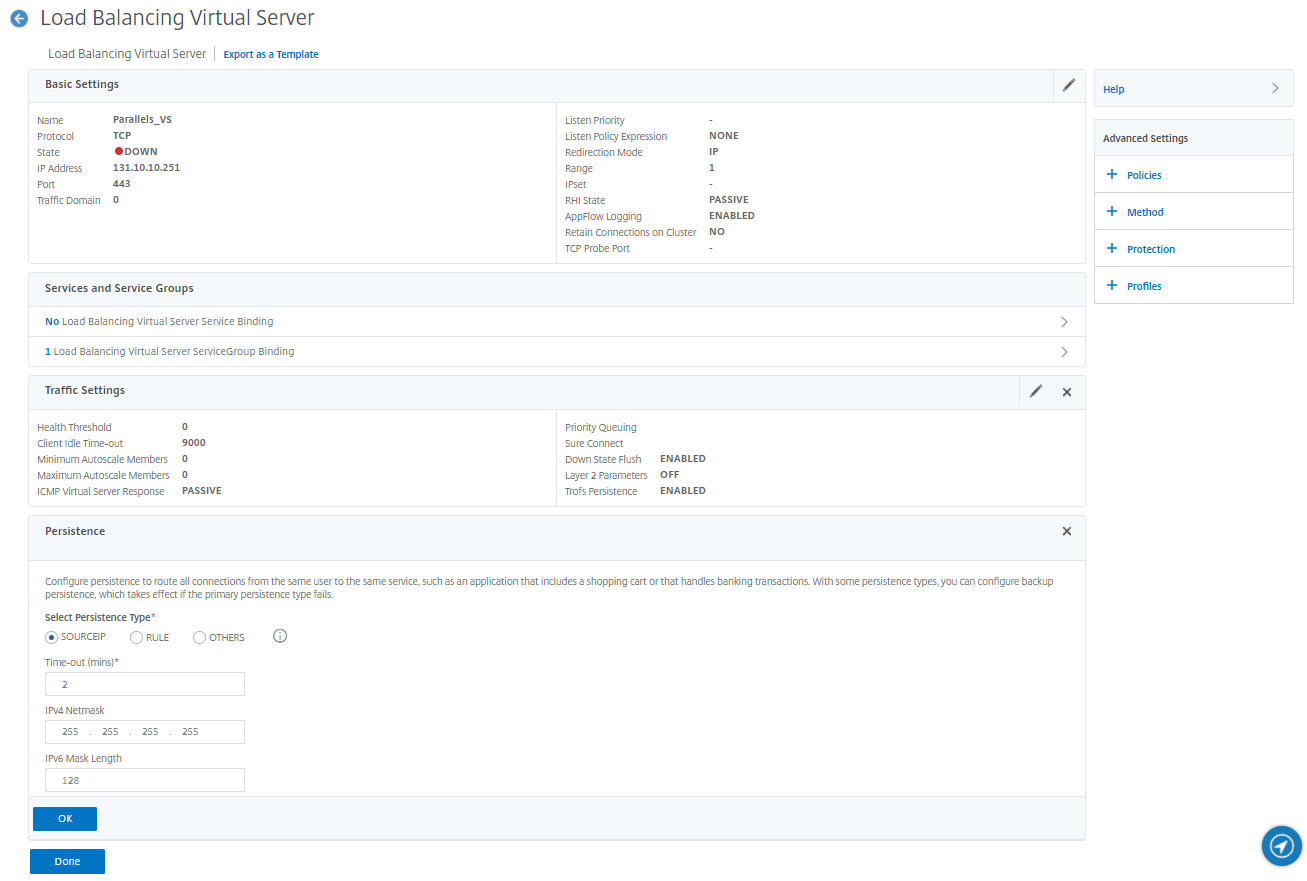
The new Virtual Server will not appears in the Virtual Servers list:

Additional Considerations
The following additional configurations may be required:
If content switching is configured and used for the AppsAnywhere and/or Cloudpaging Admin/License services, an additional content filtering rule/property must be added which include the port number with the URL/hostname. E.g.
TEXTHTTP.REQ.HOSTNAME.CONTAINS("appsanywhere.uni.edu")||HTTP.REQ.HOSTNAME.CONTAINS("appsanywhere.uni.edu:443")If required, combine Cookie insert can be used to persist the use to the same node. Reference: http://support.citrix.com/article/CTX124630
Parallels RAS Only:
Websockets WS and WSS should be allowed. Reference: https://support.citrix.com/article/CTX235401