
Deployment to Microsoft Hyper-V
Overview
The AppsAnywhere virtual appliance is available in multiple formats. If you are using Hyper-V as your hypervisor then the VHDK format appliance is the best one for you to use.
Pre-requisites
Make sure that you have read the Server Requirements section to ensure your virtual machine is provisioned with sufficient resources.
This article presumes that you have already downloaded the appropriate VMDK file from a Deployment Guide or Latest Releases within the AppsAnywhere support portal.
Importing the Appliance (using Hyper-V Manager)
The Hyper-V AppsAnywhere appliance is provided as a single VMDK virtual disk image. To deploy the appliance, you will first need to create a virtual machine with the Hyper-V Manger.
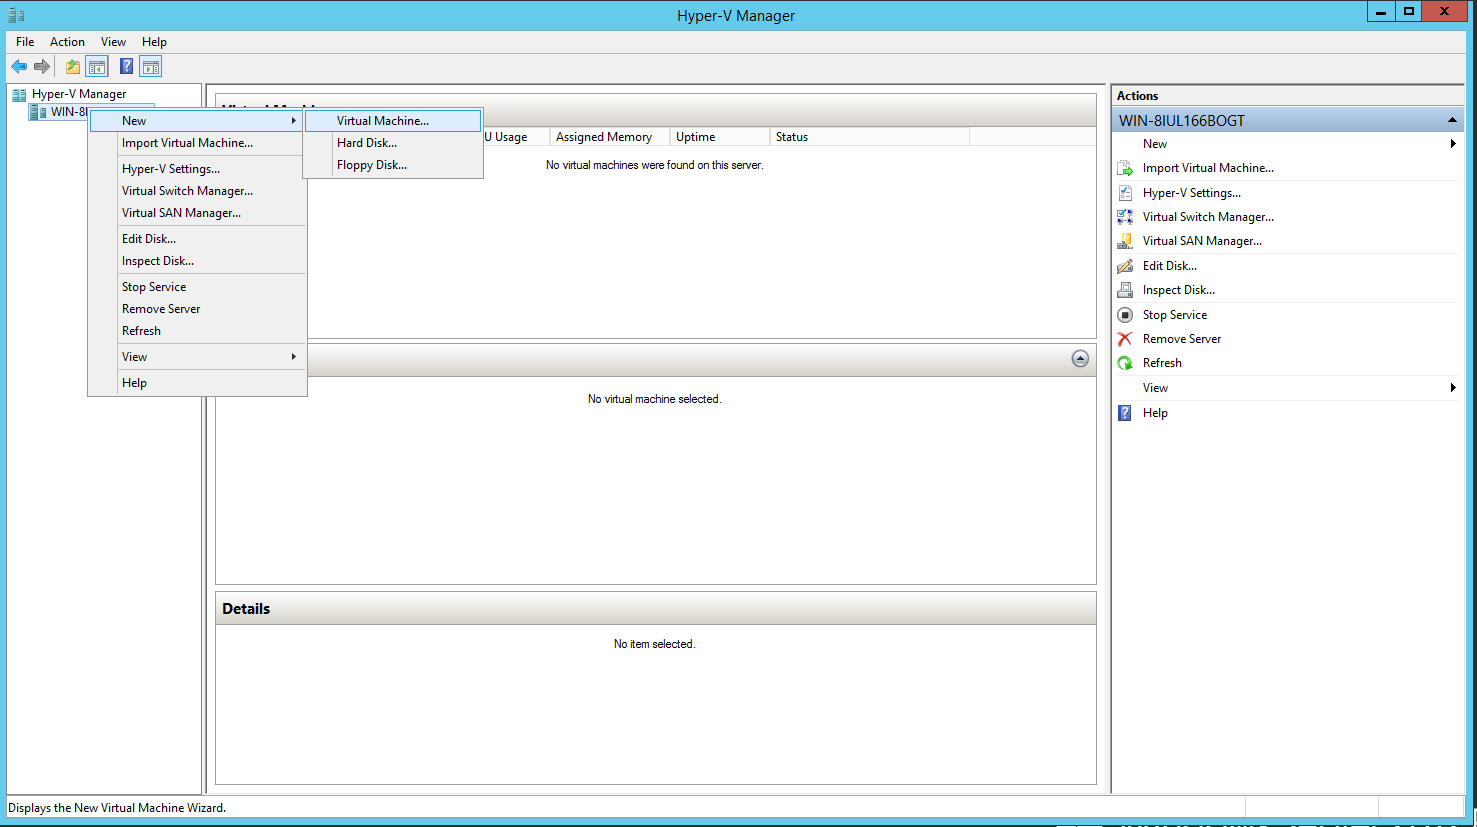
Launch the Hyper-V Manager. Select the Hyper-V host from the left-hand navigation, right click and select New > Virtual Machine
The following wizard will appear:
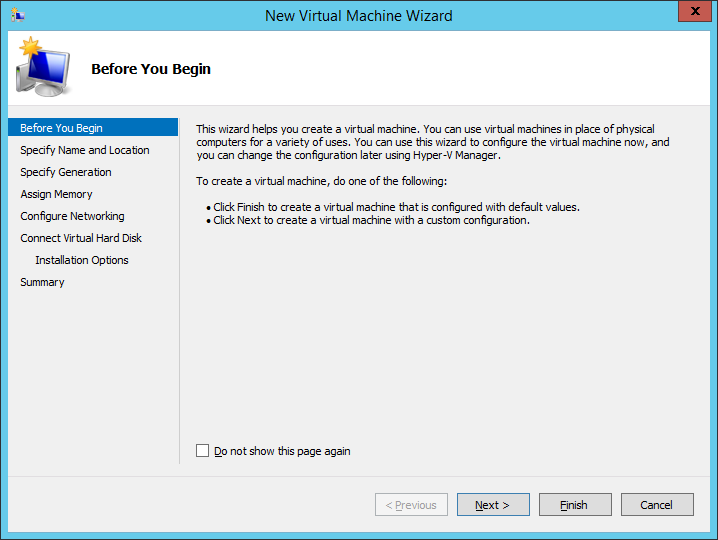
Click Next to continue.
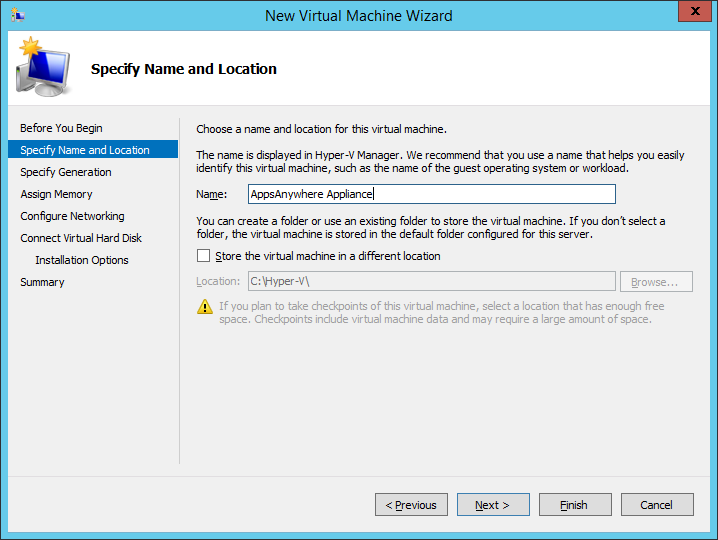
Specify the name of the virtual machine and select an appropriate storage location.
Click Next to continue.
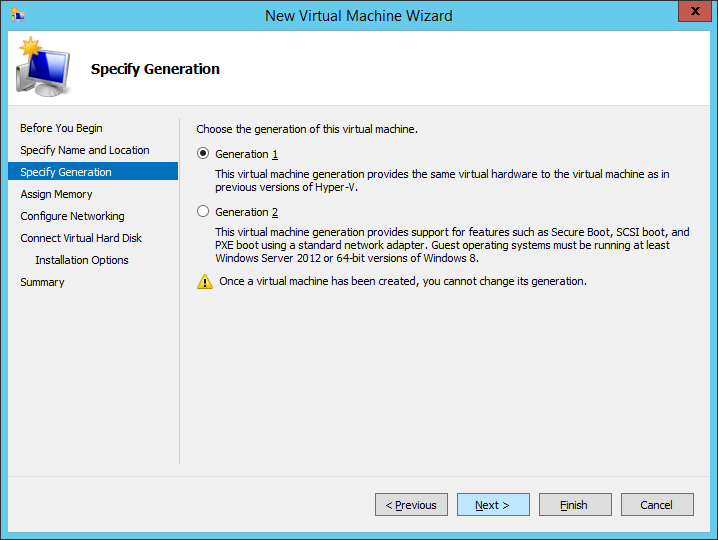
Ensure that Generation 1 or Generation 2 is selected in the Generation drop-down list based on the appliance version downloaded.
If using the Hyper-v (Gen 2) appliance, when creating the Virtual Machine within Hyper-V you MUST ensure that you select “Generation 2” and the Secure Boot template must be set to “Microsoft UEFI Certificate Authority” (as the image is Linux based).
Click Next to continue.
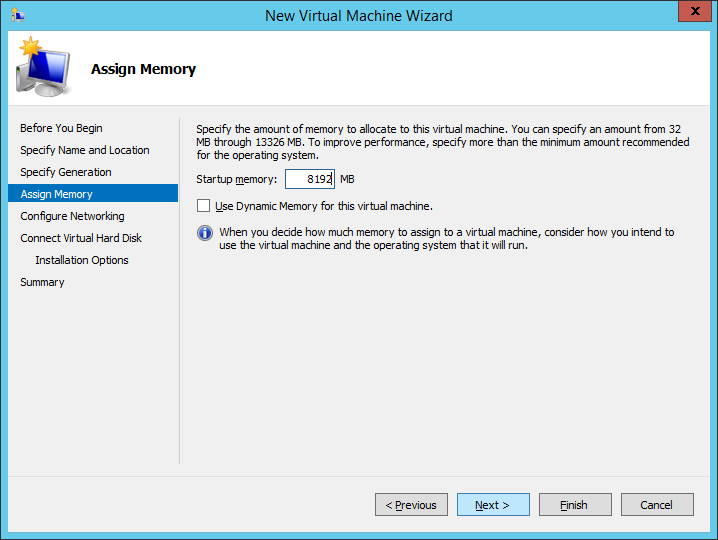
In the Startup memory field enter 8192, as per the recommended specifications.
Click Next to continue.
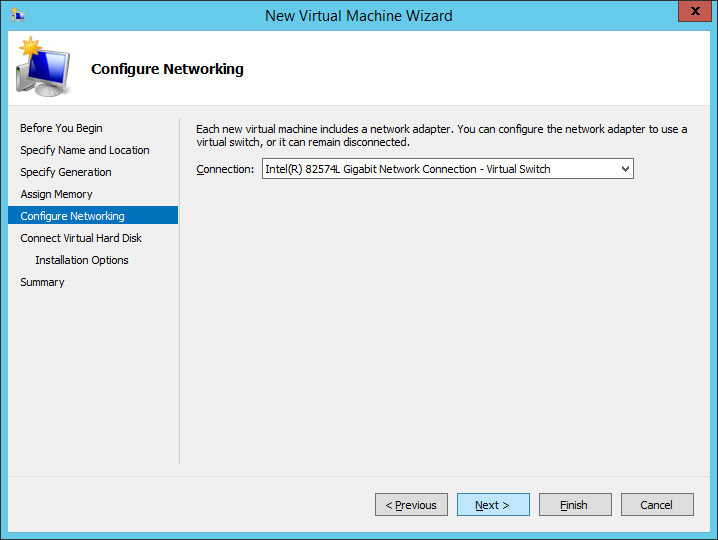
Select the relevant network Virtual Switch from the Connection drop down list.
Click Next to continue.
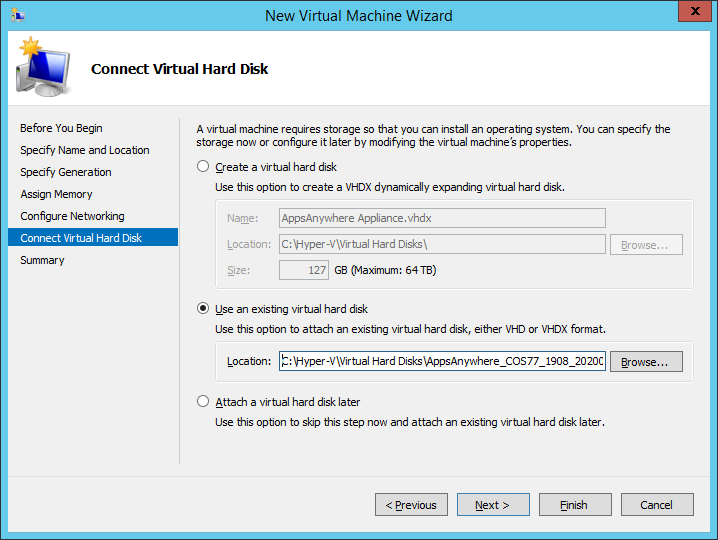
Select the Use an existing virtual hard disk option and click Browse..
Select the AppsAnywhere VMDK file that you downloaded earlier.
Click Next to continue.
In this example, the AppsAnywhere VMDK file has been copied/moved to the required storage location (in this case “C:\Hyper-V\Virtual Hard Disks”). Depending on existing storage structure and/or policy, this location may different in your environment.
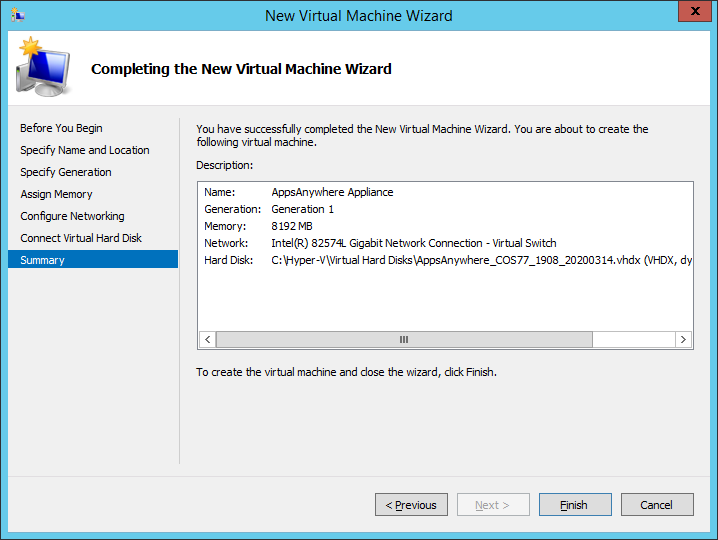
Click Finish to create the virtual machine.
By default, the virtual machine is generated with only 1 virtual CPU. This must be increased in order for the appliance to function correctly.
To increase the number of vCPU’s assigned, go back to the Hyper-V Manager, select the newly created virtual machine, right-click and select Settings
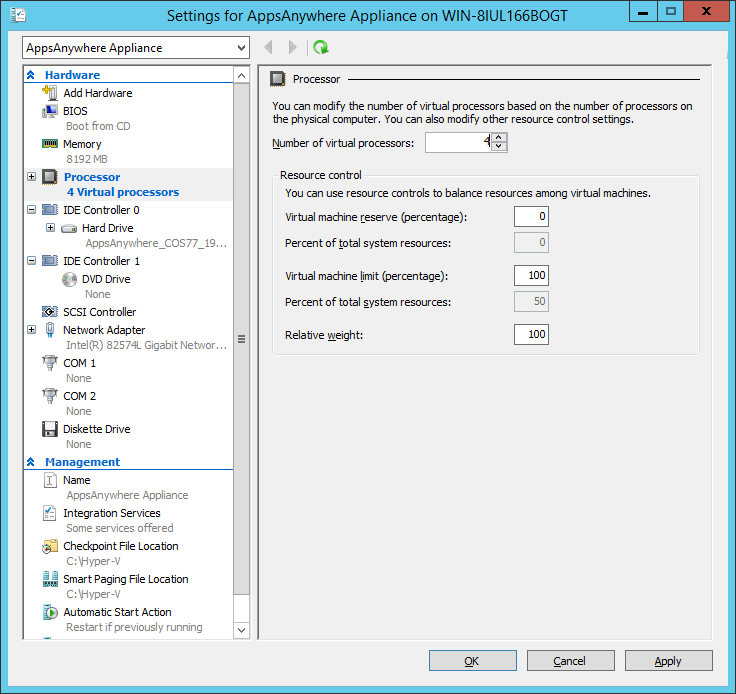
On the Settings dialog, select the Processor section on the left-hand side.
In the Number of virtual processors field on the right change the value from 1 to 4.
Click Apply and OK to complete the configuration change.
Importing the Appliance (using System Center Virtual Machine Manager)
The Hyper-V AppsAnywhere appliance is provided as a single VMDK virtual disk image. To deploy the appliance, you will first need to create a virtual machine with the System Center Virtual Machine Manager.
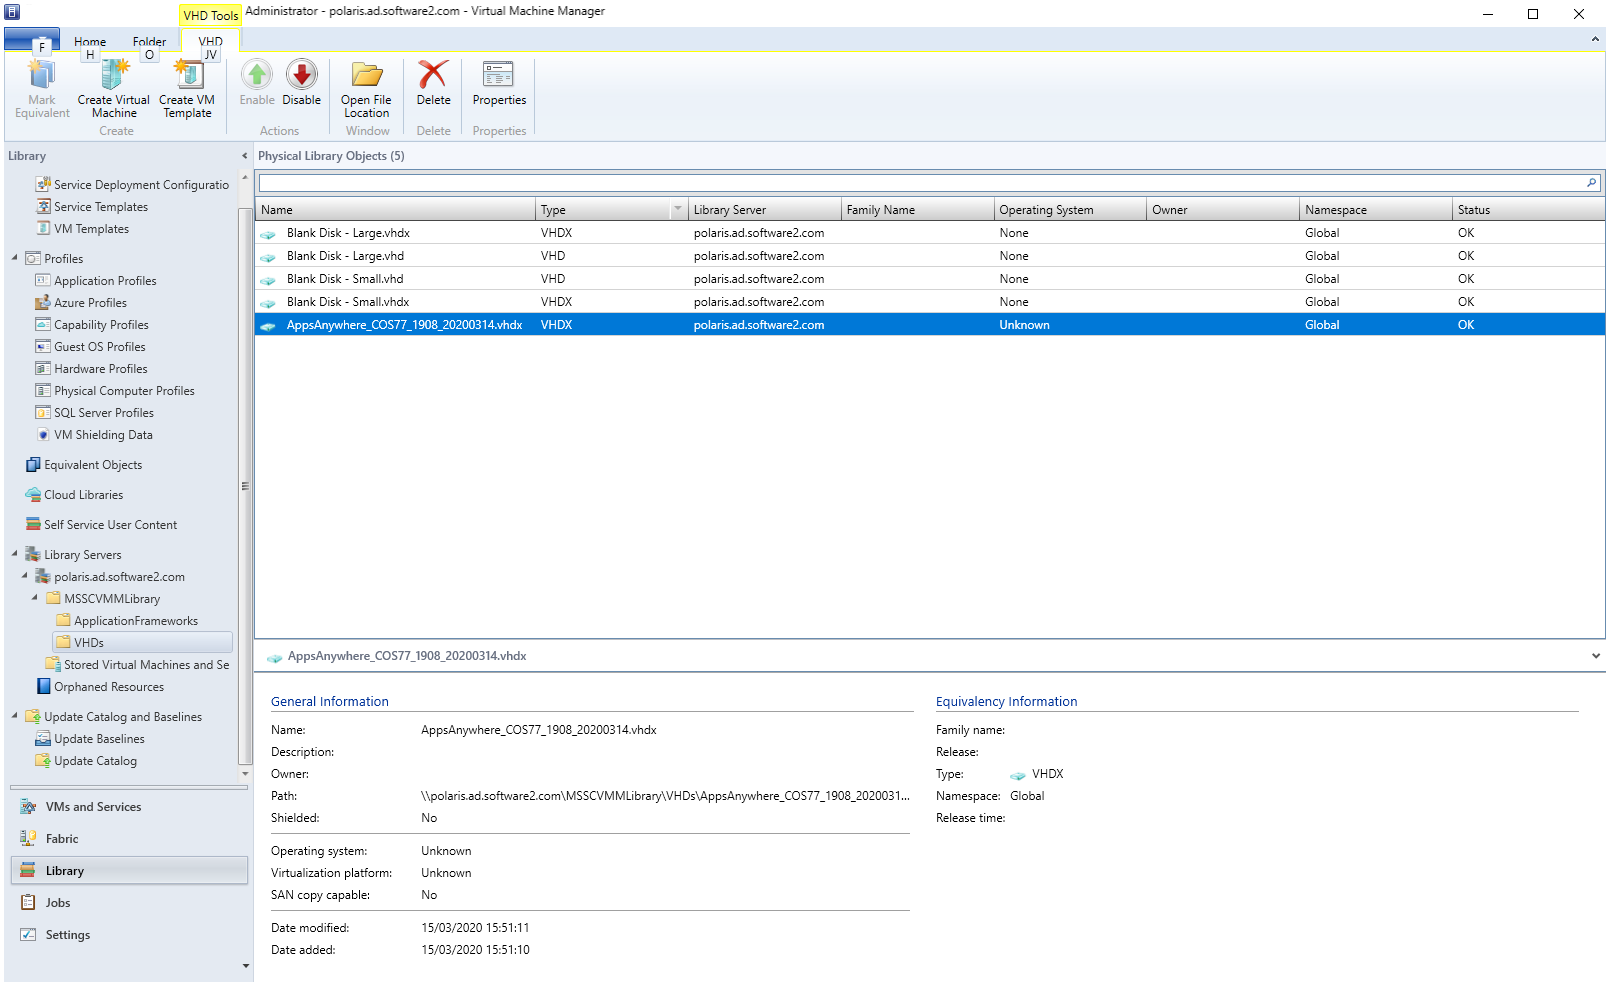
The following steps assume that the AppsAnywhere Analytics VHDK file has already been copied to the VMM Library location, as shown in the screenshot below
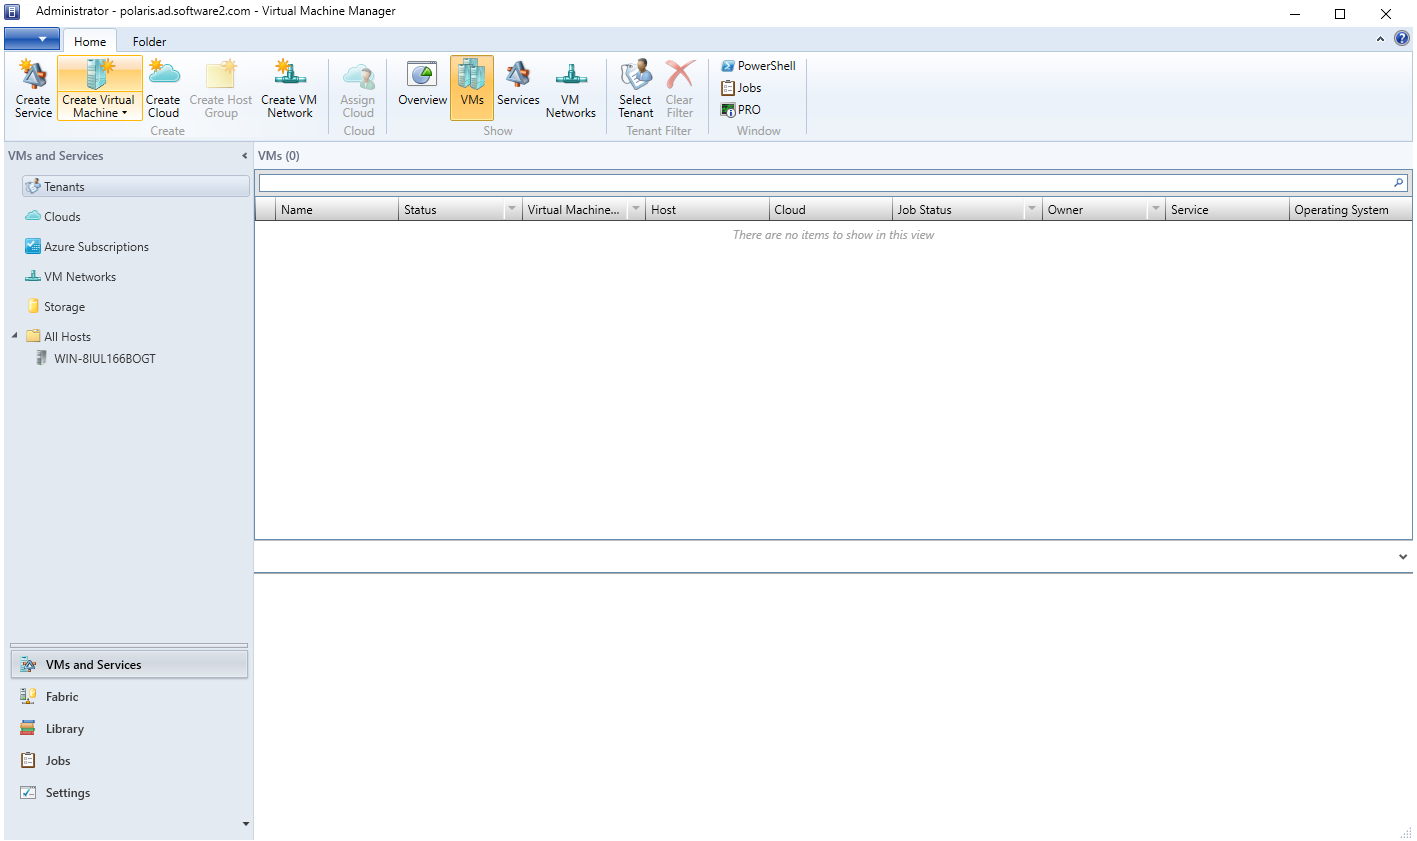
To begin importing the AppsAnywhere appliance into your environment, start by launching the Virtual Machine Manager Console.
Click the Create Virtual Machine button on the toolbar.
The Create Virtual Machine Wizard will appear:
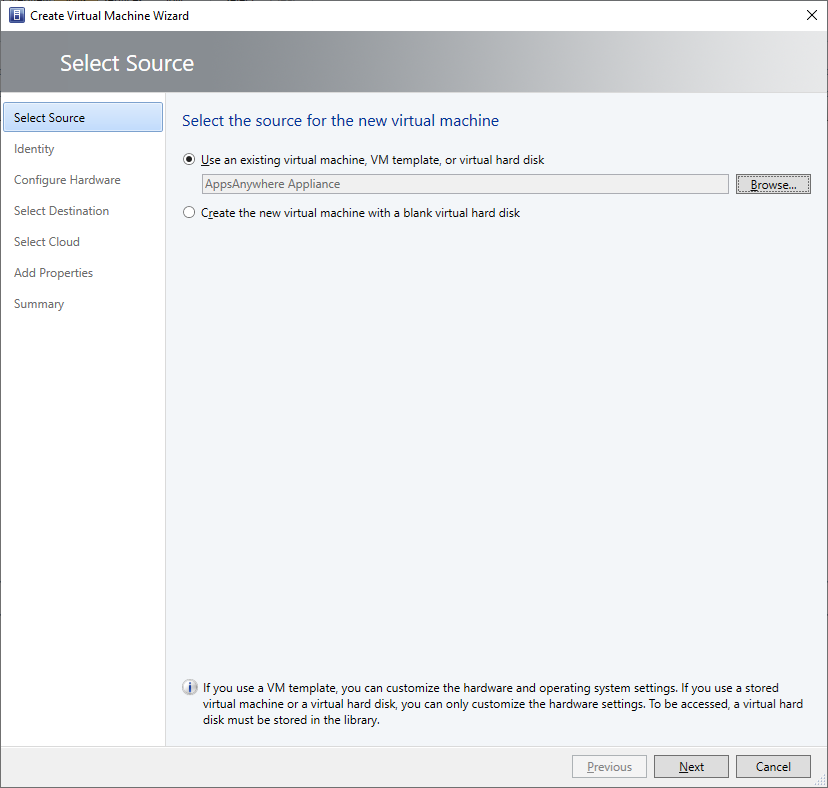
Select Use an existing virtual machine, VM template or virtual hard disk and browse to the AppsAnywhere VHDK file.
Click Next to continue.
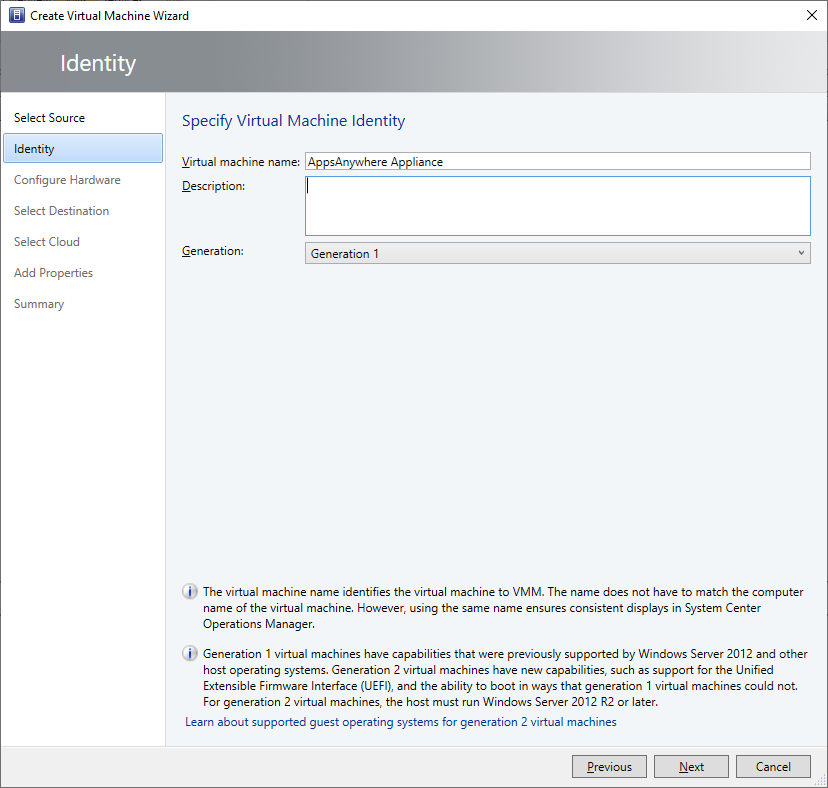
Specify the Virtual machine name, description as required.
Ensure that Generation 1 or Generation 2 is selected in the Generation drop-down list based on the appliance version downloaded.
If using the Hyper-v (Gen 2) appliance, when creating the Virtual Machine within Hyper-V you MUST ensure that you select “Generation 2” and the Secure Boot template must be set to “Microsoft UEFI Certificate Authority” (as the image is Linux based).
Click Next to continue.
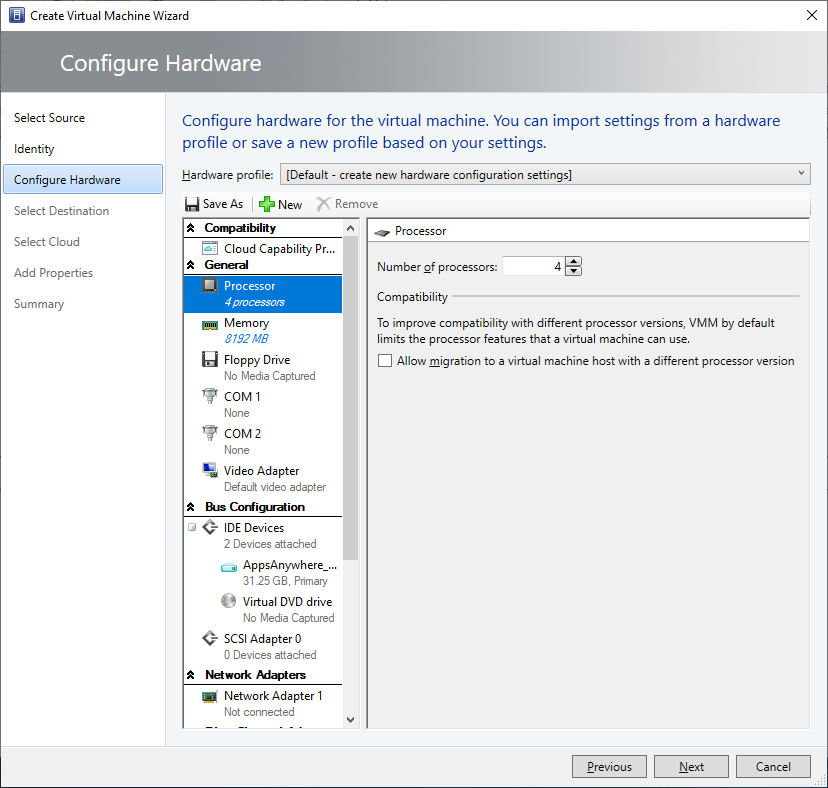
In the Configure Hardware section, select Processor and increase the number of processors from 1 to 4
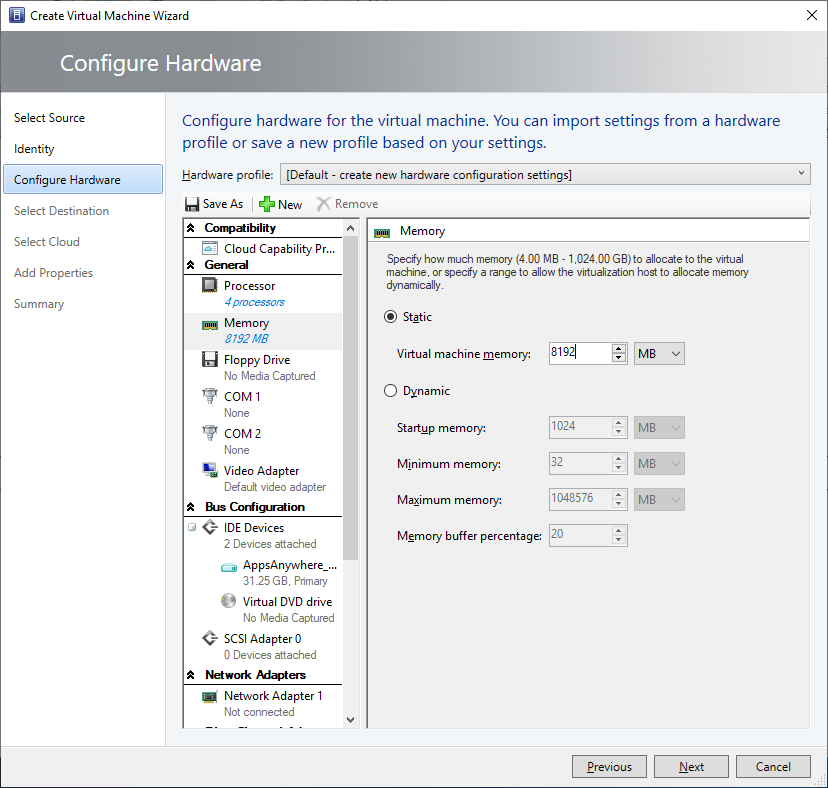
Select Memory and increase the virtual machine memory from 1024Mb to 8192Mb
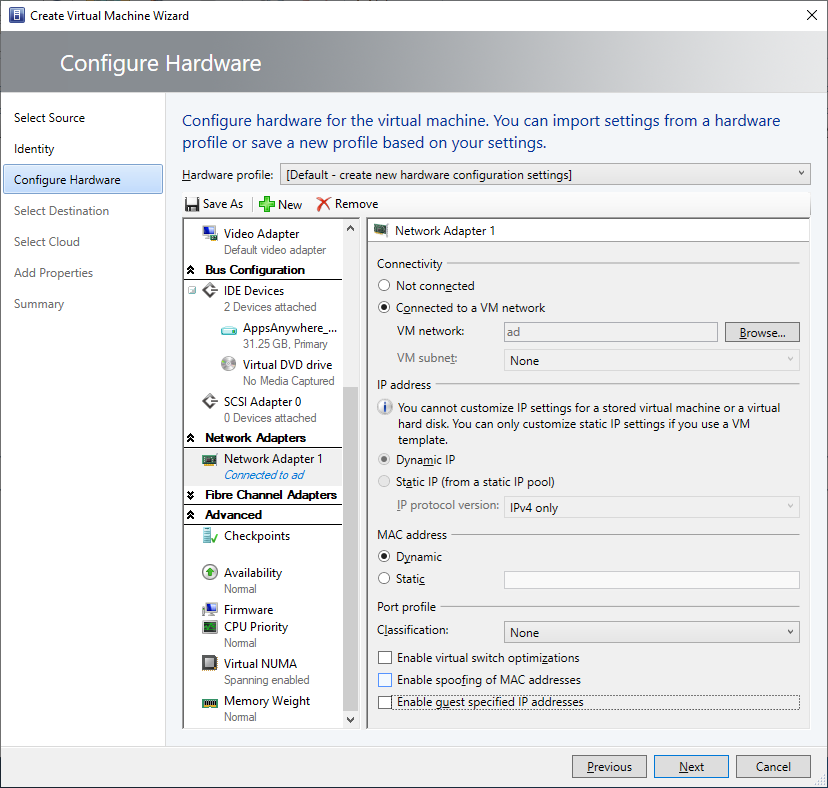
Select Network Adapter 1 and select Connected to a VM network option and click the Browse button.
Select the relevant virtual machine network from the list and click OK.
Click Next to continue.
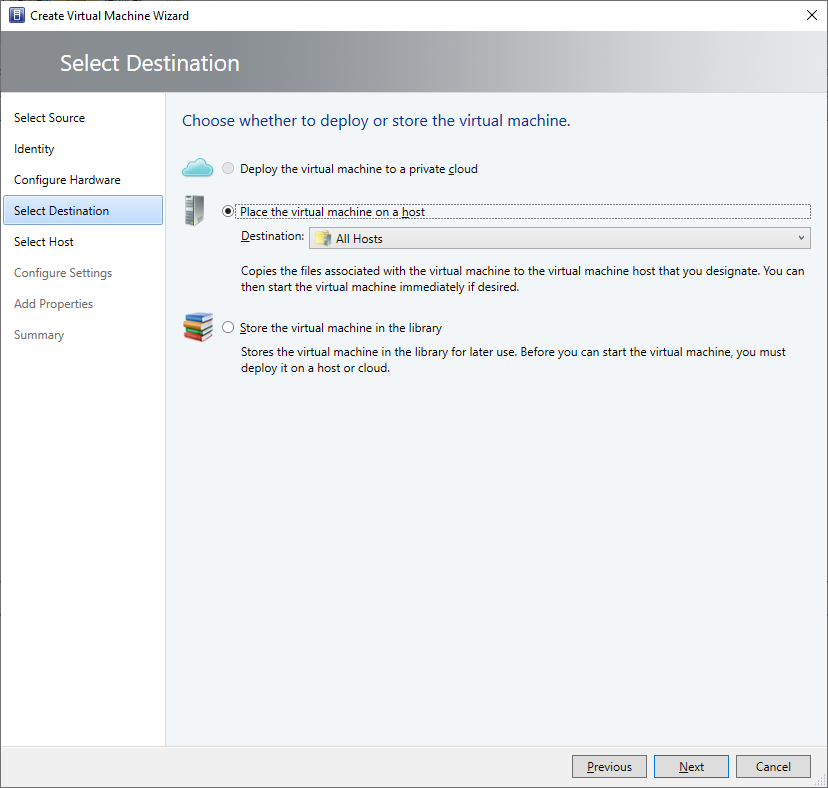
Select Place the virtual machine on a host and select the hosts folder from the dropdown list.
Click Next to continue.
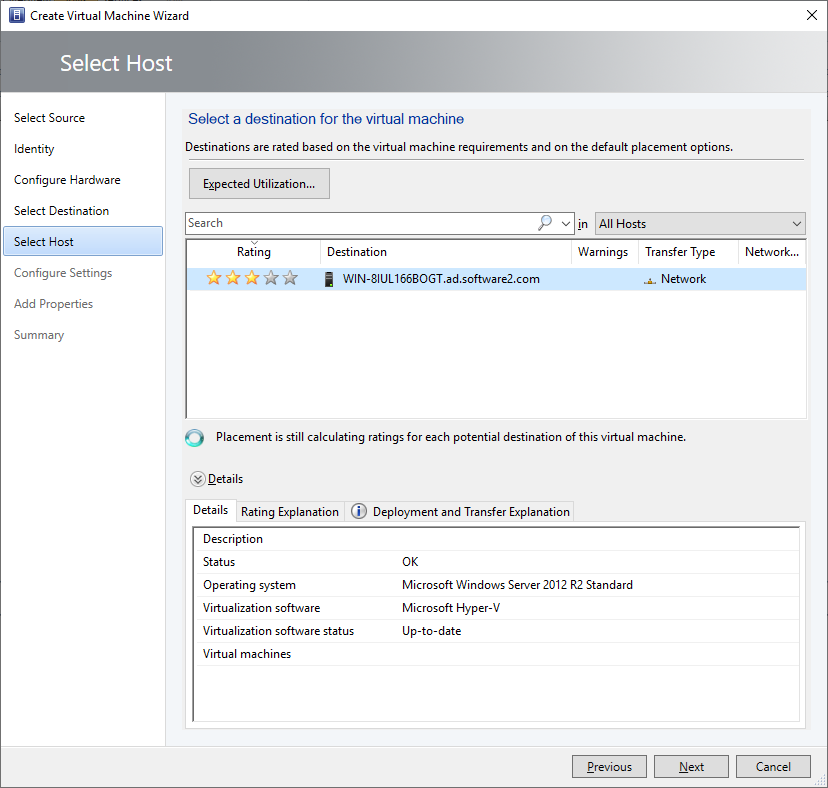
Select the relevant Hyper-V host from the list and click Next to continue.
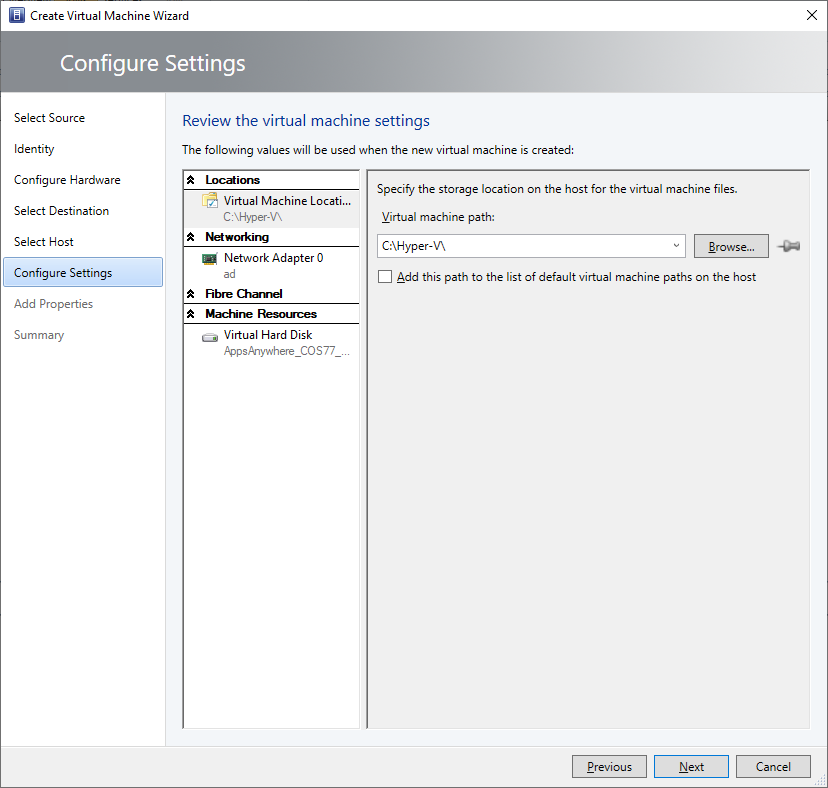
Specify the virtual machine path location.
Click Next to continue.

Select the CentOS Linux 7 (64bit) option from the Operating System dropdown list.
Click Next to continue.
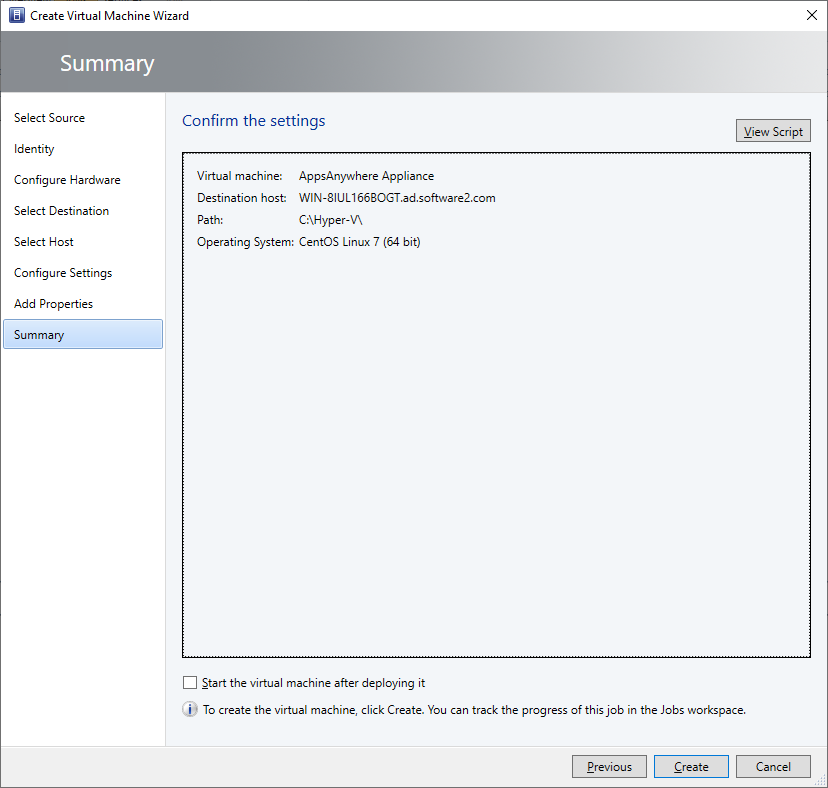
Your machine is now ready to create. Check the Start the virtual machine after deploying it box and click Create.
Next Steps
Now that you have imported your appliance, it will be available in your resource list to power on.
Hyper-V Gen 2 Considerations
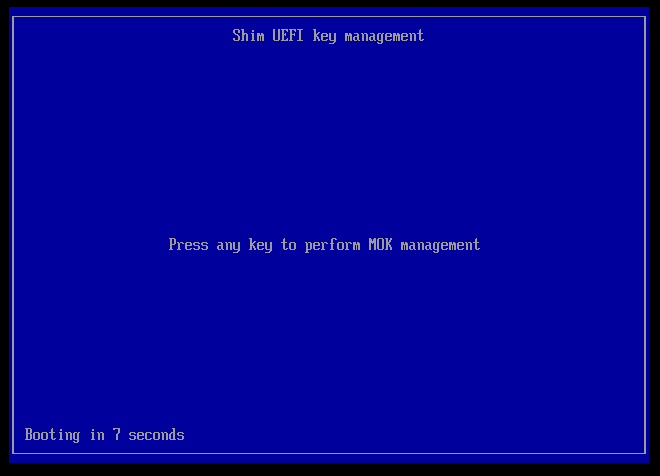
The first time the Hyper-V Gen 2 image is powered on, you will receive a Security violation error message:

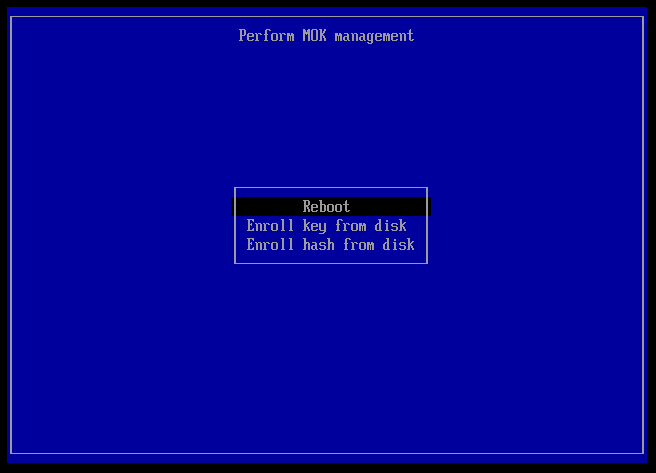
To resolve this issue click OK and press Enter to access the MOK management interface.
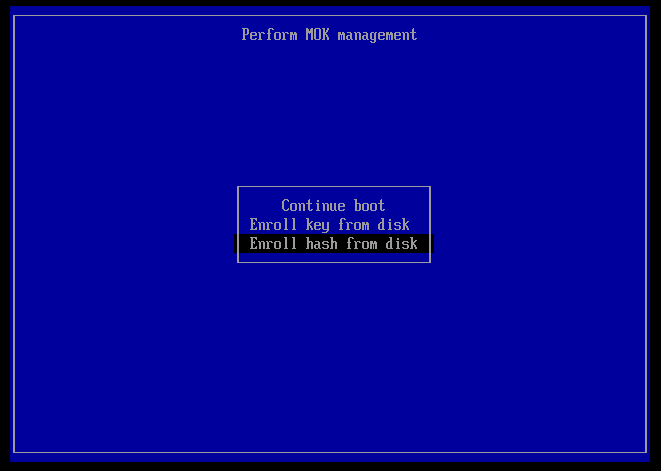
Select Enroll hash from disk option and press Enter
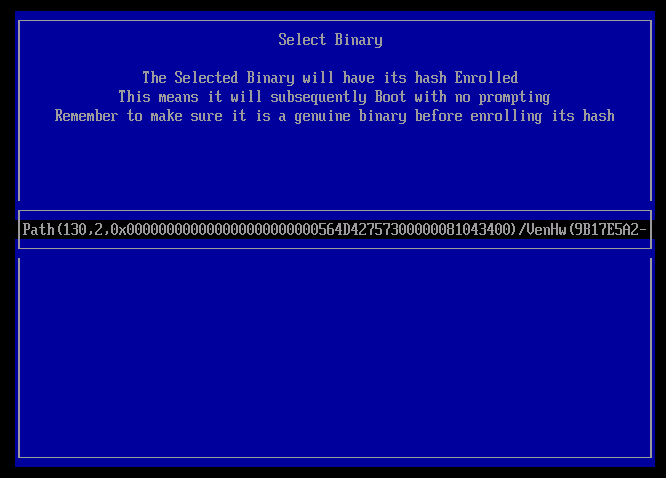
Select the disk path and press Enter
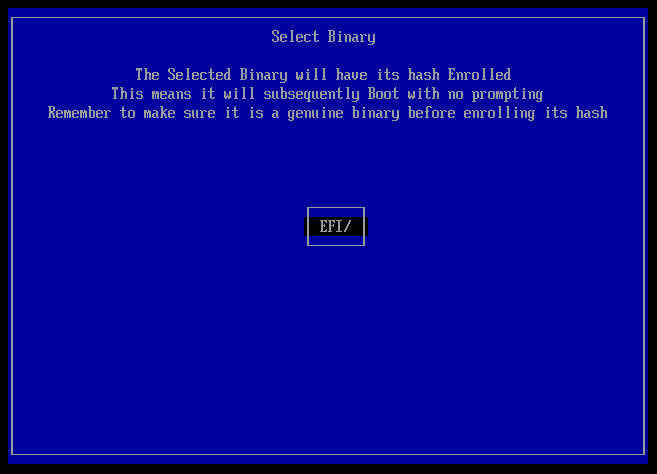
Select the EFI folder and press Enter
Select the centos folder and press Enter
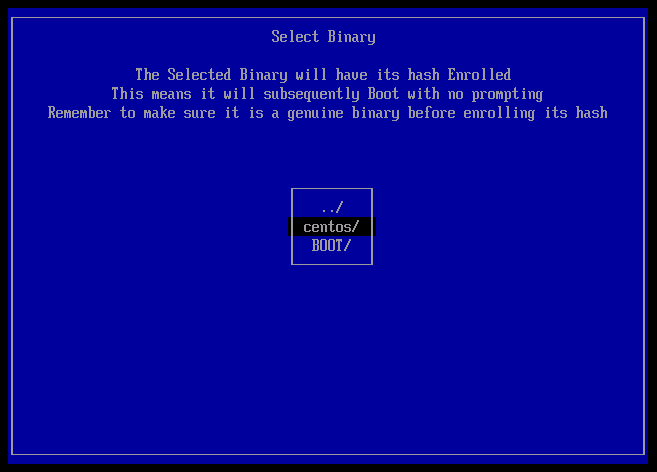
Select the grubx64.efi file and press Enter
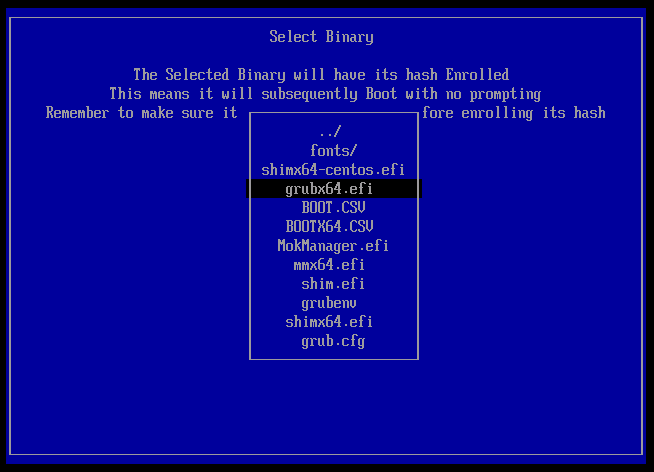
Select Continue and press Enter
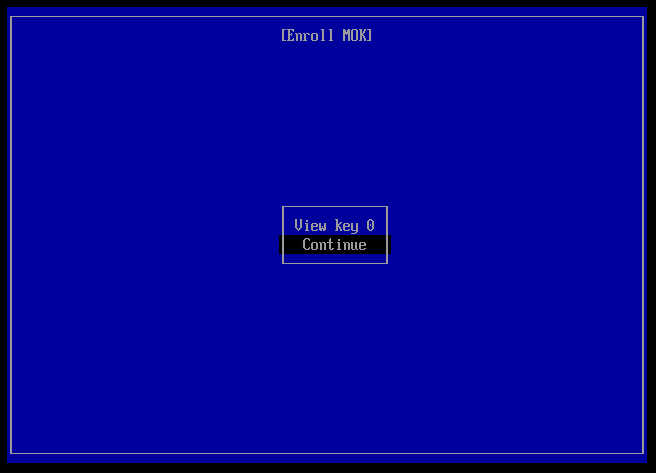
Select Yes and press Enter to enroll the key.
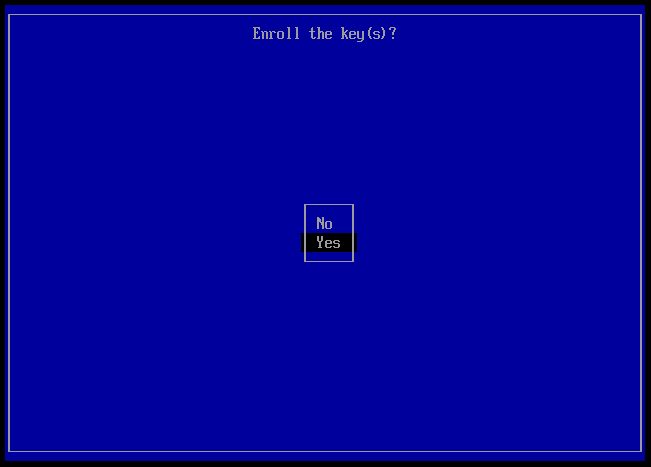
Select Reboot and press Enter to restart the Virtual machine.
Once complete the Hyper-V Gen 2 image will start correctly.