
API Key Settings
Overview
AppsAnywhere has the ability manage API keys and add a scope for the generated API key, This article will go over Managing your API Keys in AppsAnywhere.
API Keys are currently only relevant for the App Lists Exam addon, the link will not be visible unless this is enabled.
Log into AppsAnywhere as an admin user
Click on Return to Admin to access the AppsAnywhere admin portal
On the navigation buttons on the left of the page, open the Settings menu and then API Keys
Creating an API Key
You can add new API keys directly from this page. The form on the left will allow you to submit the information to add a new one, and the table on the right will display the ones that have already been added.
Enter the details of your API Key:
Form field name | Explanation | Expected value | Example |
|---|---|---|---|
Display name | The name to be displayed in AppsAnywhere | You can call the API Key anything you want, this will only be displayed in AppsAnywhere | AppsAnywhere Apps |
Scopes | Allows access to certain APIs based on what is chosen Currently there is only a single scope available:
| You can select the checkboxes for the APIs you want access to | Checked |
Once you have entered the information required you can click Save to add your new API key.
You won't be able to save your key without selecting at least one scope. However, there will be more options added in the future.
A pop up message will show once you have saved the API key and it will display what your new key is, as can be seen below: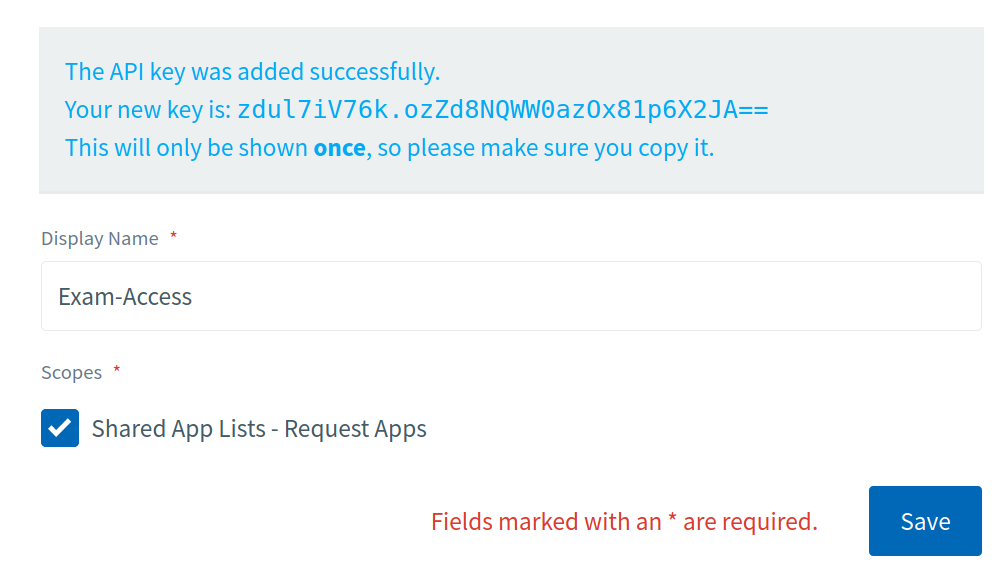
For example your new key in the above screenshot would be: zdul7iV76k.ozZd8NQWW0azOx81p6X2JA==
it is vital that you copy and paste the API key generated as it is shown once; you will have to create a new API key again to generate a new one.
Listing API Keys
As aforementioned the table on the right will display existing API keys added to the system, as can be seen below:
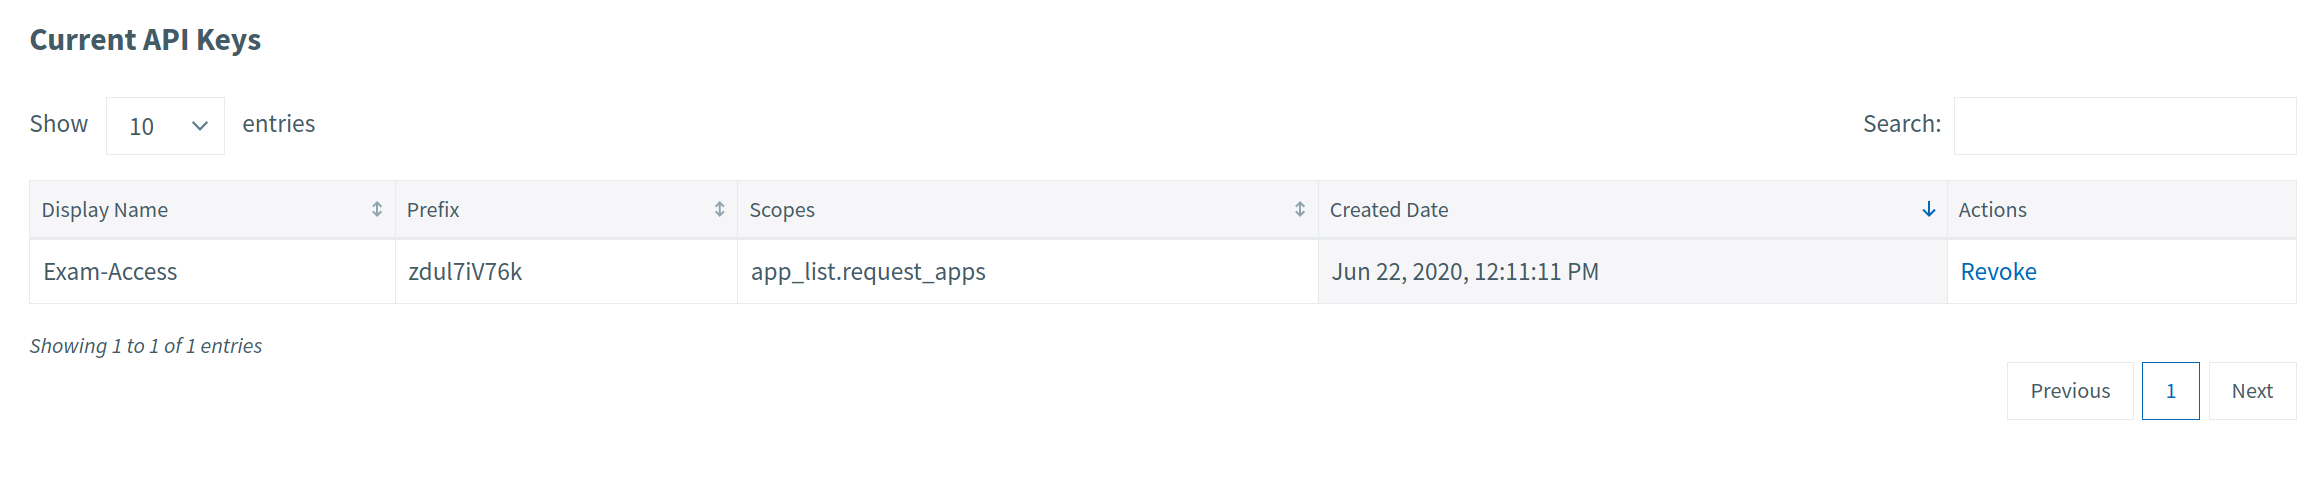
You may have noticed additional information related to the API Keys you have created, these will have been automatically generated for you to help you with administration of these keys. The following table will explain the different fields in more detail:
Field name | Explanation | Example |
|---|---|---|
Prefix | Created by the system so that you can more easily identify the API key when it is being used A randomly generated value consisting of letters and numbers | zdul7iV76k |
Created Date | The date when the API key was created | Jun 22, 2020, 12:11:11 PM |
New API keys will be added to the top of the table rather than at the bottom.
Revoking an API Key
If you want to remove access to an existing API Key then click Revoke next to the one you want to remove access for.
You will then be prompted to confirm the revocation. Check the name of the API Key in the message to ensure you are deleting the correct one.
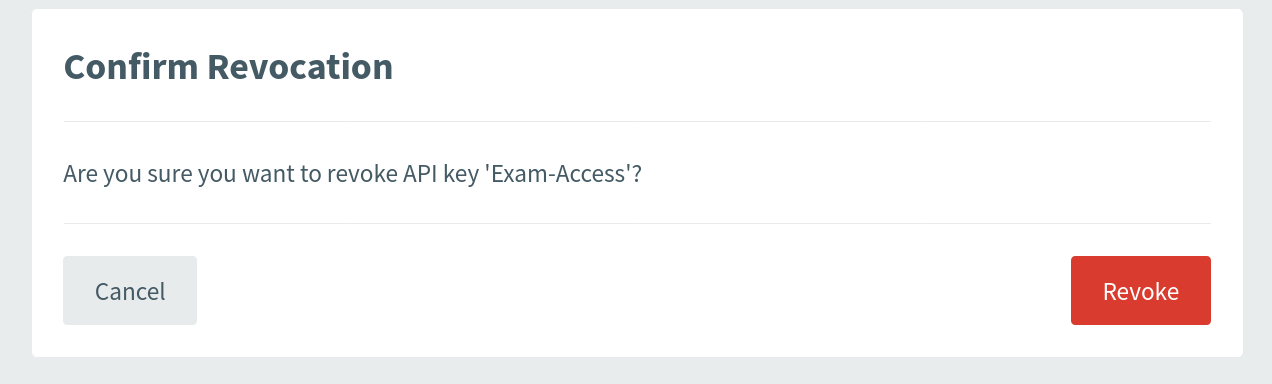
Click the Revoke button in the dialog to remove the API Key.
Make sure that the API Key you are revoking is no longer used. Revoking an API Key will immediately deny access to callers using the key. Revoking an API Key is not reversible.