
Token-Based Integration
Overview
AppsAnywhere provides a generic token-based identity integration point to allow organisations to integrate their own custom systems with the product. If you already have your own system for identifying your users that doesn't make use of an OAuth or SAML based identity system (or anything else that we natively integrate with) then you can link to AppsAnywhere using a system of secured tokens. An authorization token contains encrypted details about the authenticated user and is passed from your system to AppsAnywhere to initiate login on their behalf.
As an example, AppsAnywhere use this token-based authentication in the registration system for our online AppsAnywhere demo. When prospects interested in trying AppsAnywhere fill in their details on the registration site, we programatically create an account for them in our Active Directory domain and then take their new username and create an encrypted token that is passed through to the AppsAnywhere demo site to log them in automatically. This means that we can send them their credentials via e-mail for future reference, but they don't have to sit and wait for them to be delivered before they can try the product.
In this article, we will take you through how this all works, using a code example from this demo registration system.
Before You Begin
If you aren't yet familiar with the process of managing SSO methods and how they work, take a look at the general article on Single Sign-On Settings before continuing through this article.
Adding Tokens
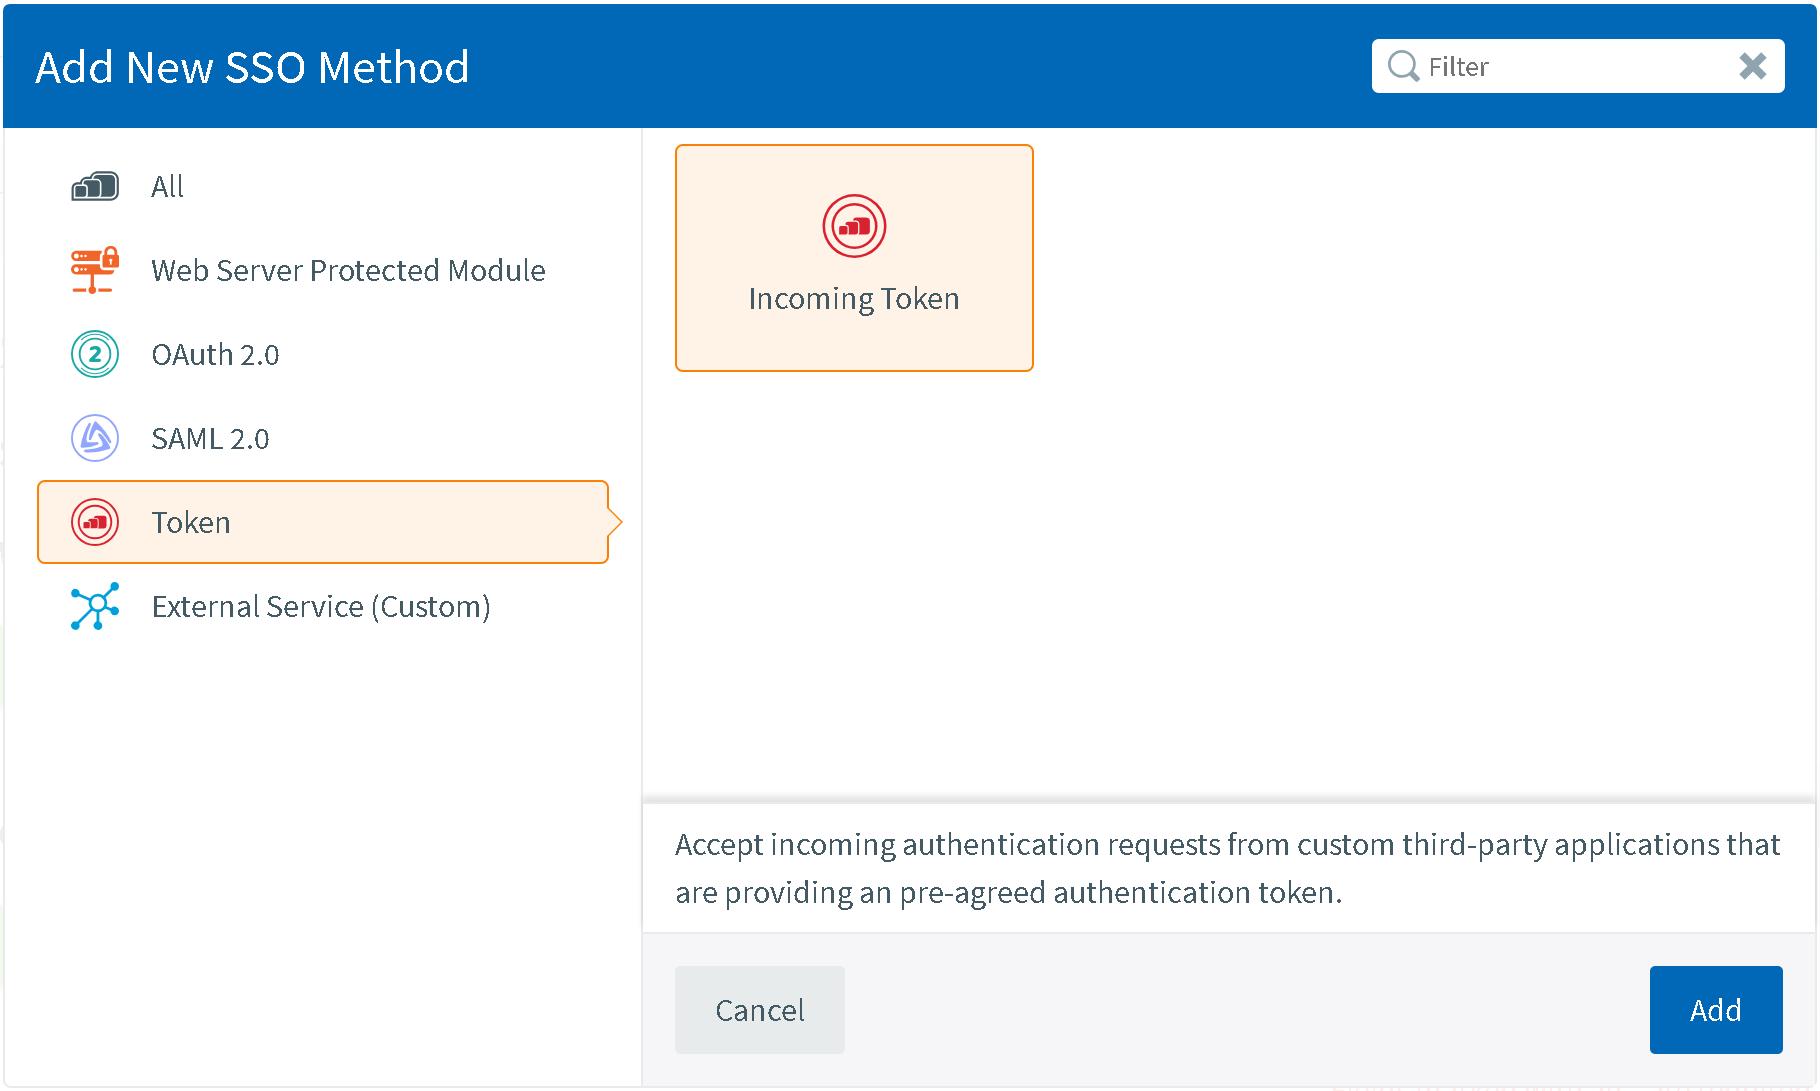
When adding a new SSO method, choose from the Token category, and select Incoming Token.
Like with every other type of SSO method, this will open up a new card and you will have to enter some details that are generic to all SSO methods (as described on the Single Sign-On Settings page)
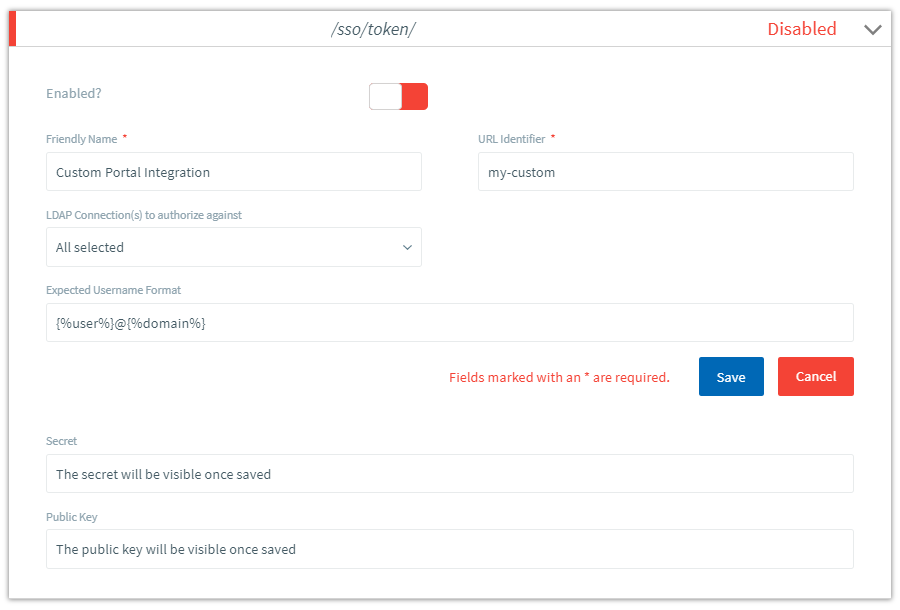
Enter a Friendly Name for your new SSO method
Decide on a URL Identifier, that will make up the last part of the access URL
Choose the LDAP Connection(s) to authorize against
Specify the Expected Username Format
Click Save
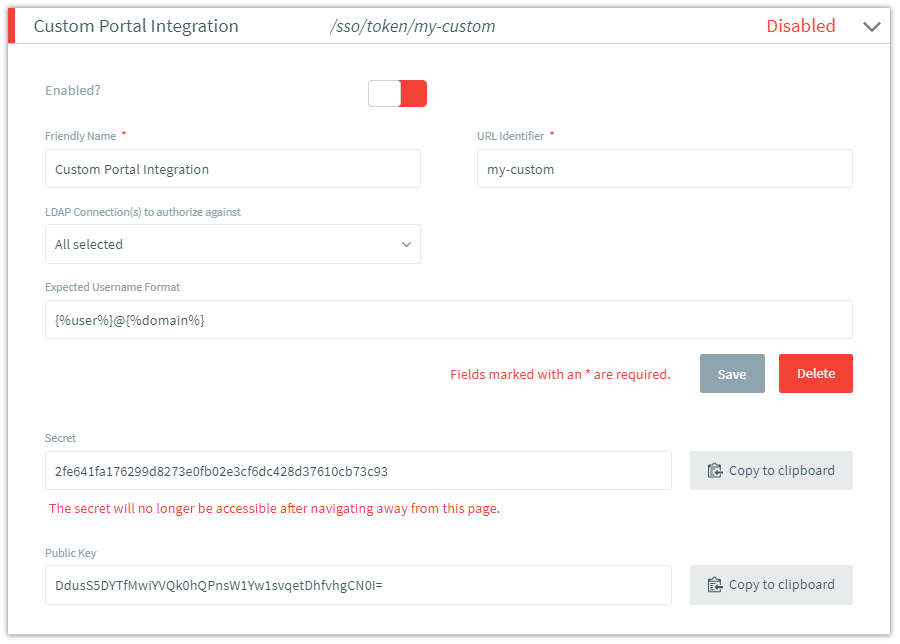
Once the new SSO method is saved, you will see the title and the URL identifier populated at the top, as shown:
You will also see the values for the Secret and Public Key, which are described in the next section.
Your new SSO method will be disabled by default. Be sure to enable it when you are ready to start testing!
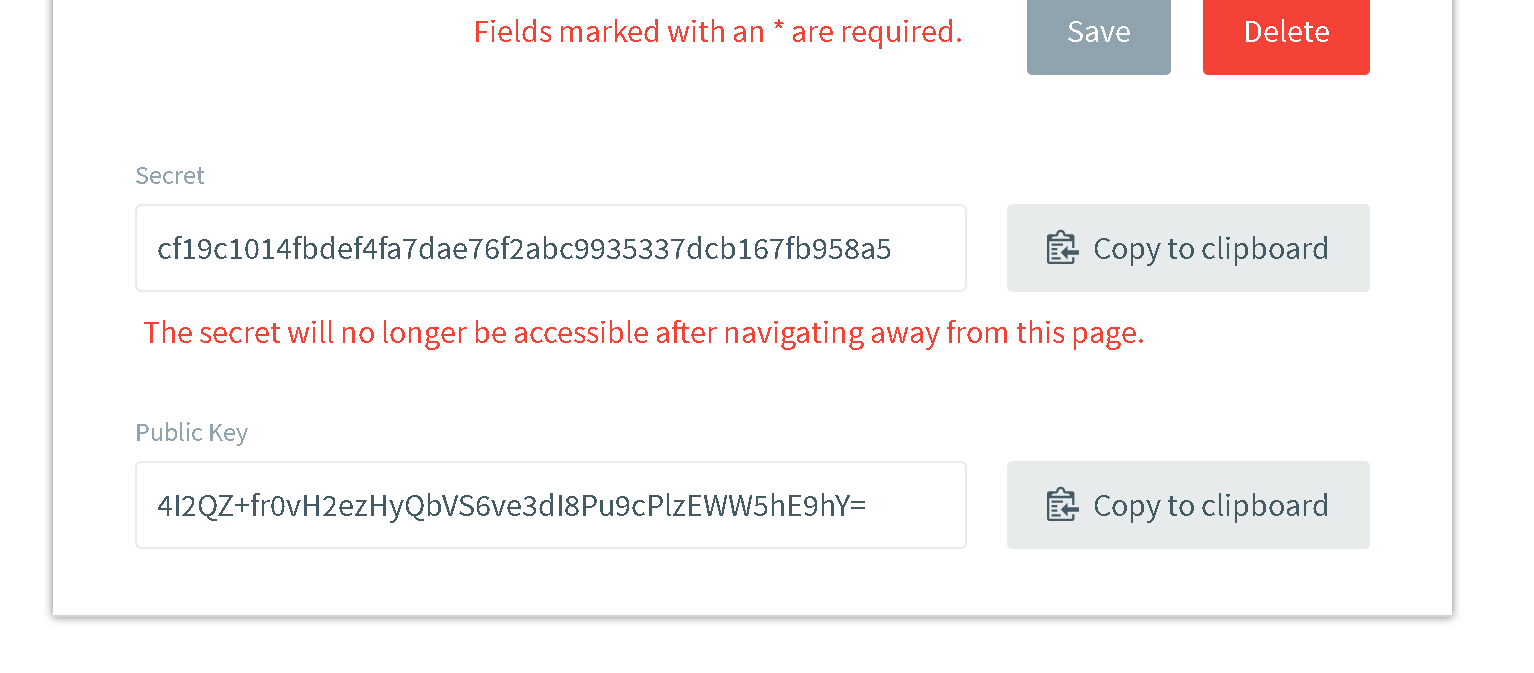
Secret and Public Key
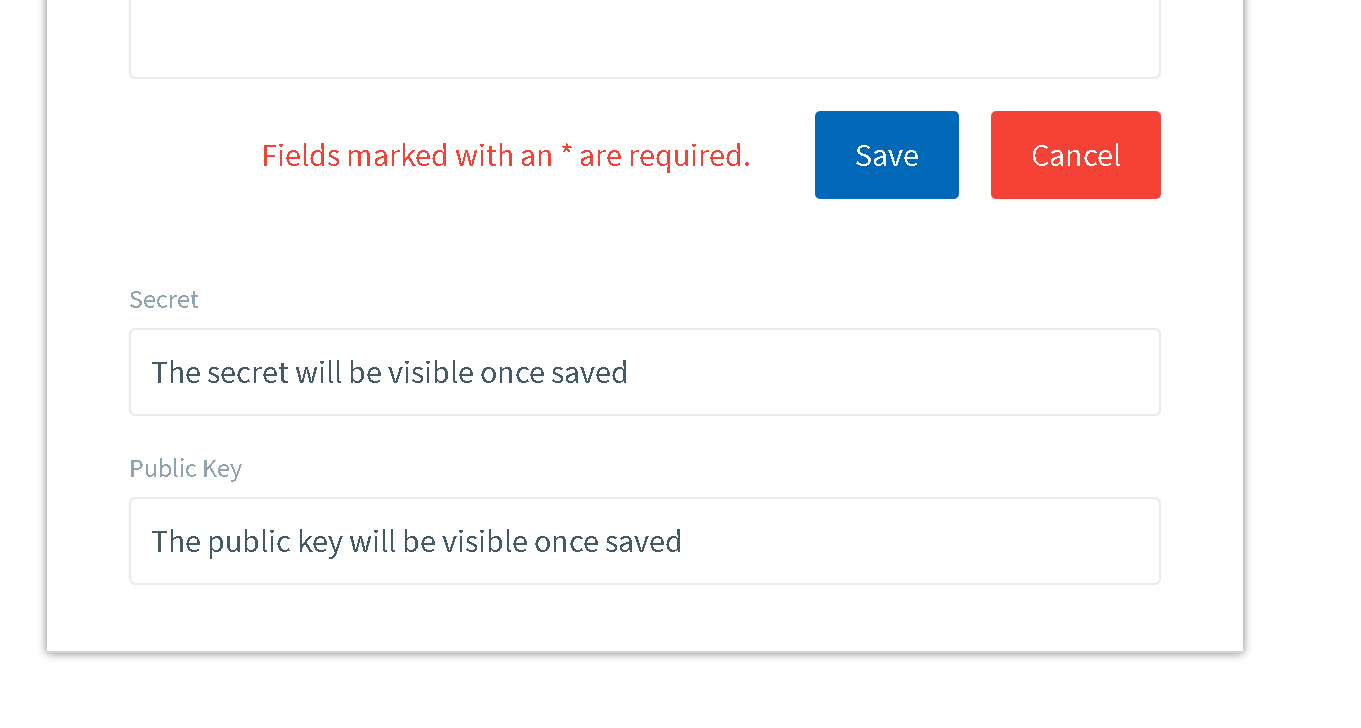
You may have noticed when you were creating your token SSO method that there were two additional fields below the Save and Cancel buttons; Secret and Public Key. These two values are generated by the system once your SSO method is saved and you will need them to create the message you will need to send to AppsAnywhere to log in a user.
Once you save your SSO methods, these two fields will be populated and you will need to make a note of the values they contain to put into your integration code.
To make it easy to make a note of these values, we added a Copy to clipboard button which you can click to copy the value from each field.
The Secret value will only be visible once, when you first save the SSO method. Make sure you make a note of this value straight away as it is not possible view it again once you navigate away from the page. If you forget your Secret, you will need to re-create the SSO method from scratch!
Anyone with access to the Secret and the Public Key for this SSO method has the ability to log ANY user into AppsAnywhere without needing their password. If you are adding this type of SSO method, make sure that your Secret and Public Key remain secure and are not disclosed to anyone other than those that absolutely require it to facilitate this integration.
You should also consider how secure these values are in the code that you write to integrate with AppsAnywhere and who else has access to that code.
Generating The Code
Once you have set up your SSO method, it's time to start writing the code that will use those values to integrate your custom system with AppsAnywhere.
Here's a sample of how to generate a login token using PHP:
SSO Token Creation
// Start with the secret and public key generated when
// you created the token SSO method in AppsAnywhere
$secret    = '<<insert secret here>>';
$publicKey = '<<insert public key here>>';

// Create the message to send to AppsAnywhere in the form of a JSON
// array containing the user's identity, the secret and a timestamp
$messageData = json_encode([
    'identity' => 'ryan@APPSANYWHERE.COM,
    'secret' => $secret,
    'timestamp' => time(),
]);

// Encrypt the message using the public key (we use the Libsodium library)
$encryptedMessage = \Sodium\crypto_box_seal($messageData, base64_decode($publicKey));

// Encode that message, ready to send it to AppsAnywhere
$token = urlencode(base64_encode($encryptedMessage));

// Generate a login link that will take the user to AppsAnywhere
// Start with the base URL of your AppsAnywhere instance
$appsanywhereUrl = 'https://your.appsanywhere-url.com';
// The second part is then the SSO path, as specified on the SSO method in AppsAnywhere
$ssoPath = '/sso/token/url-identifier';
// Finally add the token as a GET parameter to the request
$url = $appsanywhereUrl . $ssoPath . '?token='.$token;
This will give you something like the following:
Example SSO Login Link
https://your.appsanywhere-url.com/sso/token/url-identifier?token=bdzi8GGn8D...<<shortened>>...y81Wvug%3DYou can now write out this link somewhere in your own system and users will be able to click on it and be logged straight into AppsAnywhere.
Feedback
If you have used this SSO method to integrate one of your own systems with AppsAnywhere, we'd love to hear what you used it to integrate with and how that benefited your users.
Please drop us a support ticket and let us know how you got on!