Adding an Azure Virtual Desktop Environment
Overview
If you are wanting to deliver apps in Azure Virtual Desktop to your end users with the help of AppsAnywhere, you will need to link it with an Azure Virtual Desktop environment. In this article, we will discover how to create a new connection to an Azure Virtual Desktop environment.
Creating the connection
Navigate to the Manage Azure Virtual Desktop Environments page:
Log into AppsAnywhere as an admin user
Click on Return to Admin to access the AppsAnywhere admin portal
On the sidebar menu, go to Connectors > Azure Virtual Desktop
Here you will see a full list of the Azure Virtual Desktop environments AppsAnywhere is linked to.
4. Click on the Add button on the top right of the page
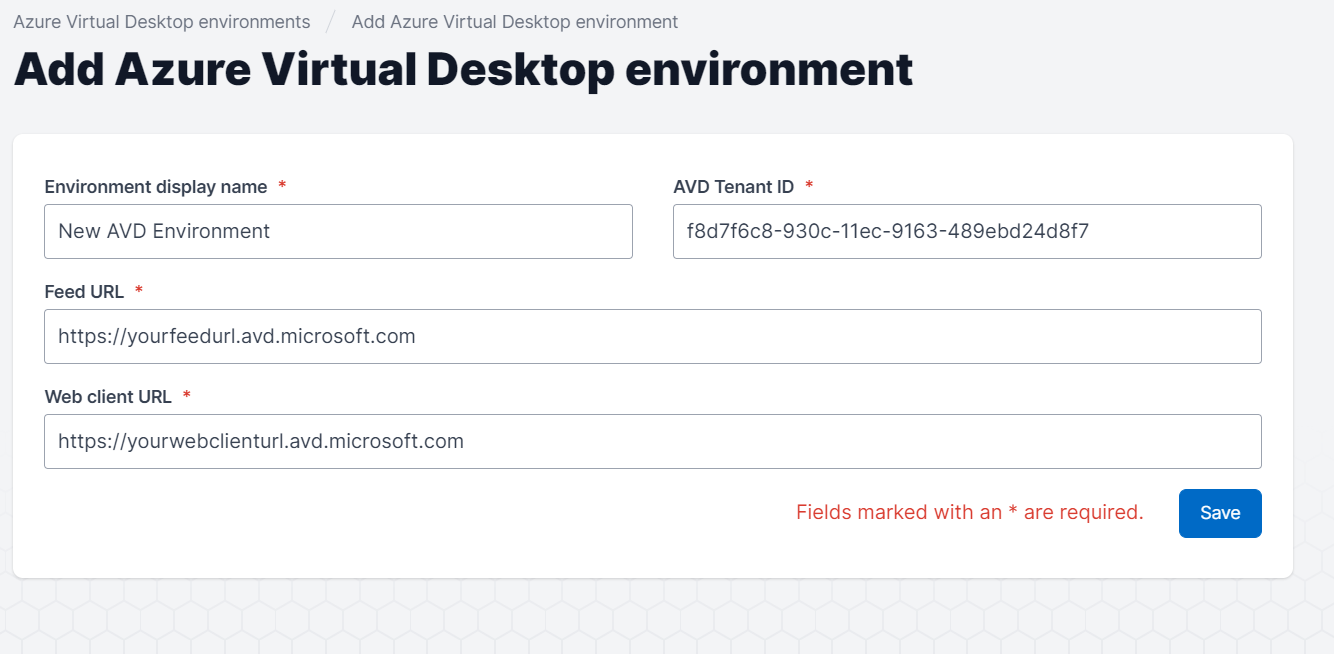
Enter the details of your Azure Virtual Desktop environment:
Form Field Name | Explanation | Expected Value | Example |
|---|---|---|---|
Name | A friendly name for the connection. | You can call the connection anything you want. | My Azure Virtual Desktop Environment |
AVD Tenant ID | The AVD Tenant ID is the ID assigned to a Azure Virtual Desktop tenant by the Azure platform. | The Tenant ID can be found by following the instructions in the Adding a Azure Virtual Desktop Environment#Finding the AVD Tenant ID section. | 7b2hj4c6-7l6b-41j7-ac6b-34c4g8d5gh43 |
Feed Url | The Feed URL allows Azure Virtual Desktop to discover the available resources and is required to be input by the user when configuring their local Azure Virtual Desktop client. The Feed URL will be provided to the user when they are launching a Azure Virtual Desktop delivery method. | There are several possible values for the Feed URL, each of these values and in scenario in which to use each one is outlined in the following Microsoft documentation page. https://docs.microsoft.com/en-us/azure/virtual-desktop/connect-windows-7-10#subscribe-with-a-url | |
Web client URL | The Web client URL gives access to Azure Virtual Desktop resources from a web browser without the lengthy installation process, this location is where the user is directed when launching a Azure Virtual Desktop Delivery Method via the HTML5 client. | There are several possible values for the Web client URL, each of these values and in scenario in which to use each one is outlined in the following Microsoft documentation page. https://docs.microsoft.com/en-us/azure/virtual-desktop/connect-web#access-remote-resources-feed |
Finding the AVD Tenant ID
Finding the Tenant ID requires a machine which has the AVD client configured. This means that the AVD client must be installed and set up, to set up Azure Virtual Desktop on a windows device follow these steps.
Locate and launch Azure Virtual Desktop client
When the client opens you may be asked to sign in with your university account
Once the AVD client has been configured, go to the %localappdata%\rdclientwpf\ folder. In this folder you will find a file named ISubscription.json, within this file you will find the Tenant ID for each of the Azure Virtual Desktop feeds the current user account is subscribed to; searching for TenantId will allow you to quickly find the configured Tenants and the ID required for the AppsAnywhere environment. Where there are multiple Tenant IDs listed the Title key alongside each Tenant ID can be used to identify the required one.
Save the connection
Once you have entered all of the relevant details of the connection, hit the button
You will then be sent back to the Viewing Azure Virtual Desktop Environments page, where you should see your new connection and the following message:
That's it!