
Overview
Once you have a RemoteApp environment set up from which you can launch applications, you will need to link AppsAnywhere to that environment and configure your session host (or hosts) to accept commands from AppsAnywhere. This is a relatively simple process as you don't need to install all of the applications you want to deliver on each session host, you only need to install the AppsAnywhere client, which will handle the delivery of your Cloudpaging applications to the server on-demand. This means you can start with a lightweight image for your RemoteApp servers.
If you are new to RemoteApp, take a look at the Building a RemoteApp Instance article which takes you through setting up a basic RemoteApp environment to test against.
If you have more than one session host in your RemoteApp environment, make sure that you complete all of the steps detailed in this article on every session host
Preparing your Session Host(s)
In order for AppsAnywhere to work with your RemoteApp session hosts, you will need to install the AppsAnywhere client and Cloudpaging Player on each of them.
The easiest way to do this is to follow the Managed Deployment of AppsAnywhere Client and Cloudpaging Player (by GPO or SCCM) article and apply the AppsAnywhere Policy Template.
Publish the AppsAnywhere Client
Now that the AppsAnywhere client is installed and configured to not run at startup, you need to make it available as a RemoteApp application so that AppsAnywhere can trigger its launch and send it commands. To do this, follow the steps below. If you have multiple servers in your RemoteApp environment, you will need to follow these steps on your Connection Broker server.
You only need to do this step once per RemoteApp environment. If you have already published the application when you set up another session host, you just need to make sure it is installed and configured on subsequent session hosts.
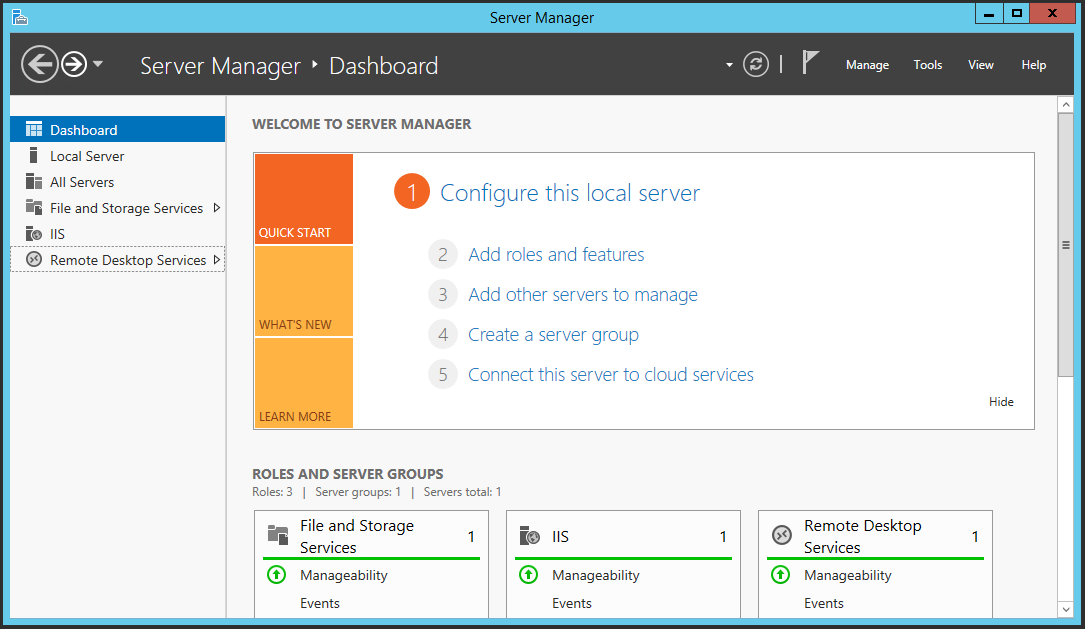
Launch Server Manager
All management of the RemoteApp environment is done through Server Manager.
-
Open Server Manager
-
Click on Remote Desktop Services on the left
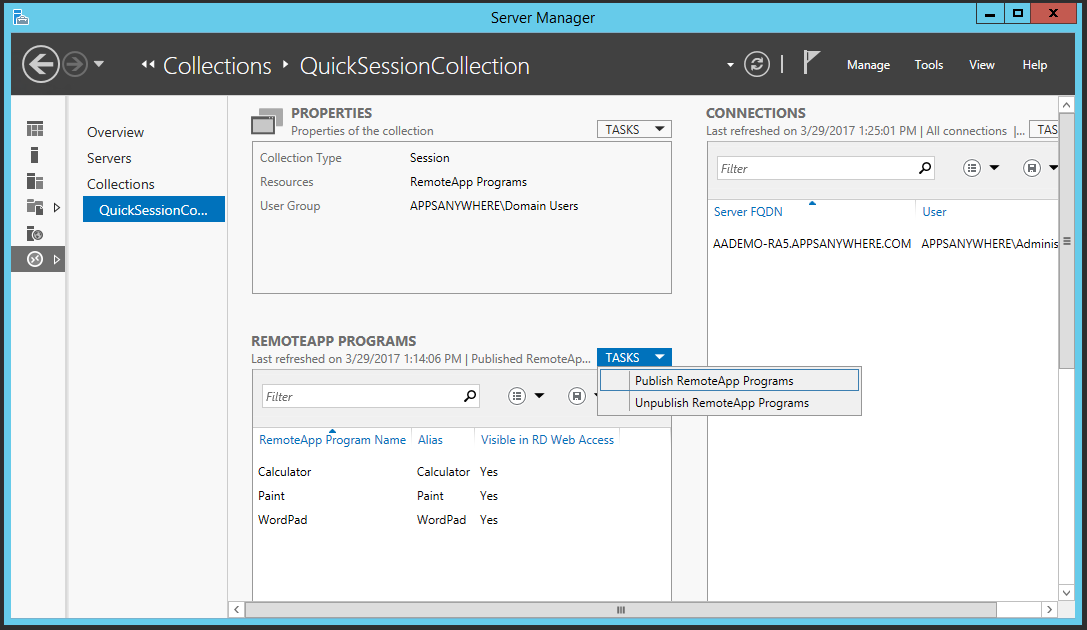
Load up the Session Collection
Each RemoteApp environment has at least one session collection, which represents a number of apps hosted on a specific set of servers in your environment. Select the session collection that you are using to provide applications delivered via AppsAnywhere. In our example, with a single server setup, we are using the default session collection, which is named QuickSessionCollection.
-
Under Collections, select your session collection

Publish a new program
We need to add the AppsAnywhere client as a published RemoteApp application so that it can be launched by AppsAnywhere.
-
Locate the dropdown marked Tasks at the top of the RemoteApp Programs section
-
Click on the dropdown and select Publish RemoteApp Programs
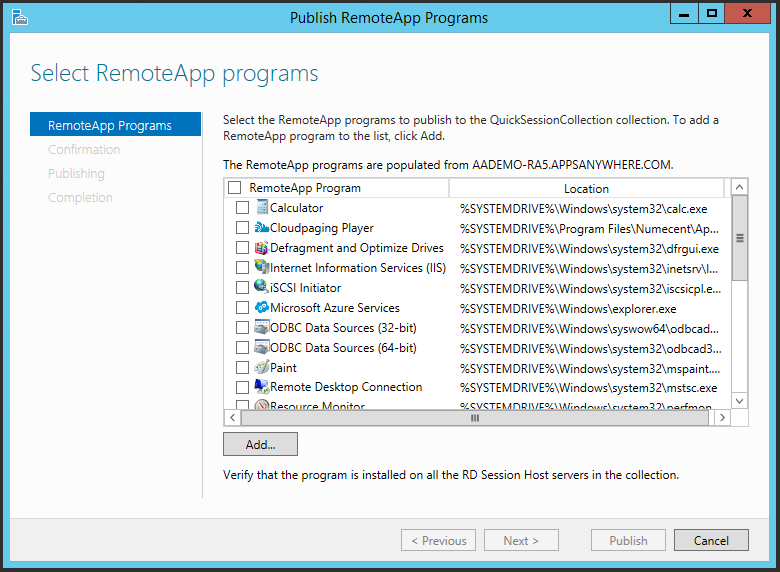
Make your way through the wizard
Selecting to publish a new RemoteApp program will launch a wizard to take you through the basic steps. Follow this wizard through to publish the AppsAnywhere client as a RemoteApp program:
-
Click Add to add an application that is not listed
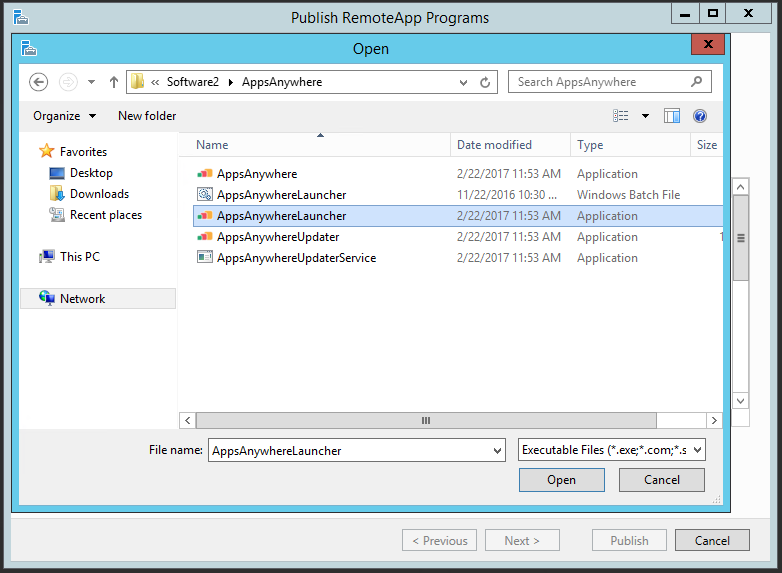
Add the AppsAnywhere client executable
The wizard will present you with a file dialog to locate the application you want to add. Note the location by default is set to a shared location on the current server. It is necessary to browse for the application through the share location; do not click 'This PC' and work your way from the actual C drive as this won't work.

Locate and select the AppsAnywhereLauncher exe.
-
Select Program Files
-
Select Software2
-
Select AppsAnywhere
-
Select AppsAnywhereLauncher (If you see two, use the application and not the batch file)
-
Click Open (which will take you back to the wizard)
-
Click Next
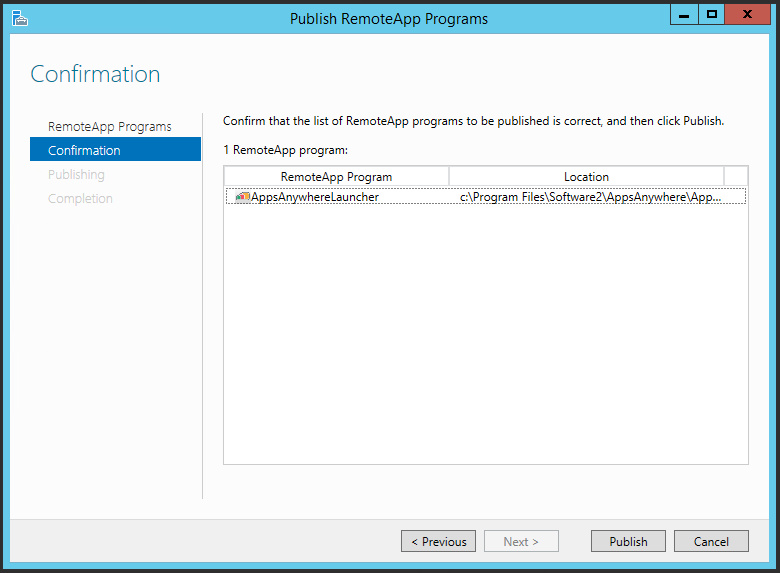
Confirm your selection
You will then be asked to confirm your selection
-
Confirm the path points to the AppsAnywhereLauncher executable
-
Click Publish
-
Click Close once publishing is complete
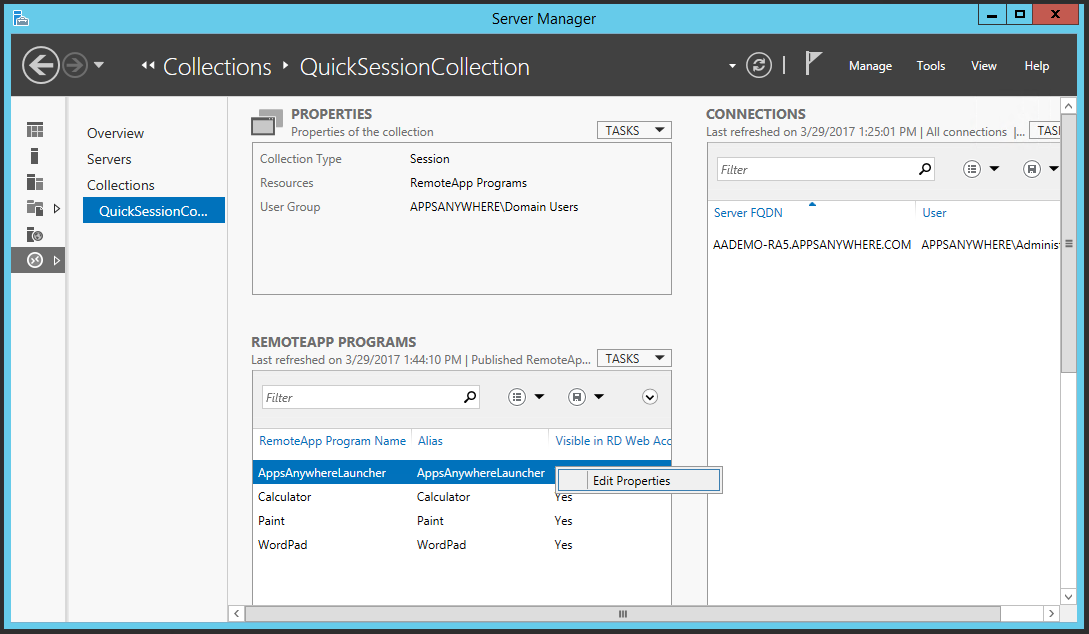
Edit the RemoteApp program properties
You will now see the application listed in the RemoteApp Programs section in Server Manager. The AppsAnywhere client is now published but you will need to alter the settings slightly before making use of it.
-
Right click on the AppsAnywhereLauncher entry
-
Click Edit Properties
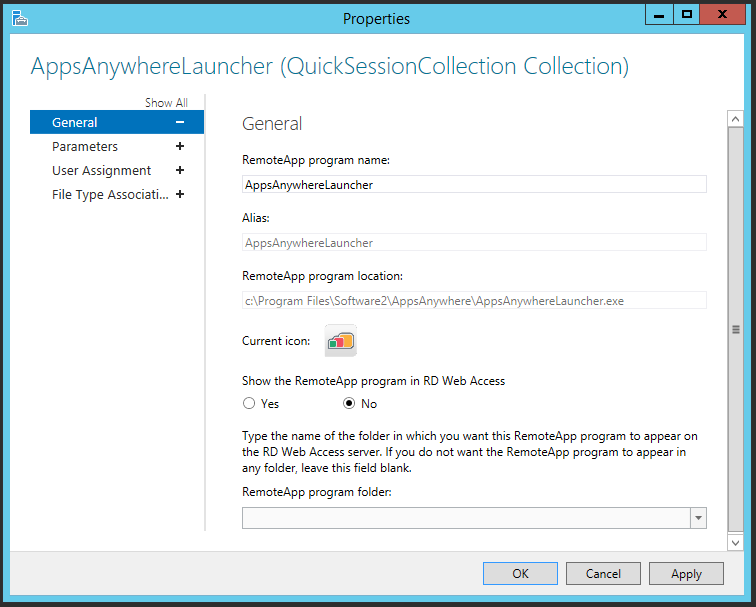
Remove from RDWeb
By default, all applications are available via RemoteApp's own portal RDWeb (more on that later). As the AppsAnywhere client doesn't do anything on it's own, you may as well stop it from being displayed in RDWeb
-
Under Show the RemoteApp program in RD Web Access - Select No
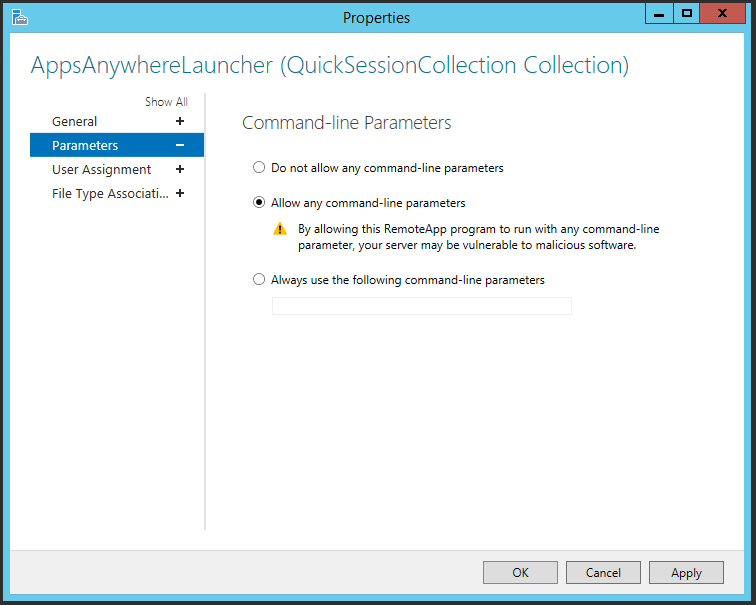
Allow command line parameters
If it is to launch the correct application, AppsAnywhere will need to be able to pass commands to the AppsAnywhere client when it initiates a new session.
-
Go to the Parameters section of the properties dialog
-
Select Allow any command-line parameters
-
Click Apply > OK
You should not be concerned about allowing command line parameters to be passed in this way as the AppsAnywhere client only accepts parameters in a specific, encrypted format that only AppsAnywhere can generate.
Link AppsAnywhere to RemoteApp
Now you have configured your session host(s) and published the AppsAnywhere client, you are ready to link AppsAnywhere to your RemoteApp environment. All of this is managed through the AppsAnywhere admin interface, so start by logging in and going to the RemoteApp settings section.
-
Log into AppsAnywhere as a Global admin user (usually reserved for AppsAnywhere Support)
-
Click on Return to Admin to access the AppsAnywhere admin portal
-
On the navigation menu at the top of the page, go to Settings > RemoteApp Settings
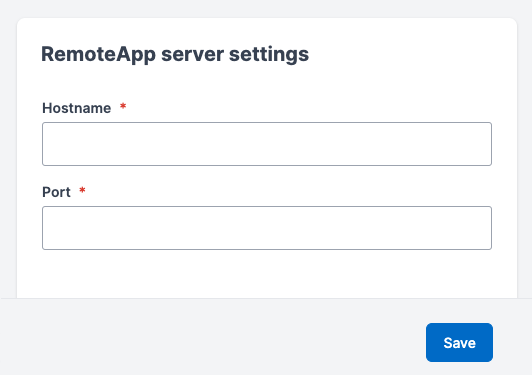
Enter your server details
On the left hand side of the RemoteApp settings page, you will see a section named RemoteApp Server Settings. Here you can define the hostname and port that AppsAnywhere will use to communicate with your RemoteApp environment. In the case of a multi-server environment, you should specify the details of your connection broker server. As we are using a single-server setup in this example, we just enter those details.
-
Enter the Hostname for your RemoteApp connection broker service
-
Enter the Port it is running on (3389 by default)
-
Click Submit
Submitting the form will update the 'full address', 'workspace id' and 'server port' values in the RemoteApp settings list on the right hand side. You can find out more about the settings on this page in the Managing RemoteApp settings article.
When configuring the connection in AppsAnywhere, the configuration should be compared to the .rdp file delivered by the RemoteApp gateway
All Done!
That's It! You have now setup your RemoteApp environment for AppsAnywhere and configured AppsAnywhere to link to it. For information on configuring your user experience, you will want to take a look at the Managing RemoteApp settings article.
Take a look at the article describing adding a RemoteApp Delivery Method for how to start launching applications through your newly setup environment.