
Overview
By default the AppsAnywhere appliance uses Chrony NTP client to configure its time services. The default NTP servers used are:
2.rocky.pool.ntp.org
Customer access to the appliance is only available via the hypervisor console (e.g. via vSphere or Hyper-V).
The Configure NTP Settings section of the ACC allows view and define the required NTP Server details or restore the default appliance NTP configuration.
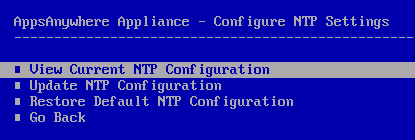
View Current NTP Configuration
The View Current NTP Configuration option will display the currently configured NTP servers. Only custom servers that have been specified will be displayed.
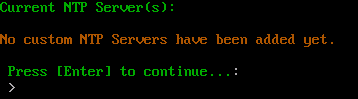
If no customer servers have been specified and the default NTP servers are used then the “No custom NTP Servers have been added yet.” message will be displayed.
Press Enter to return to the ACC.
Update NTP Configuration
The Update NTP Configuration option allows you to define the NTP Server addresses that you wish to use.

Enter the required NTP Server address(s). If multiple NTP Servers are specified, each server value must be separated by a comma. Press Enter to continue.
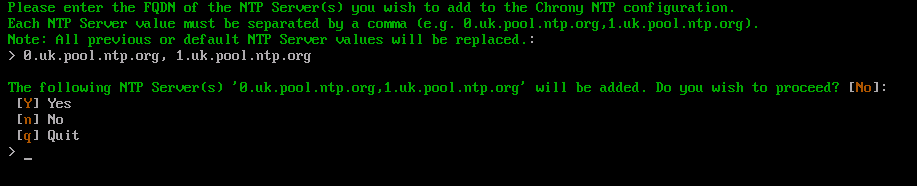
Enter Y and Enter to confirm the address(s) specified to continue. Press n and Enter to change the address(s). Otherwise enter q and Enter to cancel this process.
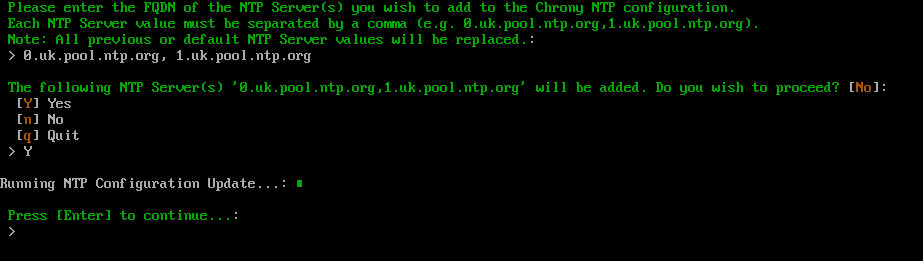
Press Enter to return to the ACC.
Restore Default NTP Configuration
This command may show an error when executed without prior alterations being made to NTP configuration. This can be validated using the View Current NTP Configuration command.
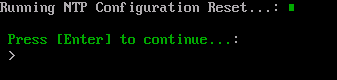
The Restore Default NTP Configuration option will remove any previously defined custom NTP servers and restore the default Chrony NTP Servers.
Press Enter to return to the ACC.