Overview
In this article, we'll take a look at how to set up SAML 2.0 in Azure Active Directory.
AppsAnywhere currently supports the following SAML 2.0 providers:
-
Azure Active Directory (this page)
-
Active Directory Federation Services (ADFS)
-
Shibboleth 2
-
Any custom SAML 2.0 provider
The method you use will depend on the system you are trying to link AppsAnywhere to. This guide will take you through setting up SAML 2.0 within AzureAD.
AzureAD Enterprise Application
Log into your institution's Azure Portal as a system administrator.
Create Enterprise Application
Click Azure Active Directory from the drop down menu (accessible via the top right-hand corner button)
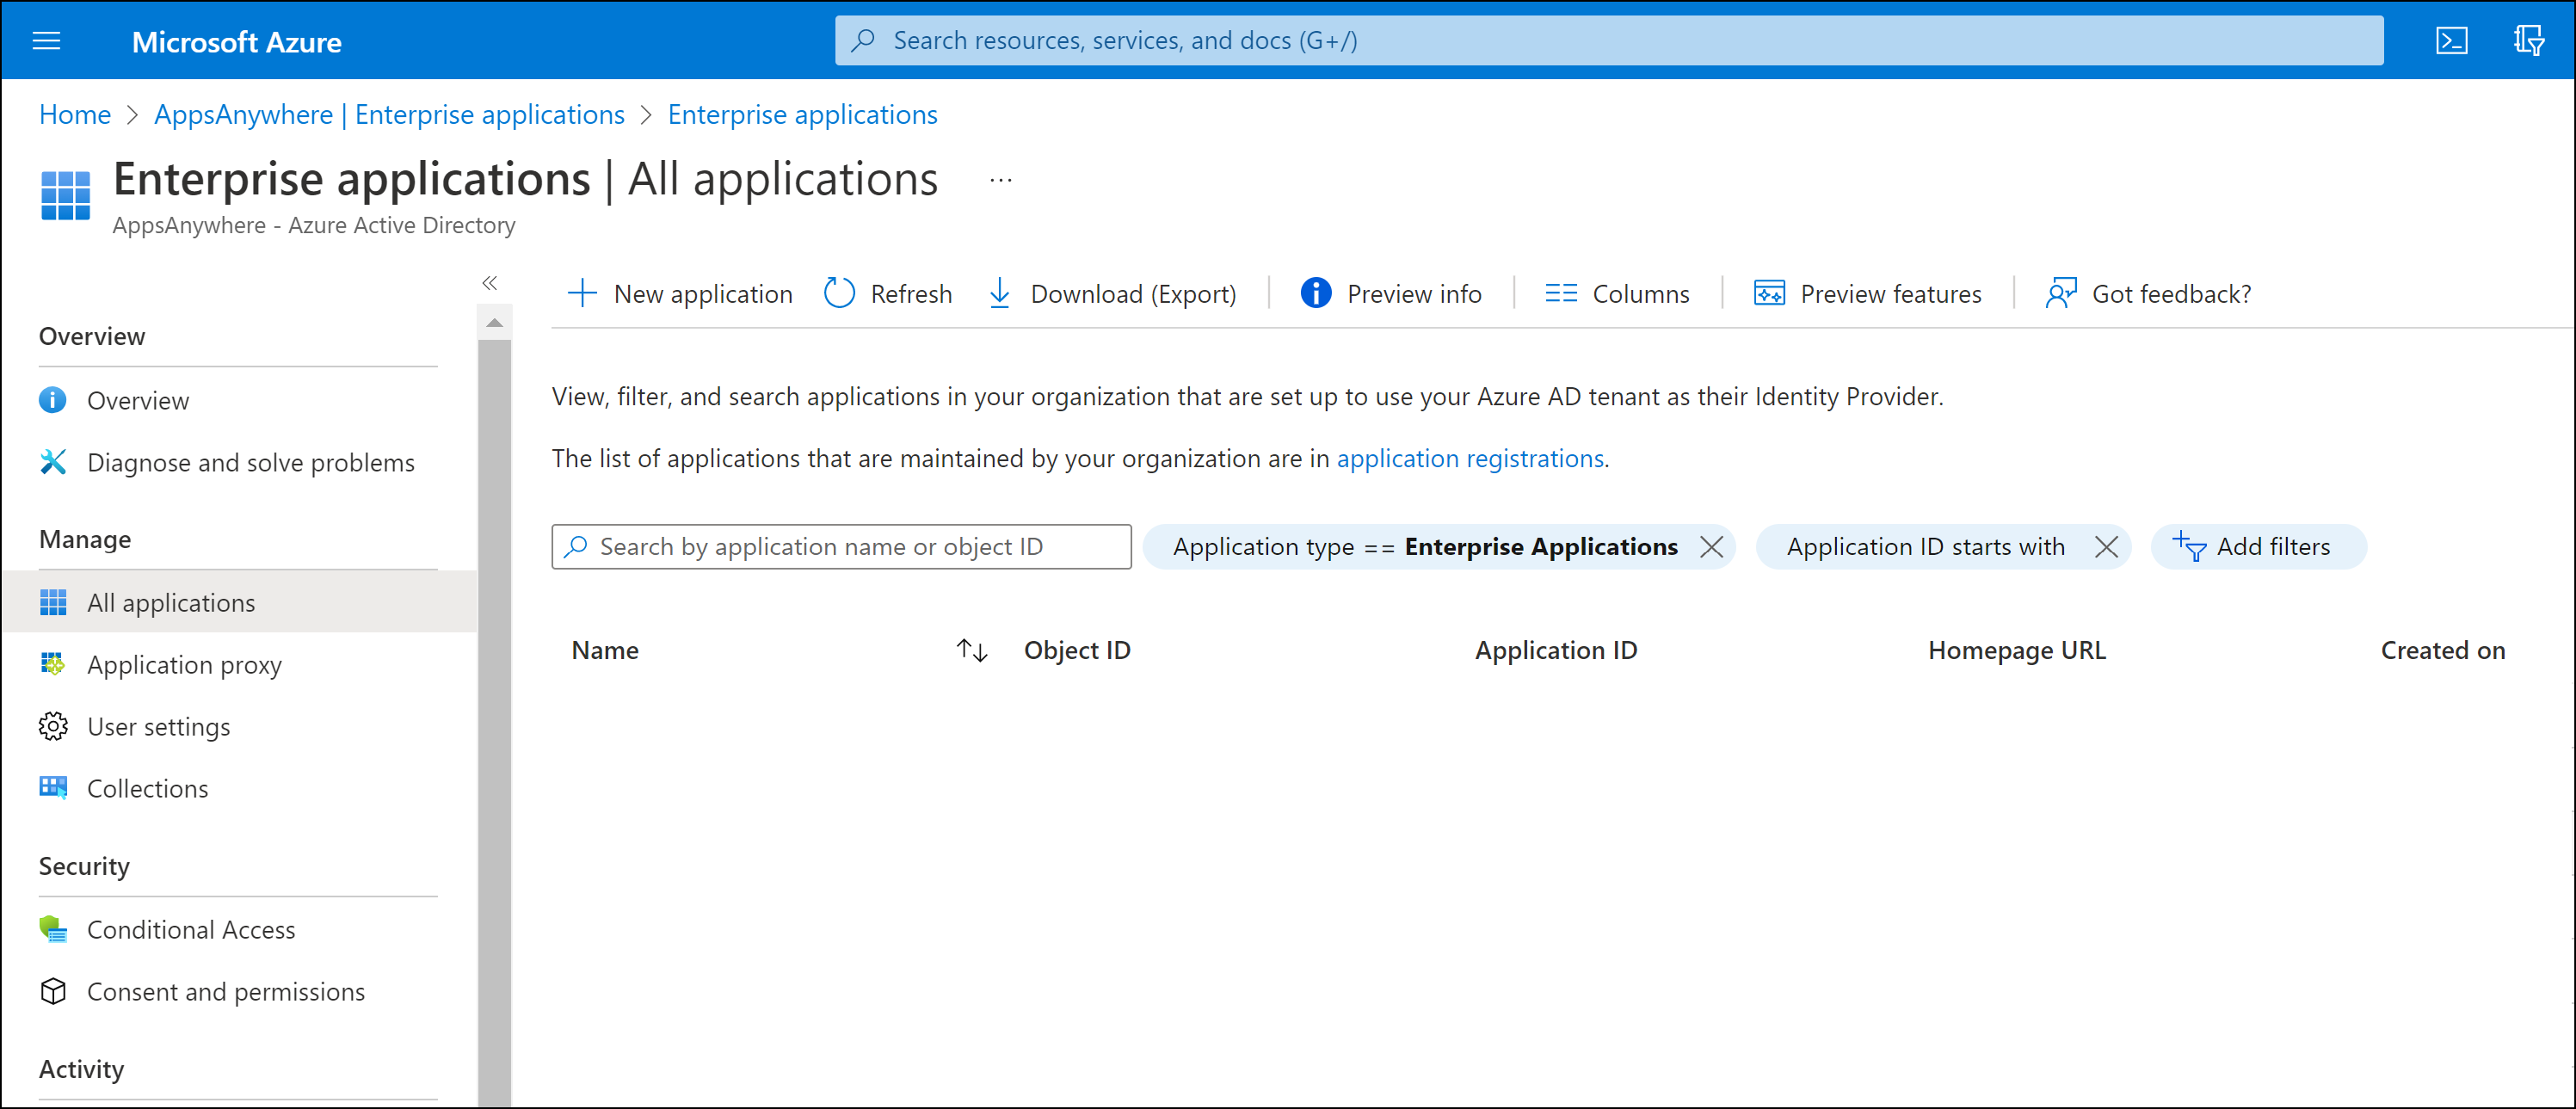
On the AzureAD sub menu, click Enterprise Applications
Click New application
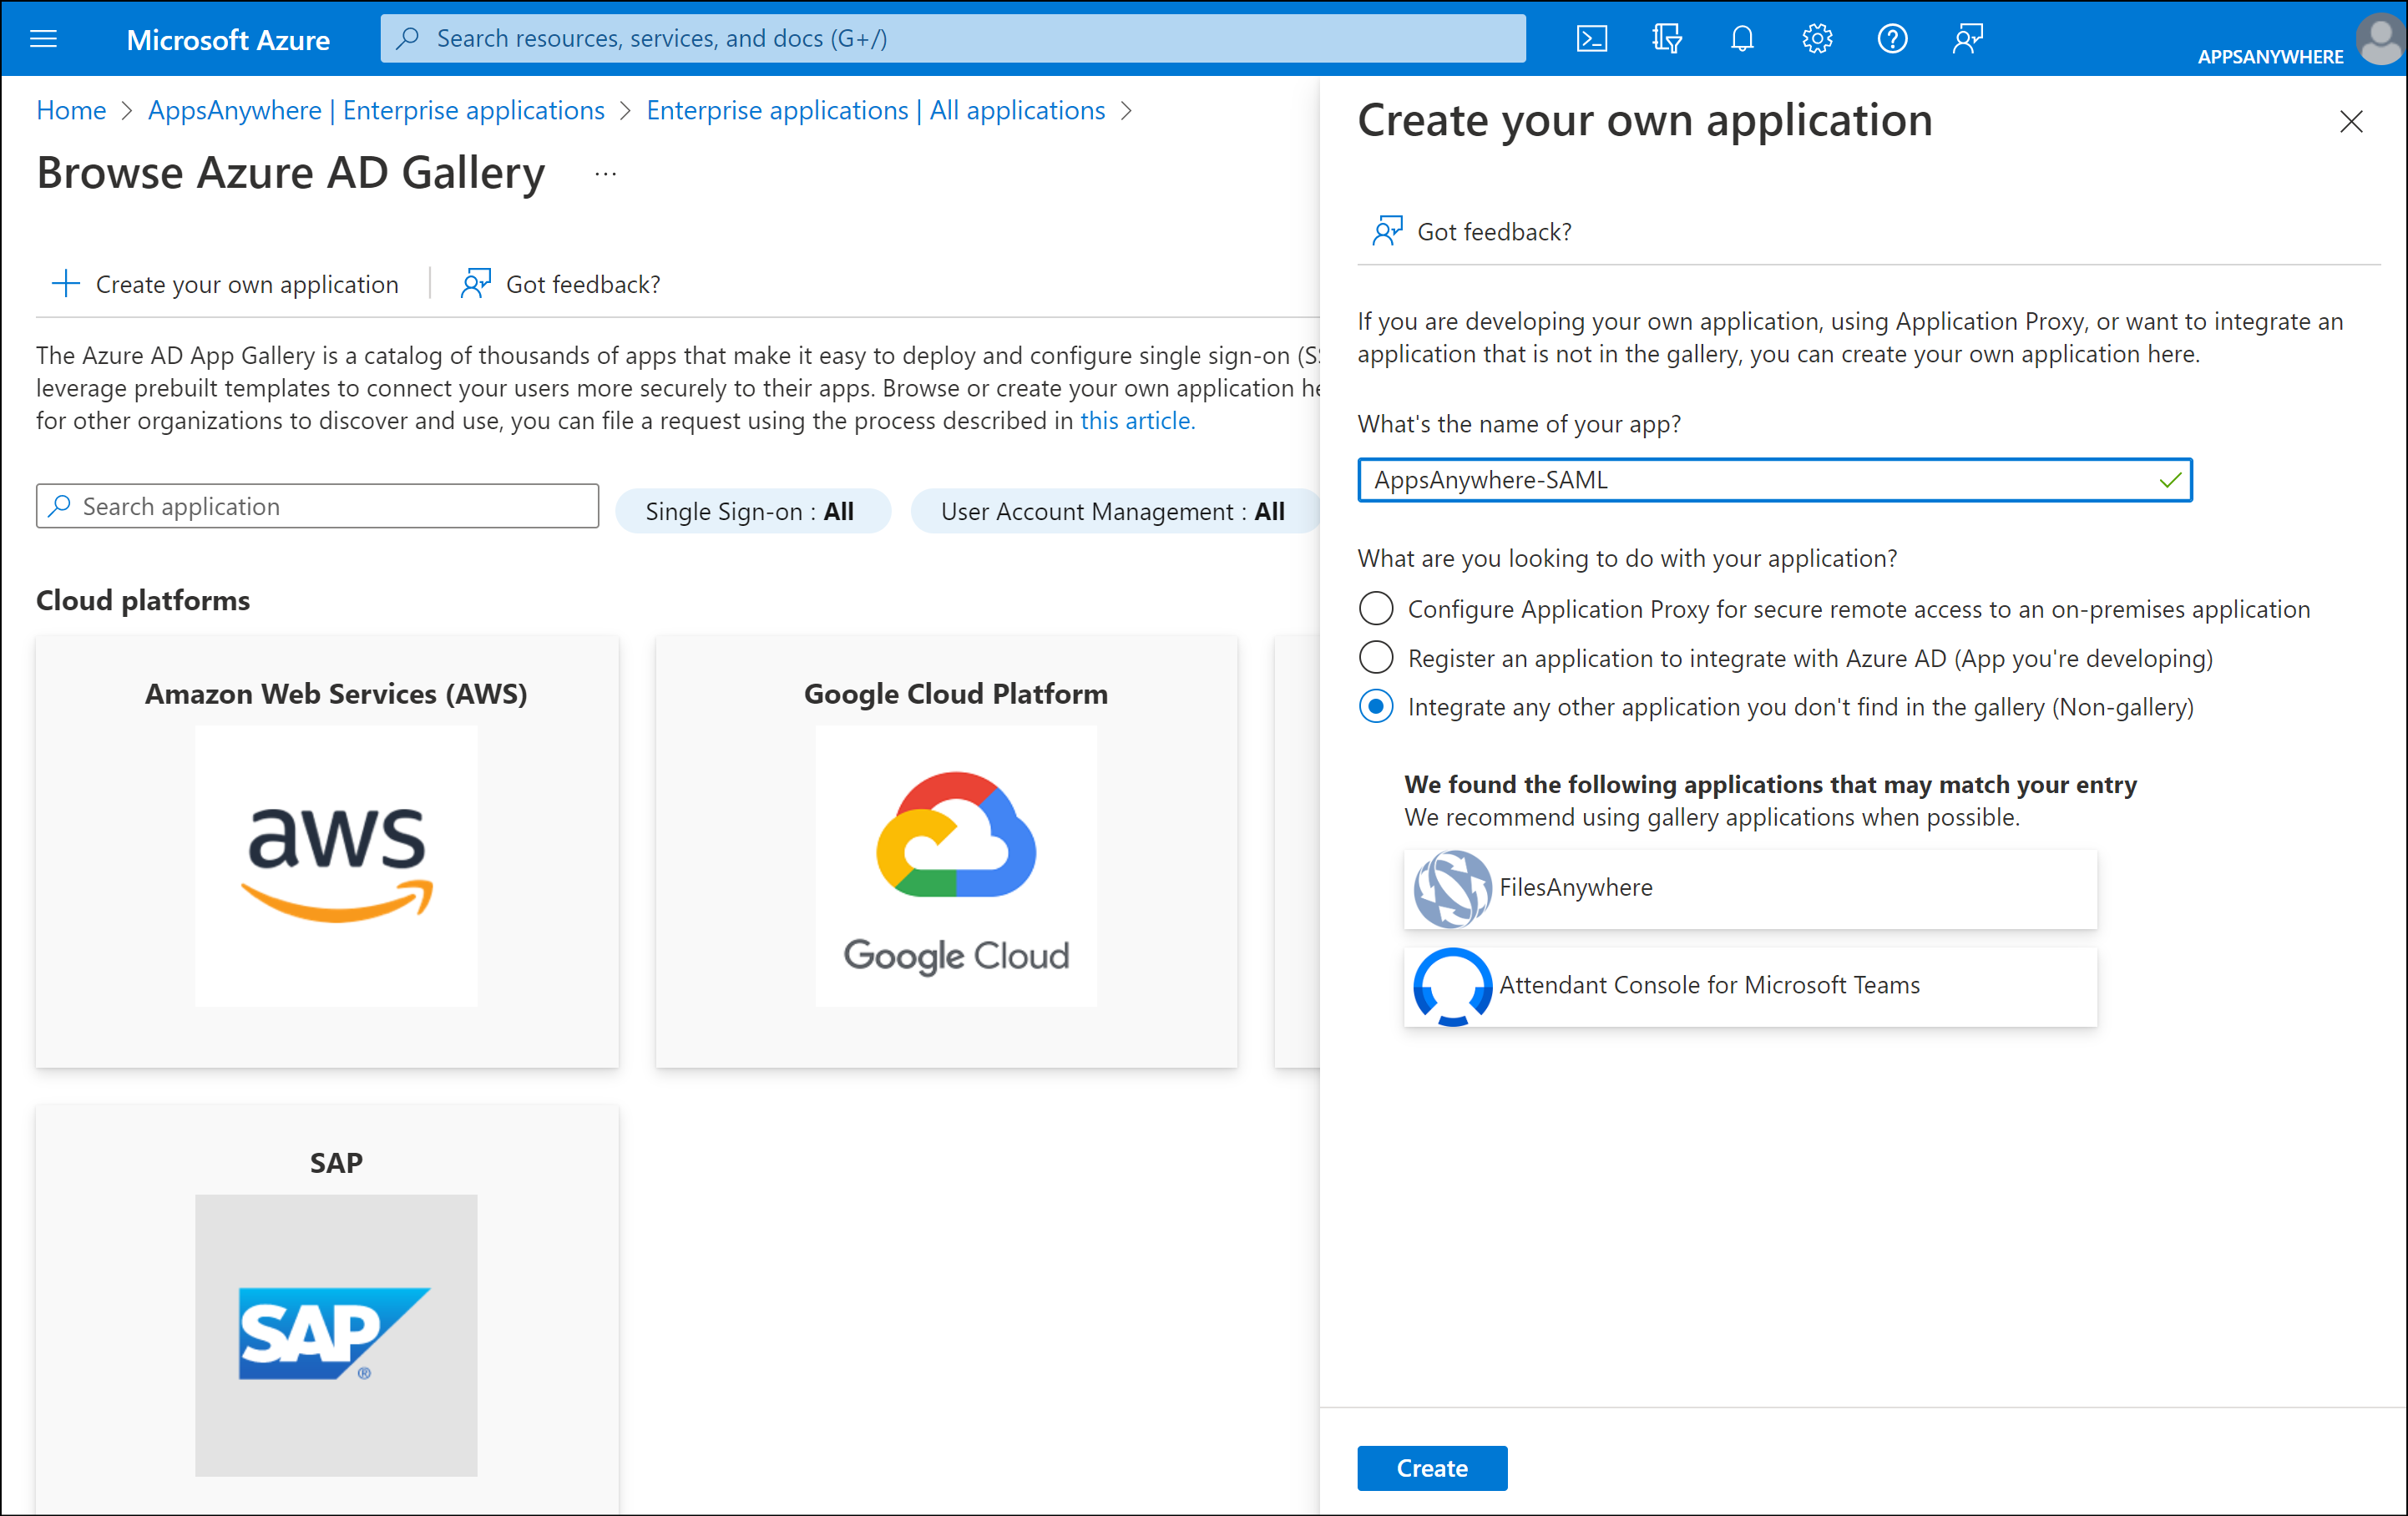
Click Create your own application.
Enter a your preferred friendly name for this app under What’s the name of your app?
e.g. AppsAnywhere-SAML
Ensure the “Integrate any other application you don’t find in the gallery (Non-gallery)” option is selected.
Click Create
Single sign-on settings
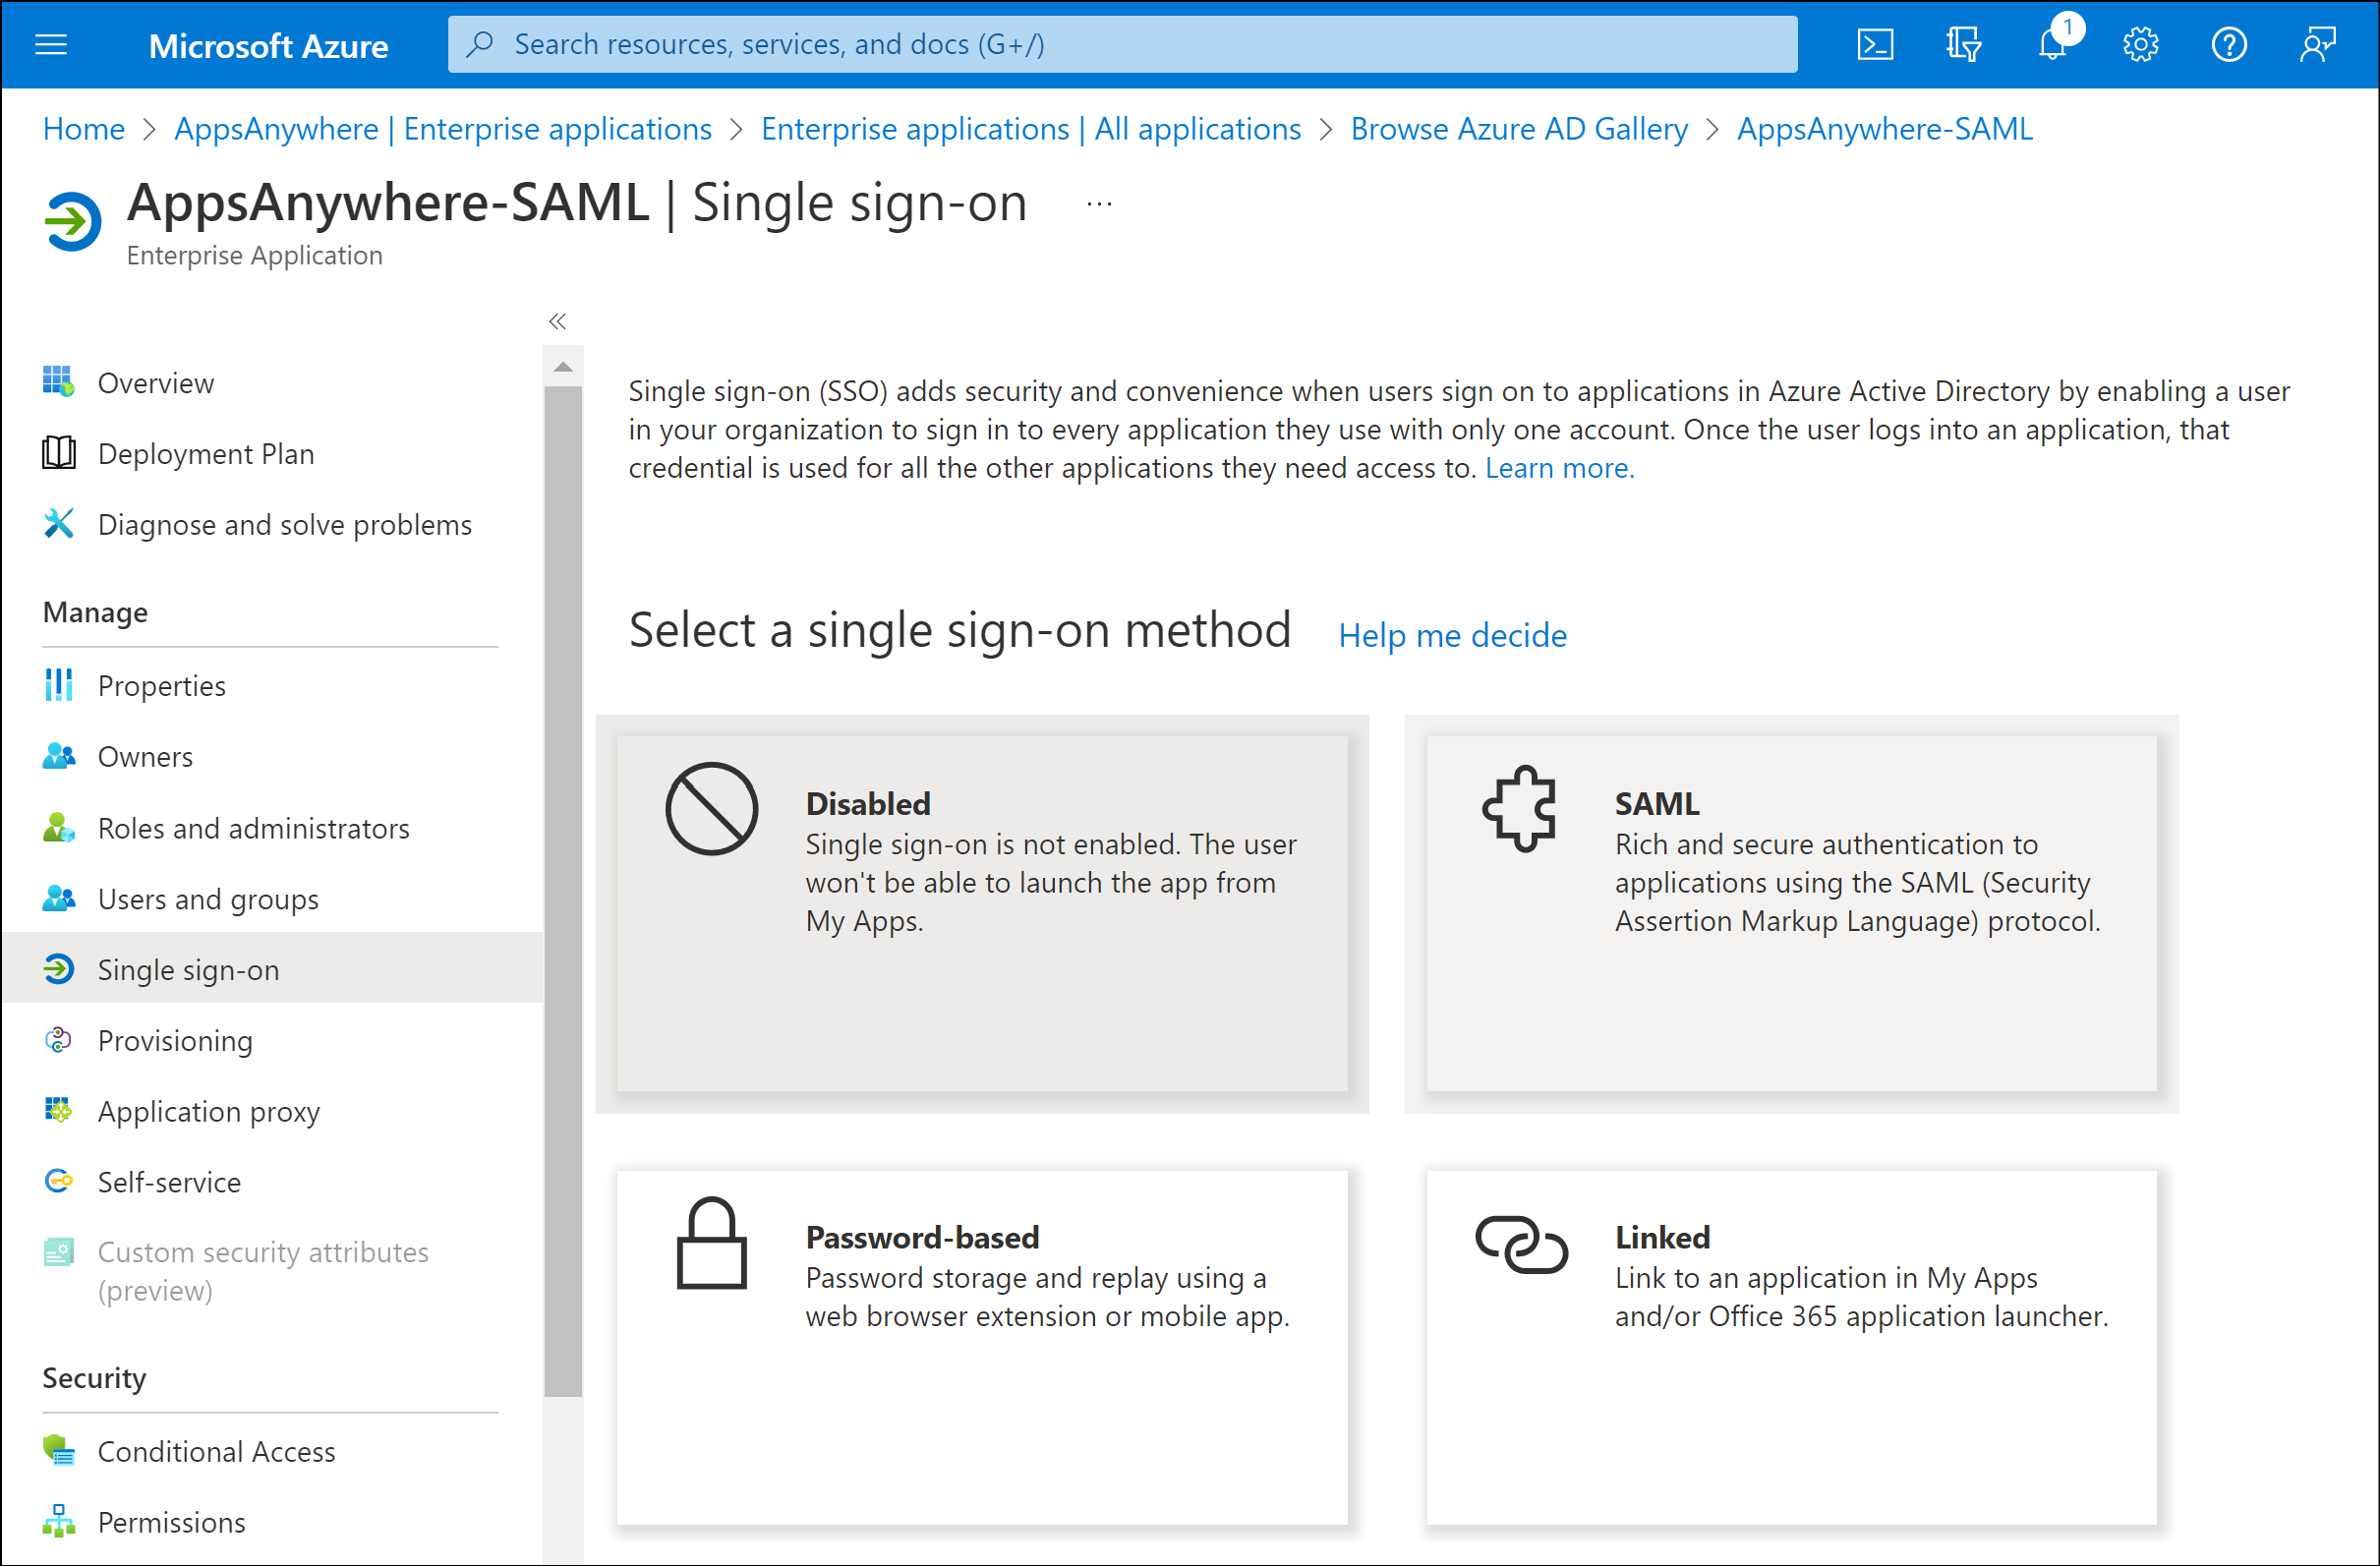
Select the Single sign-on option from the sub menu.
Click the SAML method.
Basic SAML Configuration
Click Edit within the Basic SAML Configuration section.
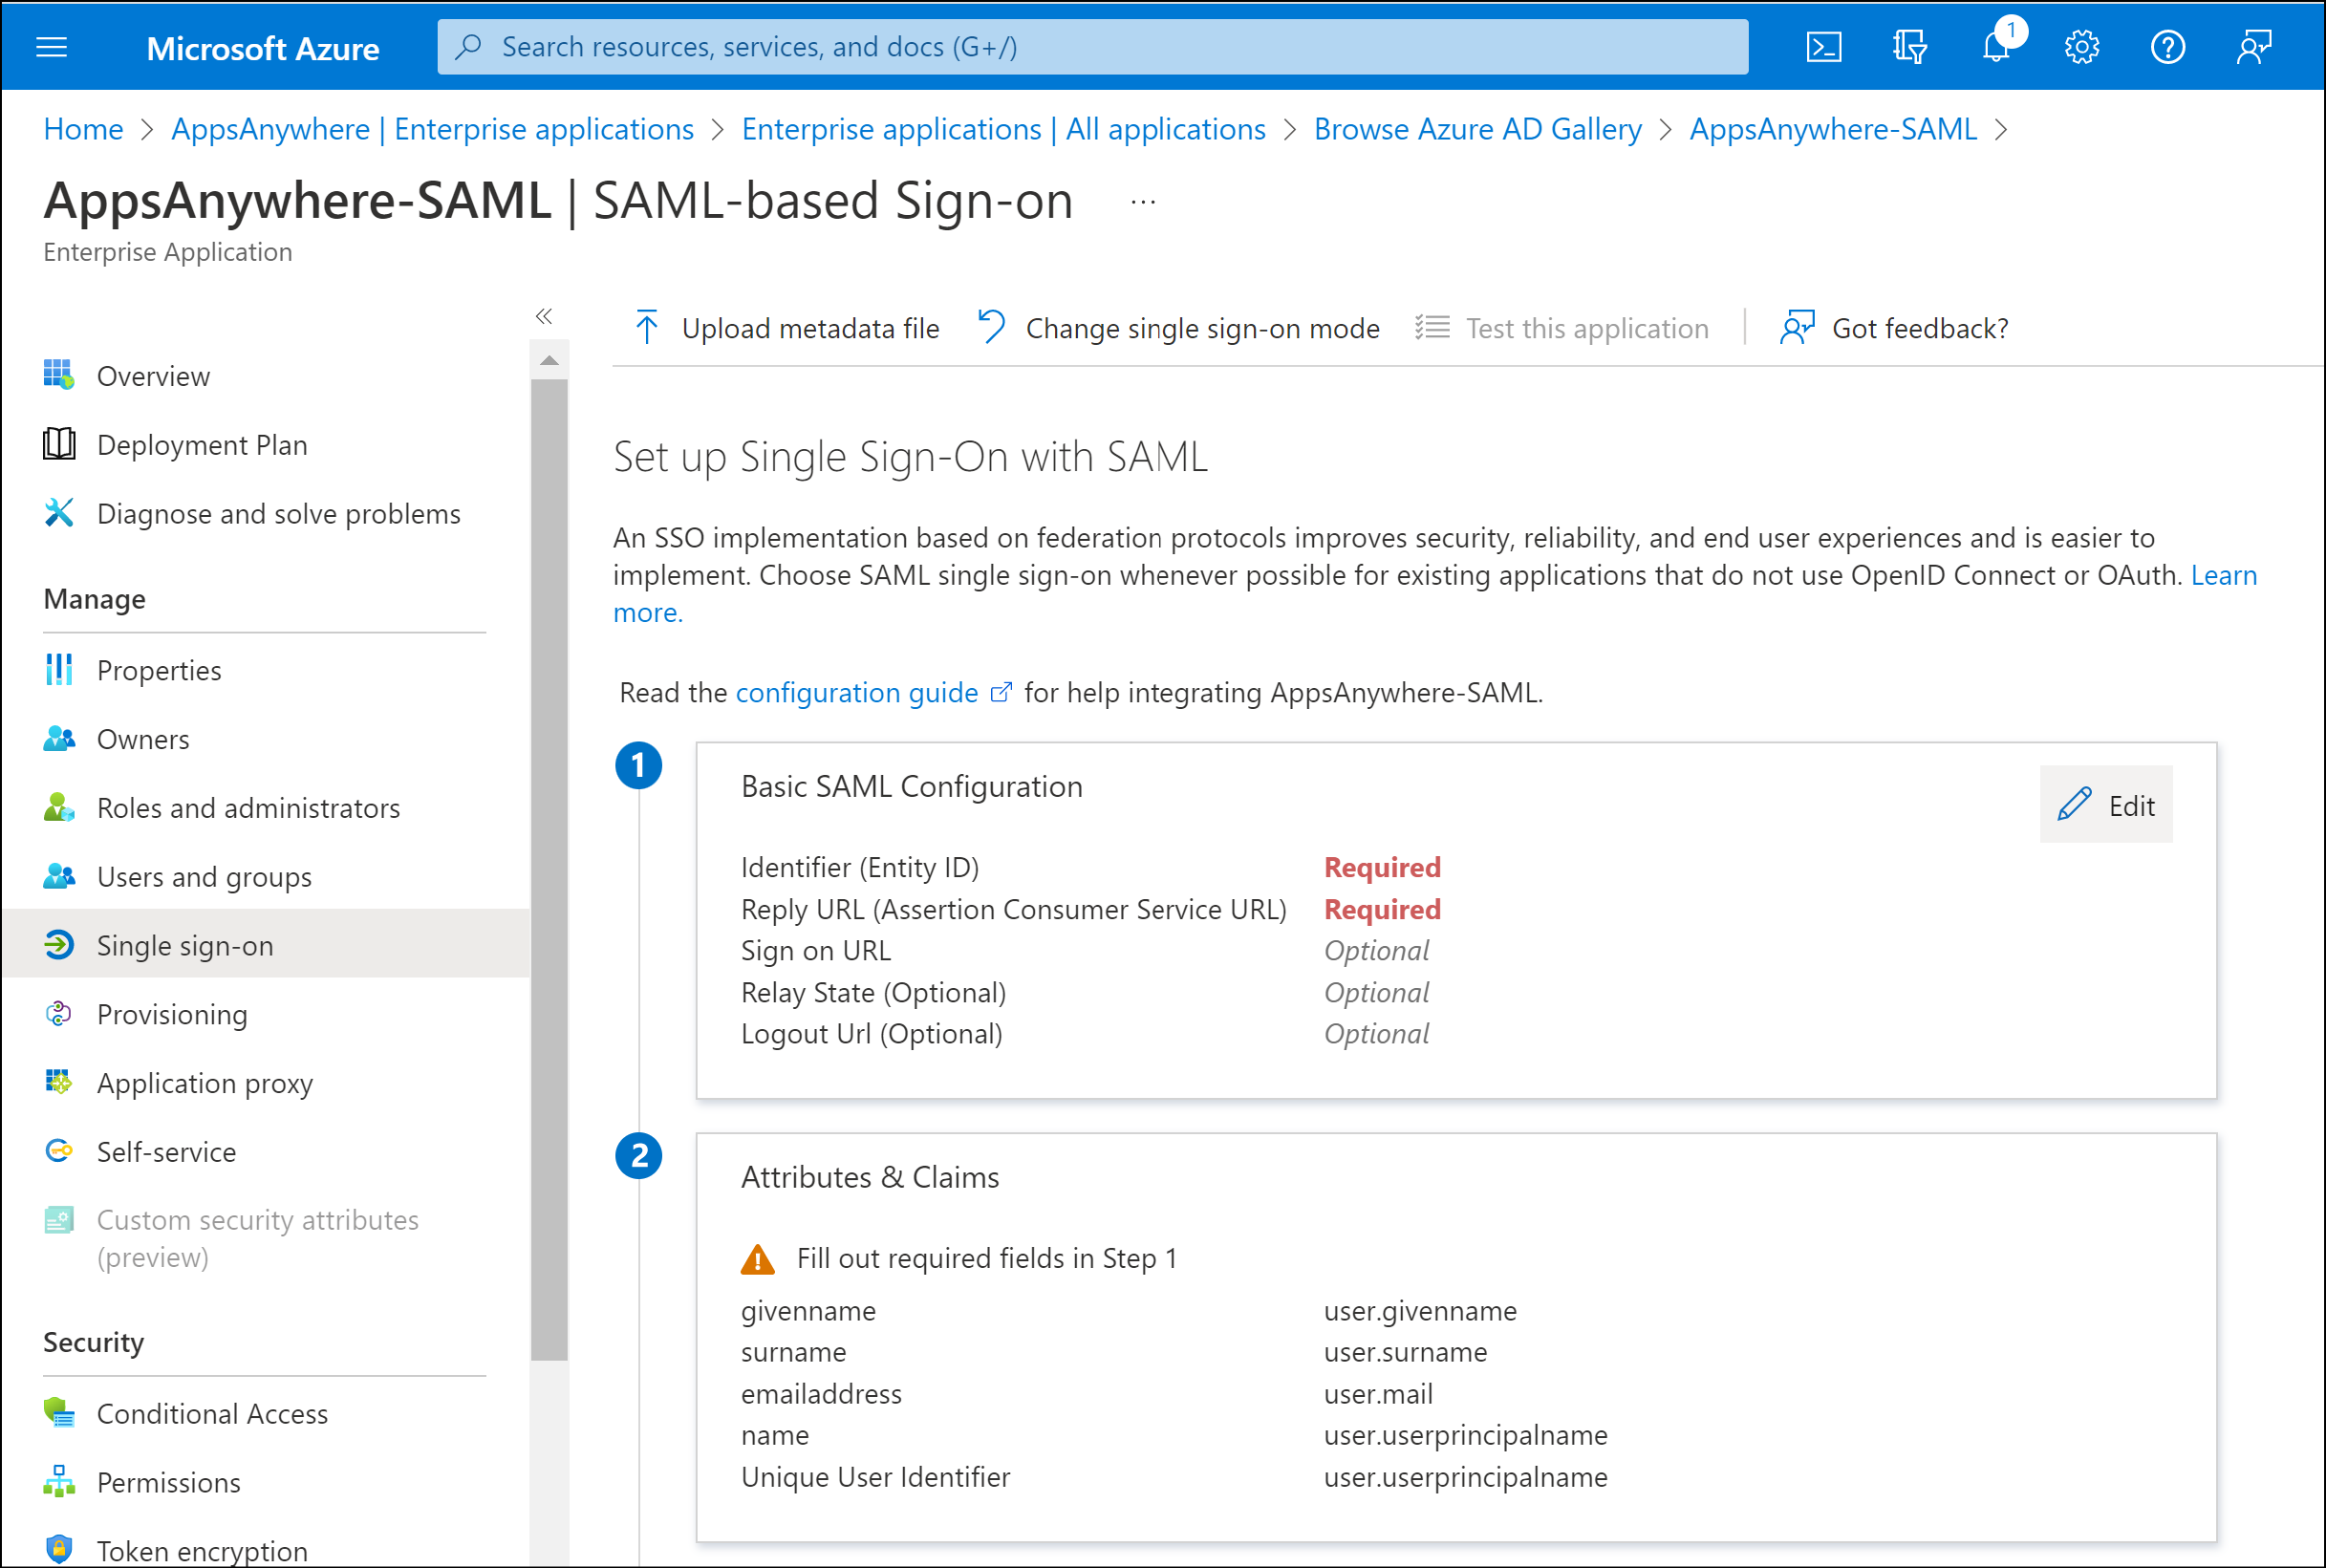
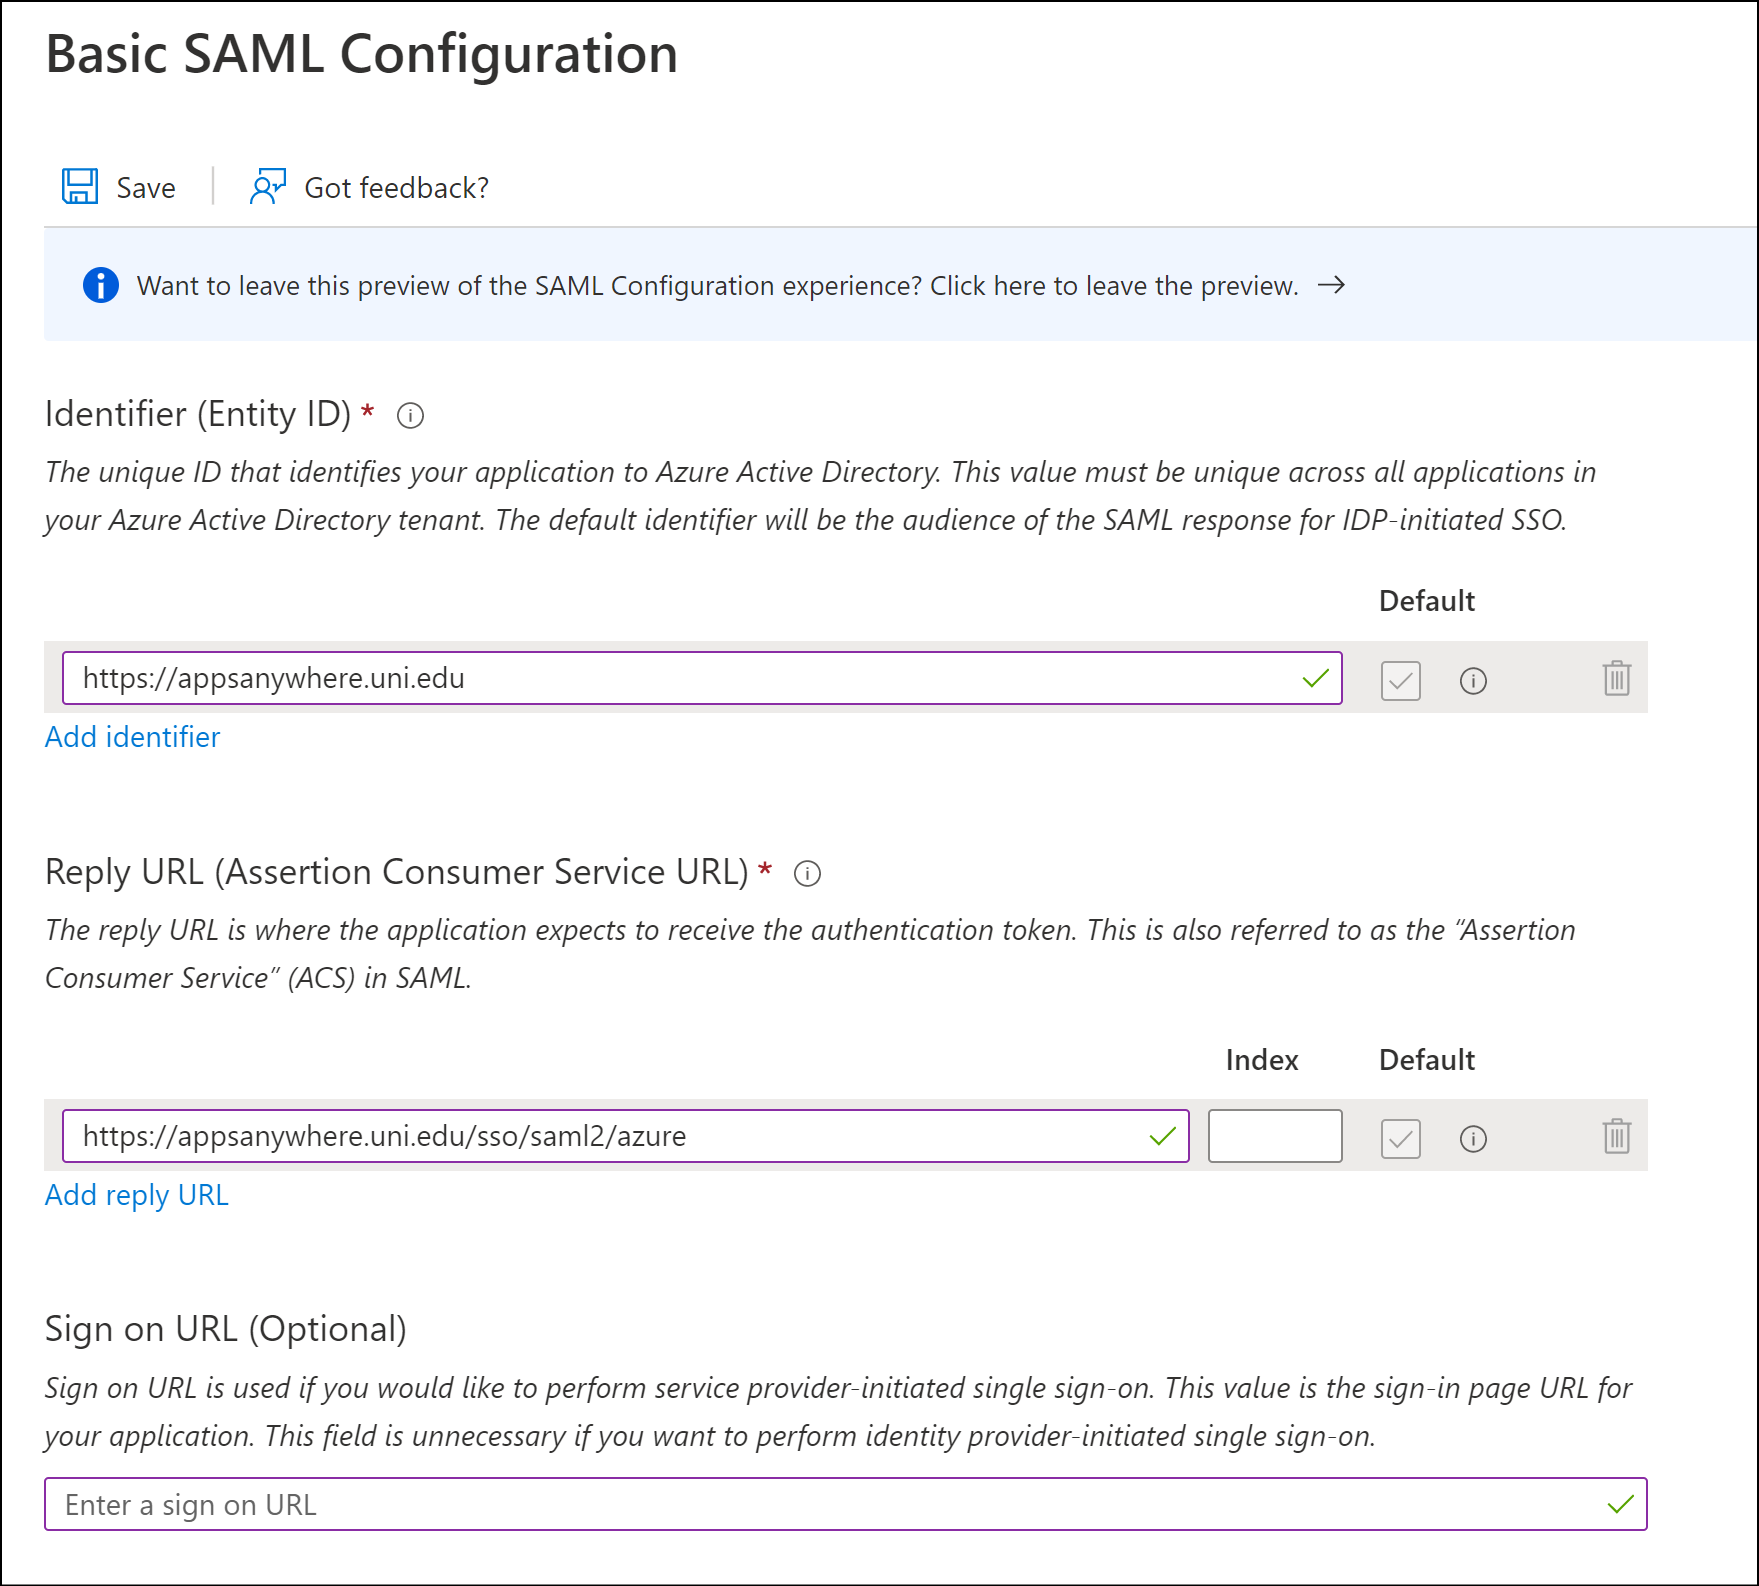
Enter the required values into the Identity (Entity ID) and Reply URL (Assertion Consumer Service URL) fields.
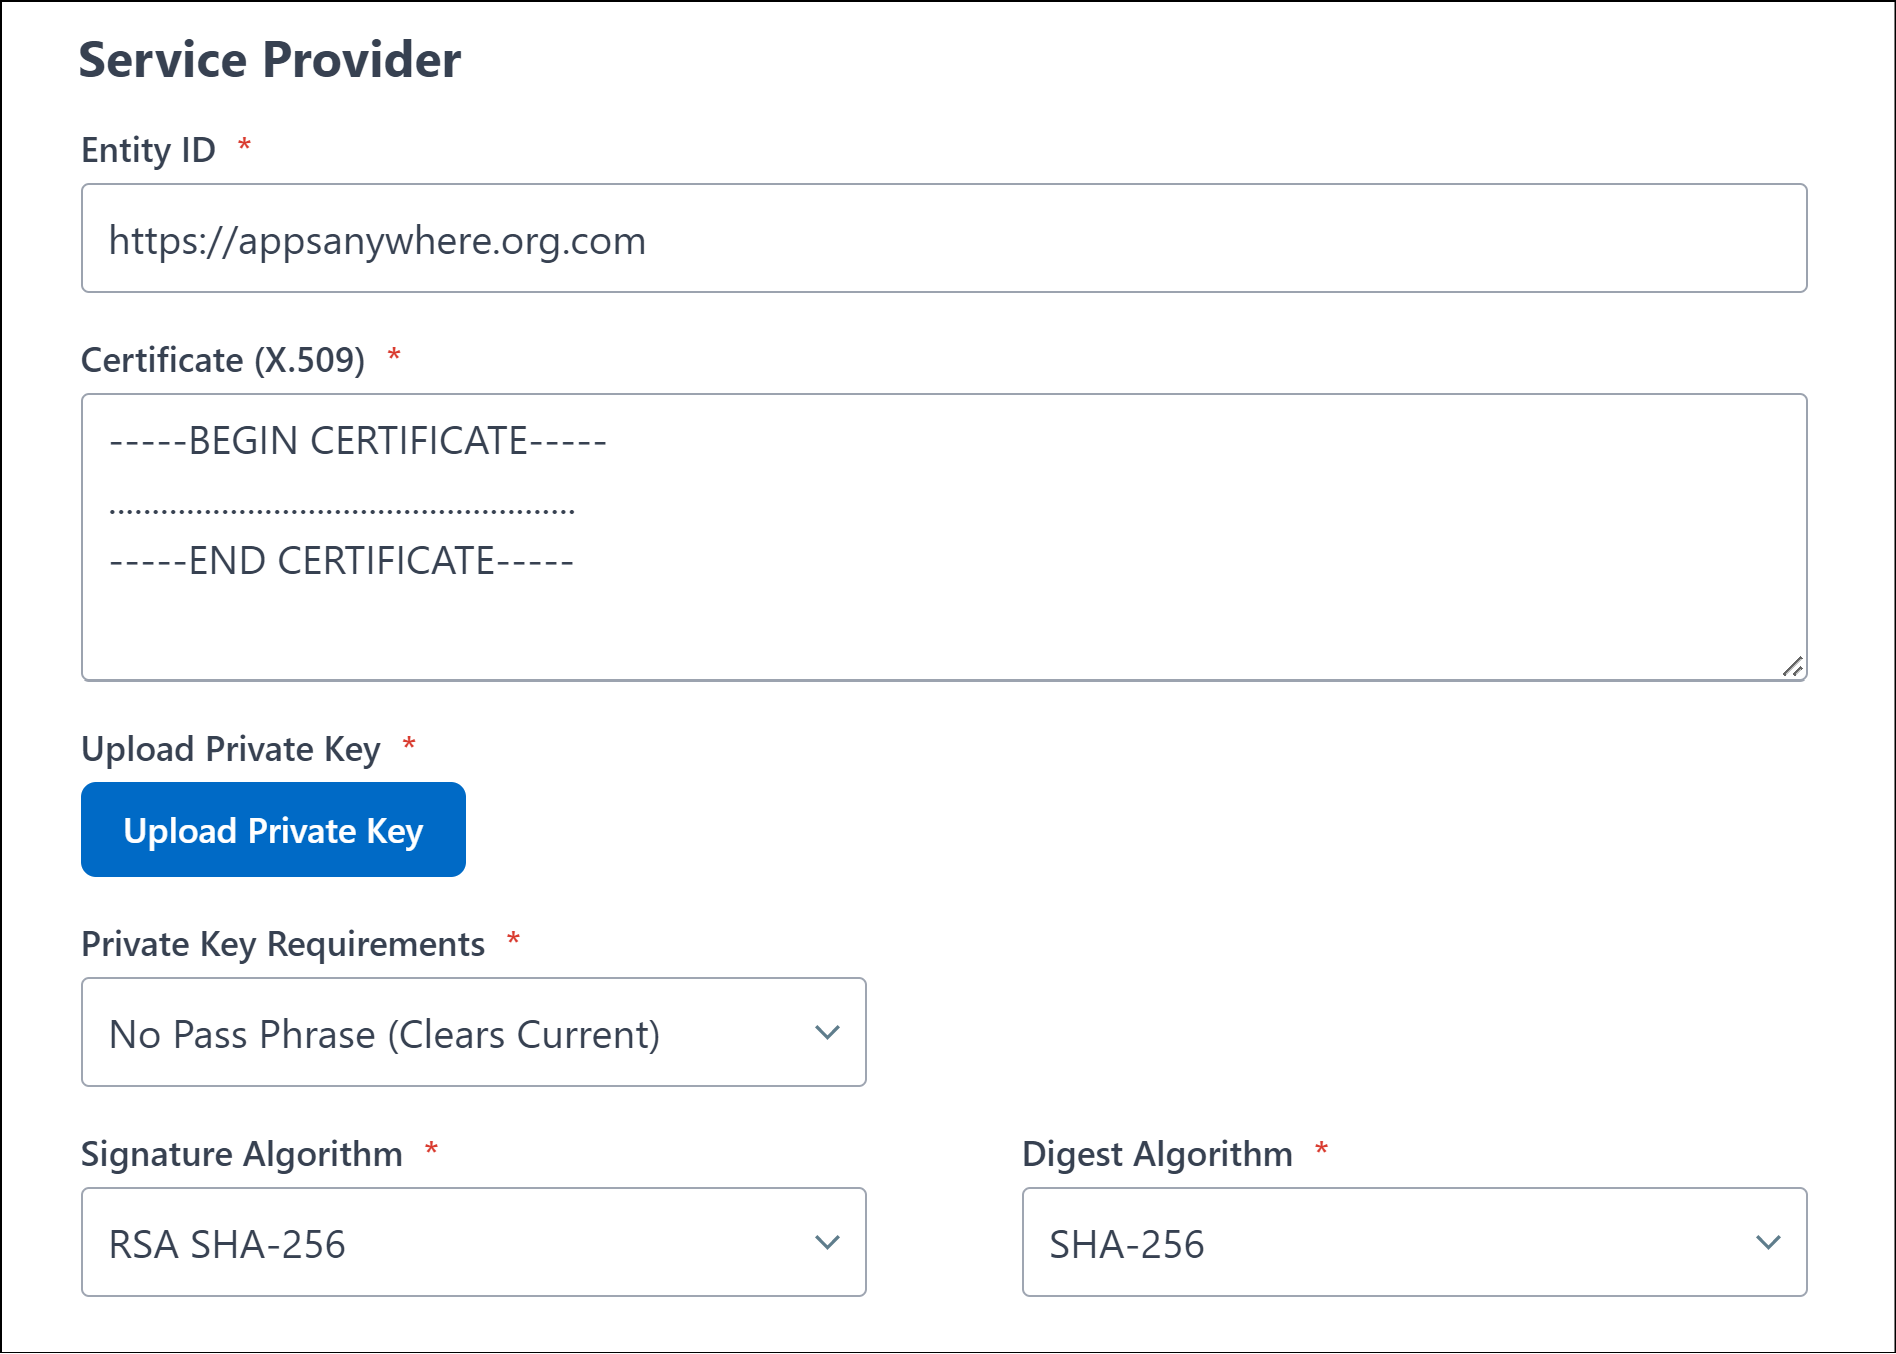
The Identity (Entity ID) value is used as a unique identifier for the SAML configuration, this is normally application/service specific. It is recommend (and by default) this value is set to your AppsAnywhere service URL
e.g. https://appsanywhere.uni.edu
The Reply URL (Assertion Consumer Service URL) value defines the AppsAnywhere URL that the SAML response/information is sent to once an authentication request has been process by the SAML provider (Azure in this instance)
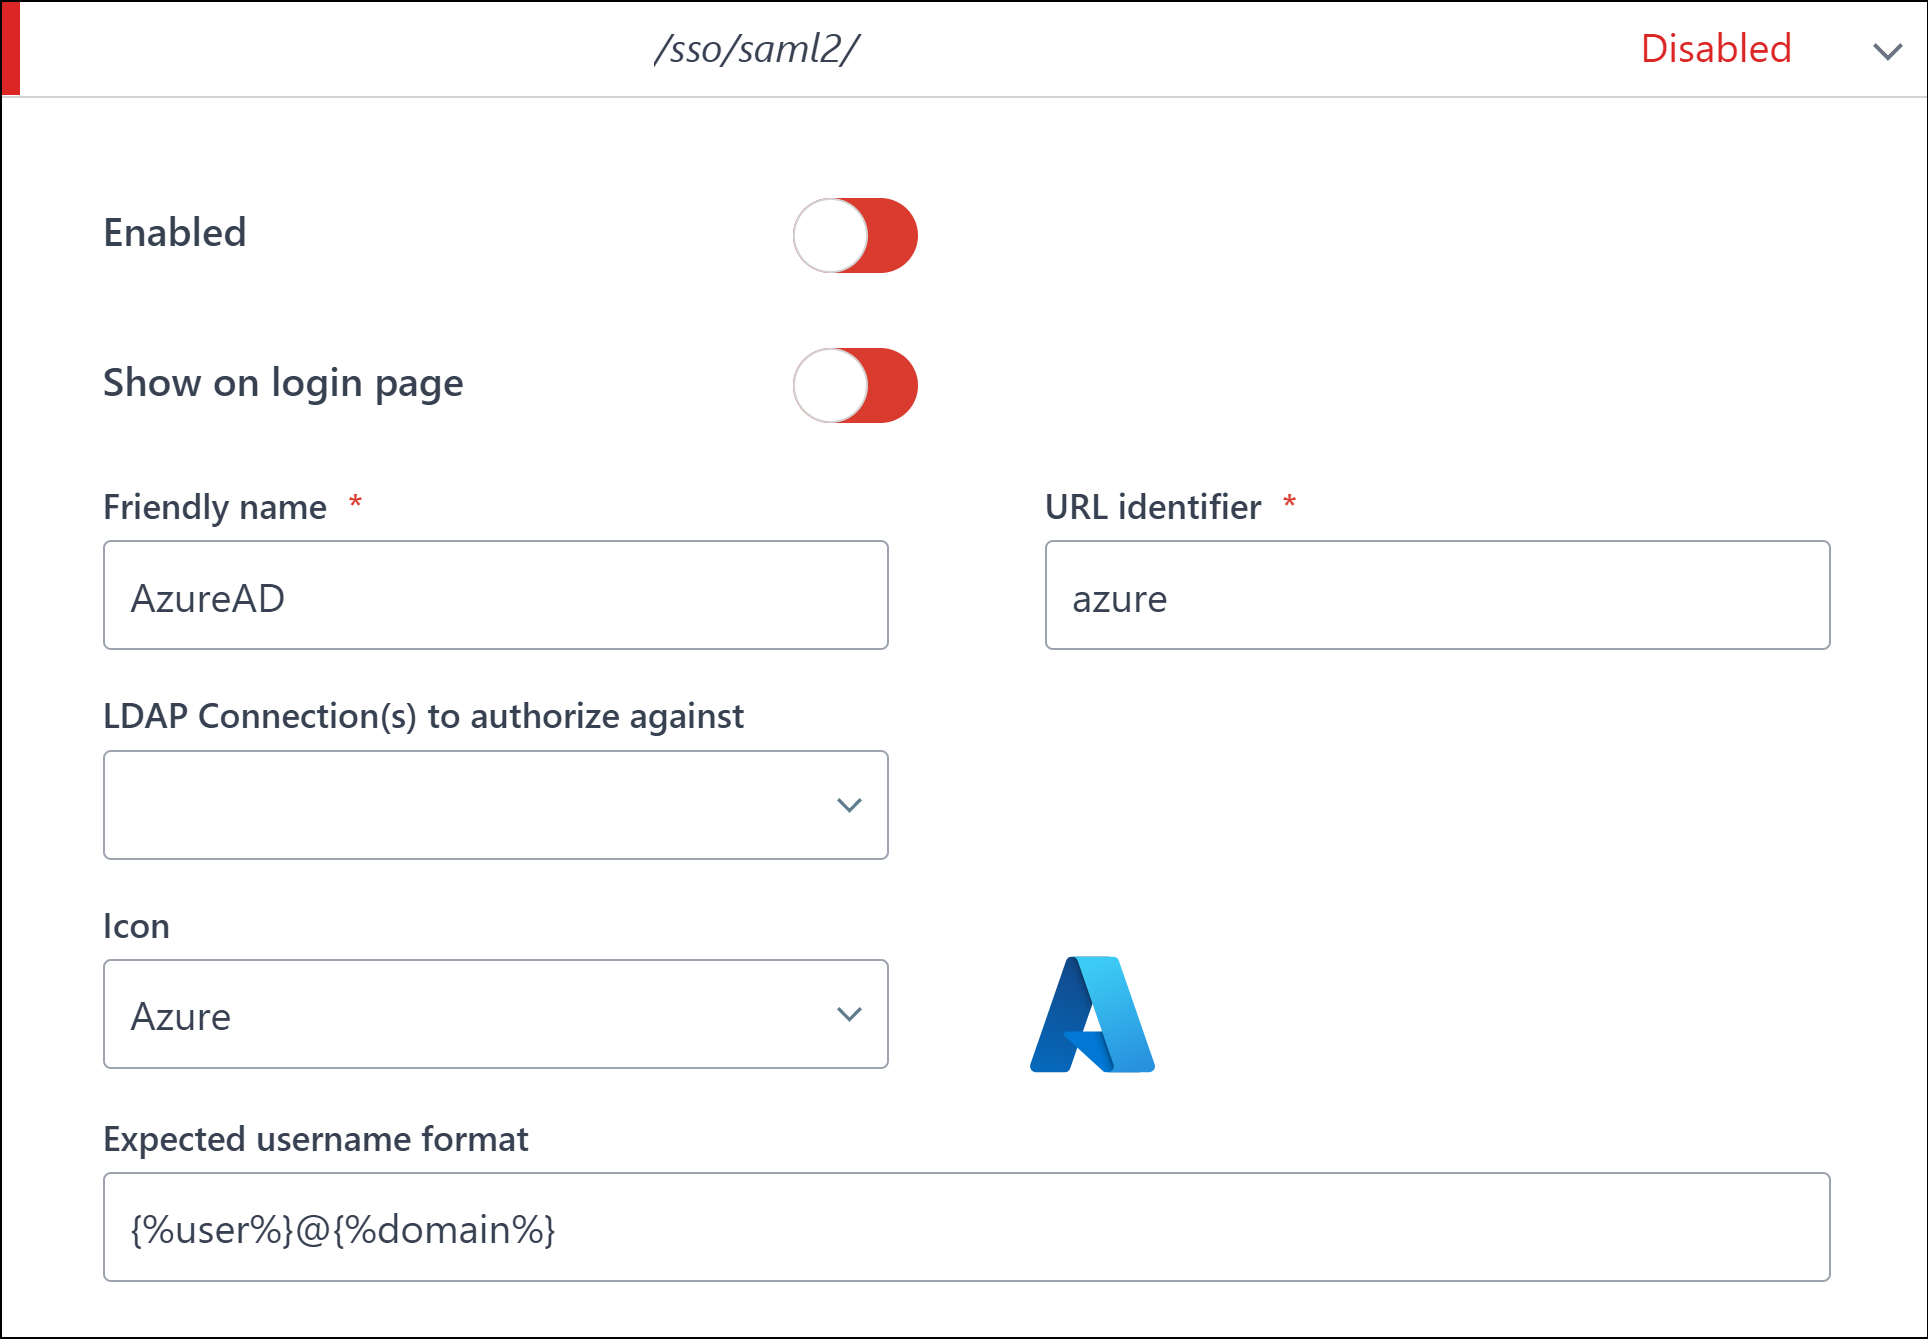
e.g. https://appsanywhere.uni.edu/sso/saml2/azure
The Reply URL is comprised of your AppsAnywhere service URL e.g. https://appsanywhere.uni.edu, the default AppsAnywhere SSO provider path /sso/saml2 and a URL identifier for this sso method in AppsAnywhere; in this example we are using /azure
Please be aware that the AppsAnywhere SSO provider path /sso/saml2 is specific and MUST be entered exactly as per this example.
You can use an alternative URL identifier (friendly name) to replace the /azure part if you wish. However, it must not contain any non-alphanumeric characters or spaces. It must be a single word.
It is important you make a note of your chosen Reply URL as it will be required in a later step when defining the Single Sign-On method within AppsAnywhere.
Click Save to continue.
Attributes & Claims
Note on Nested groups with Entra SAML group claims
If you wish to assign user roles or provisions based on Entra group membership, you may wish to add a group claim.
If you wish to make use of nested groups in Entra with AppsAnywhere SAML SSO please be aware that Entra will not return groups inferred via nested membership if you select the using the option to restrict the group claims to groups that are assigned to the application. When using this option only the groups that a user has direct membership of will be returned in the SAML group claim.
See https://learn.microsoft.com/en-us/entra/identity/hybrid/connect/how-to-connect-fed-group-claims#options-for-applications-to-consume-group-information for more information on Entra group claims and limitations
Click Edit within the User Attributes & Claims section.
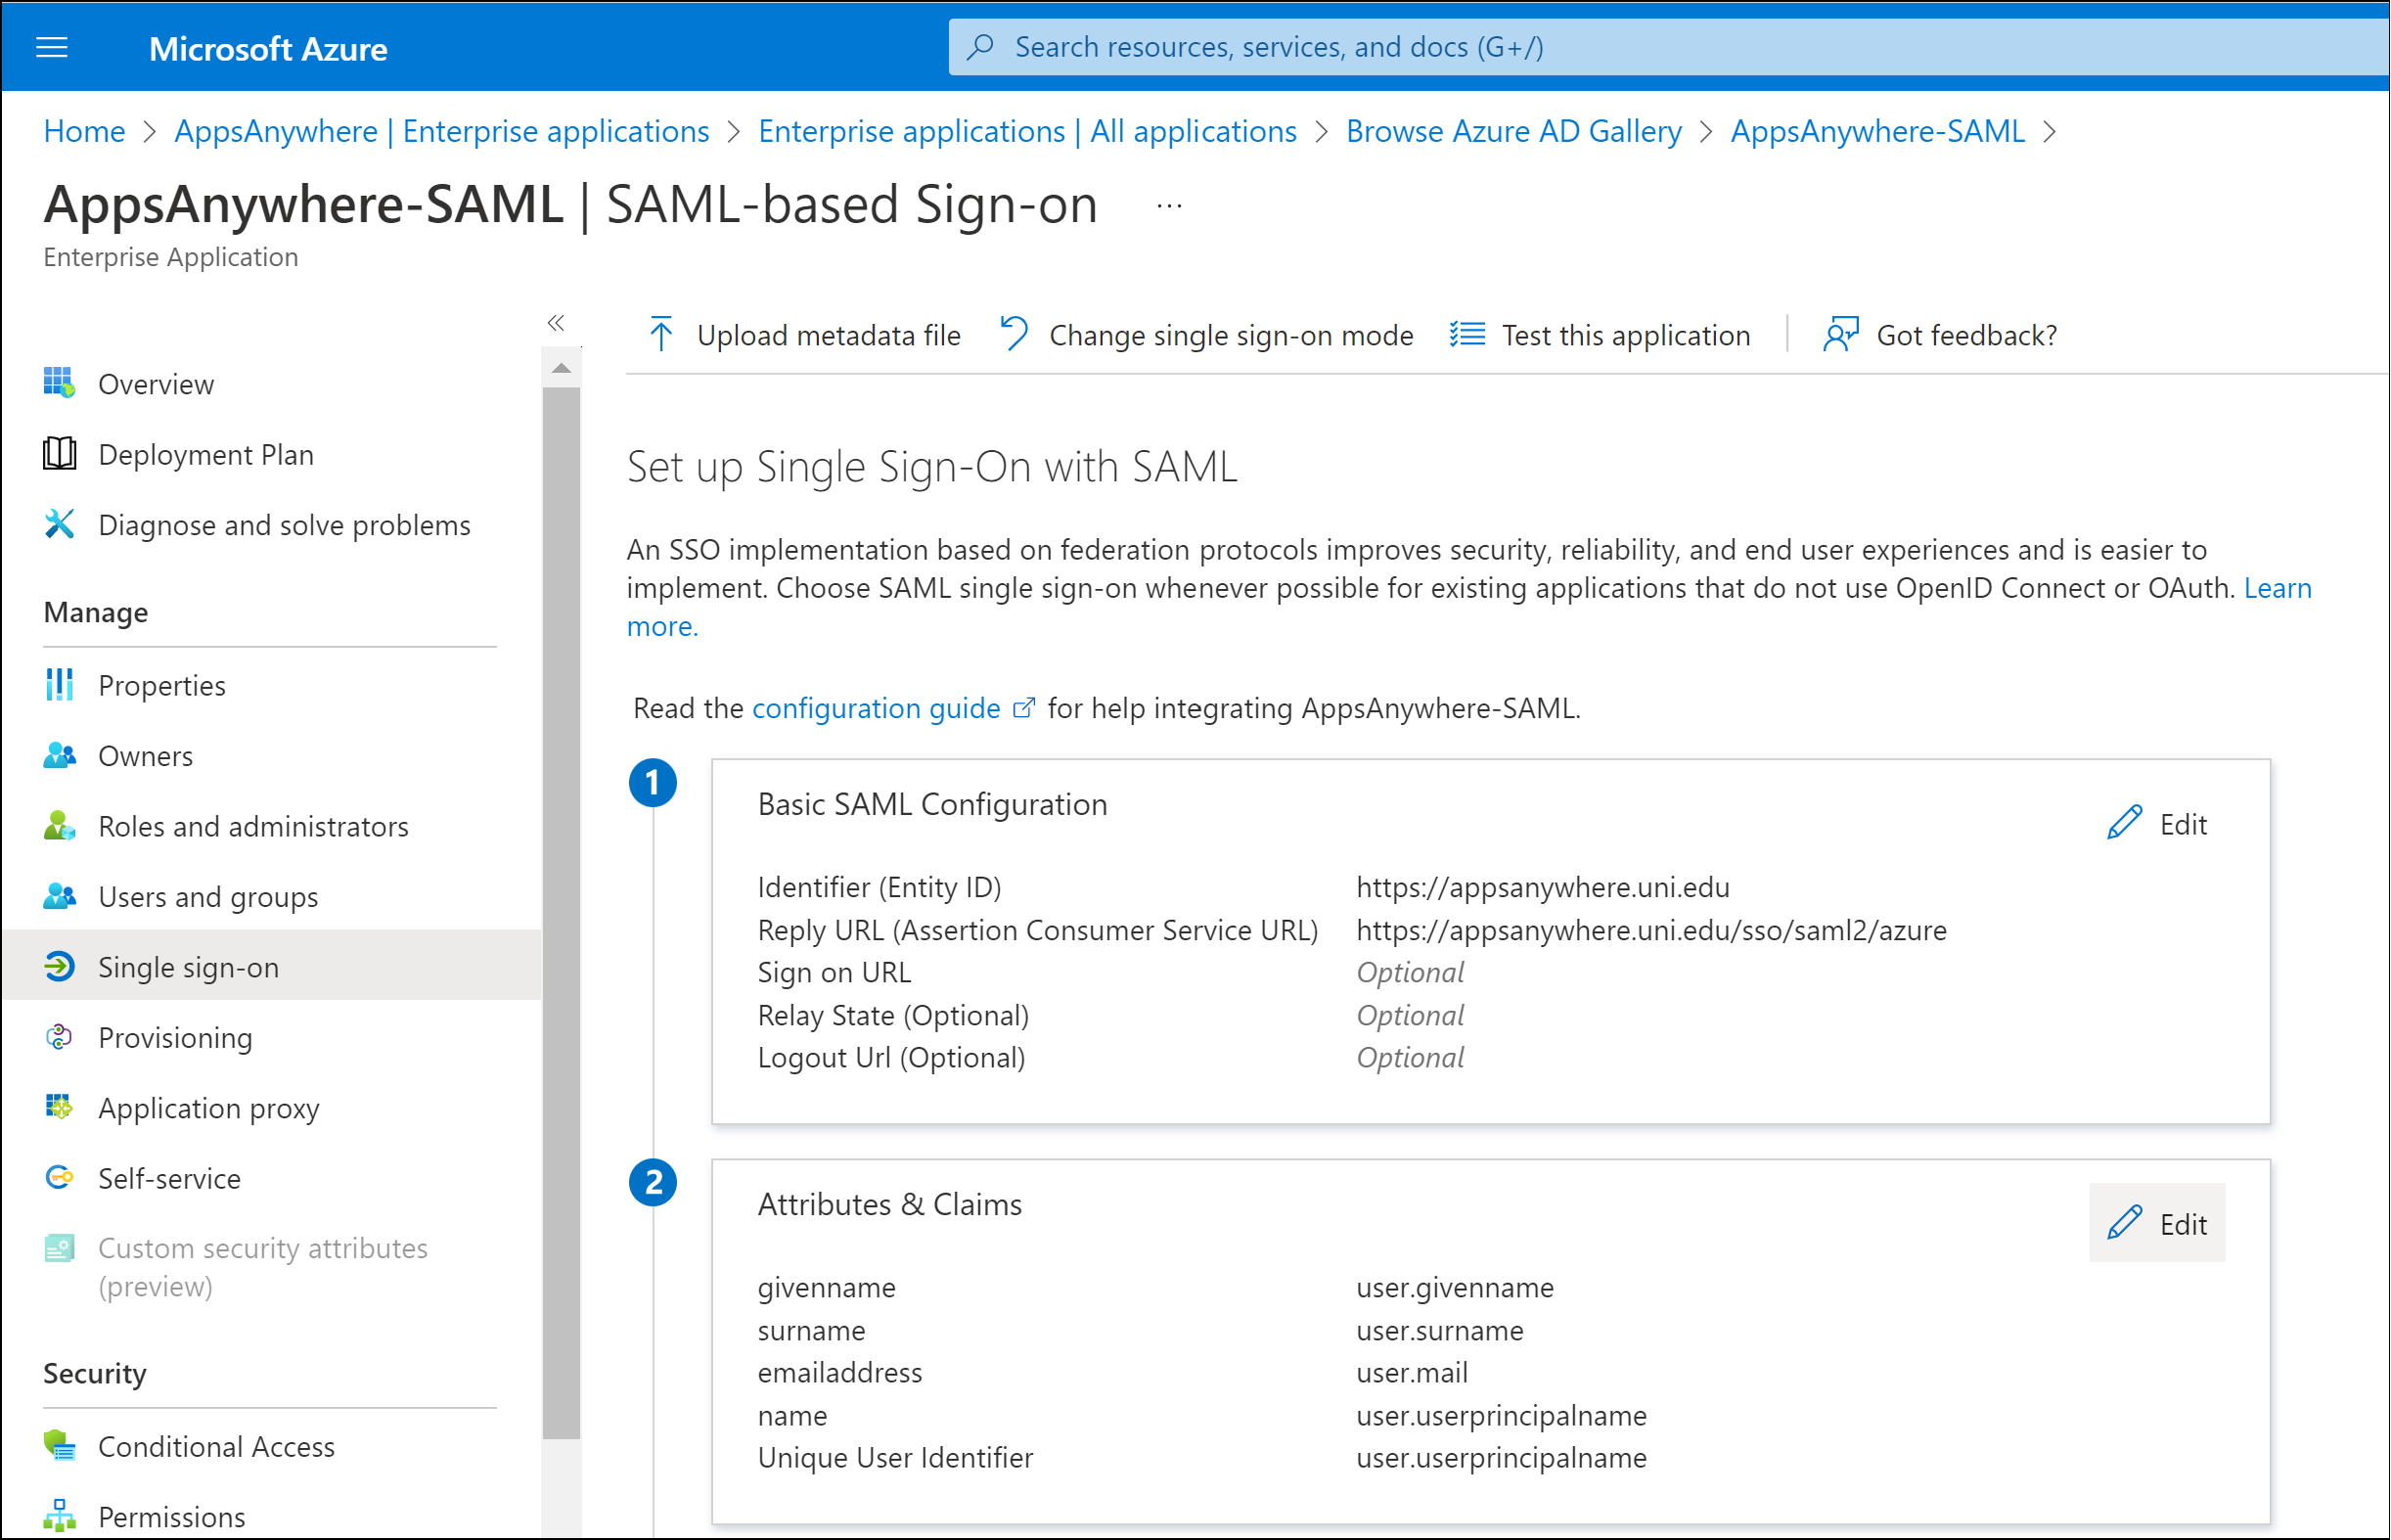
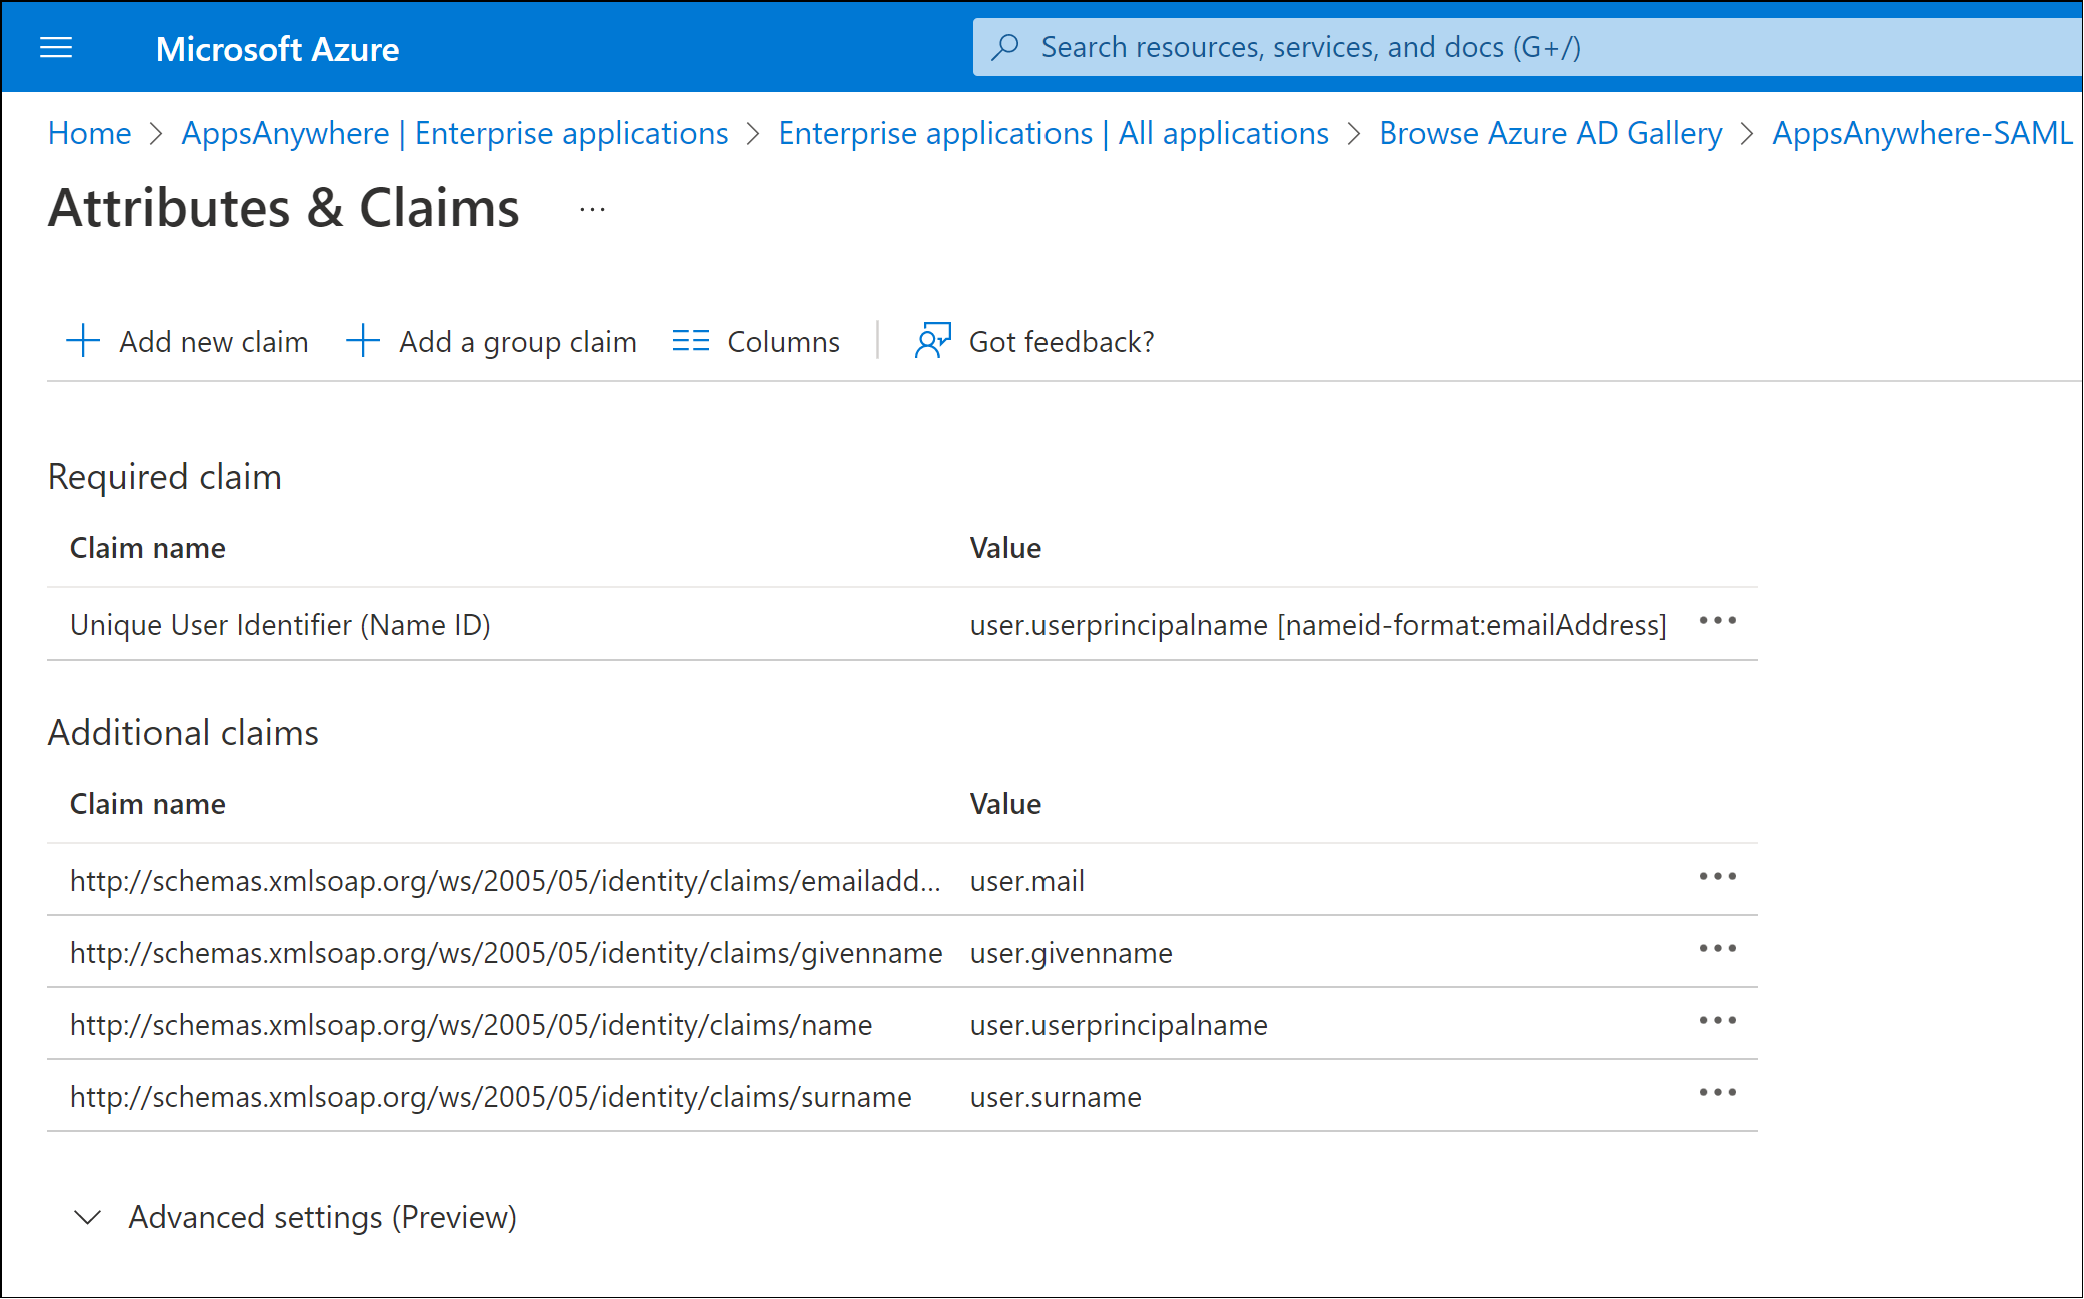
By default there are a number of attributes that are passed within the SAML response. These claims contain user attributes that can be used by AppsAnywhere to determine the identity of the user.
The most common value used to represent the user's identity is the user.userprincipalname attribute and value.
In order to use this value, you need to make a note of the Claim Name for the user.userprincipalname value
e.g. http://schema.xmlsoap.org/ws/2005/05/identity/claims/name
This value is required for a later step when defining the Single Sign-On method within AppsAnywhere.
Add displayname claim
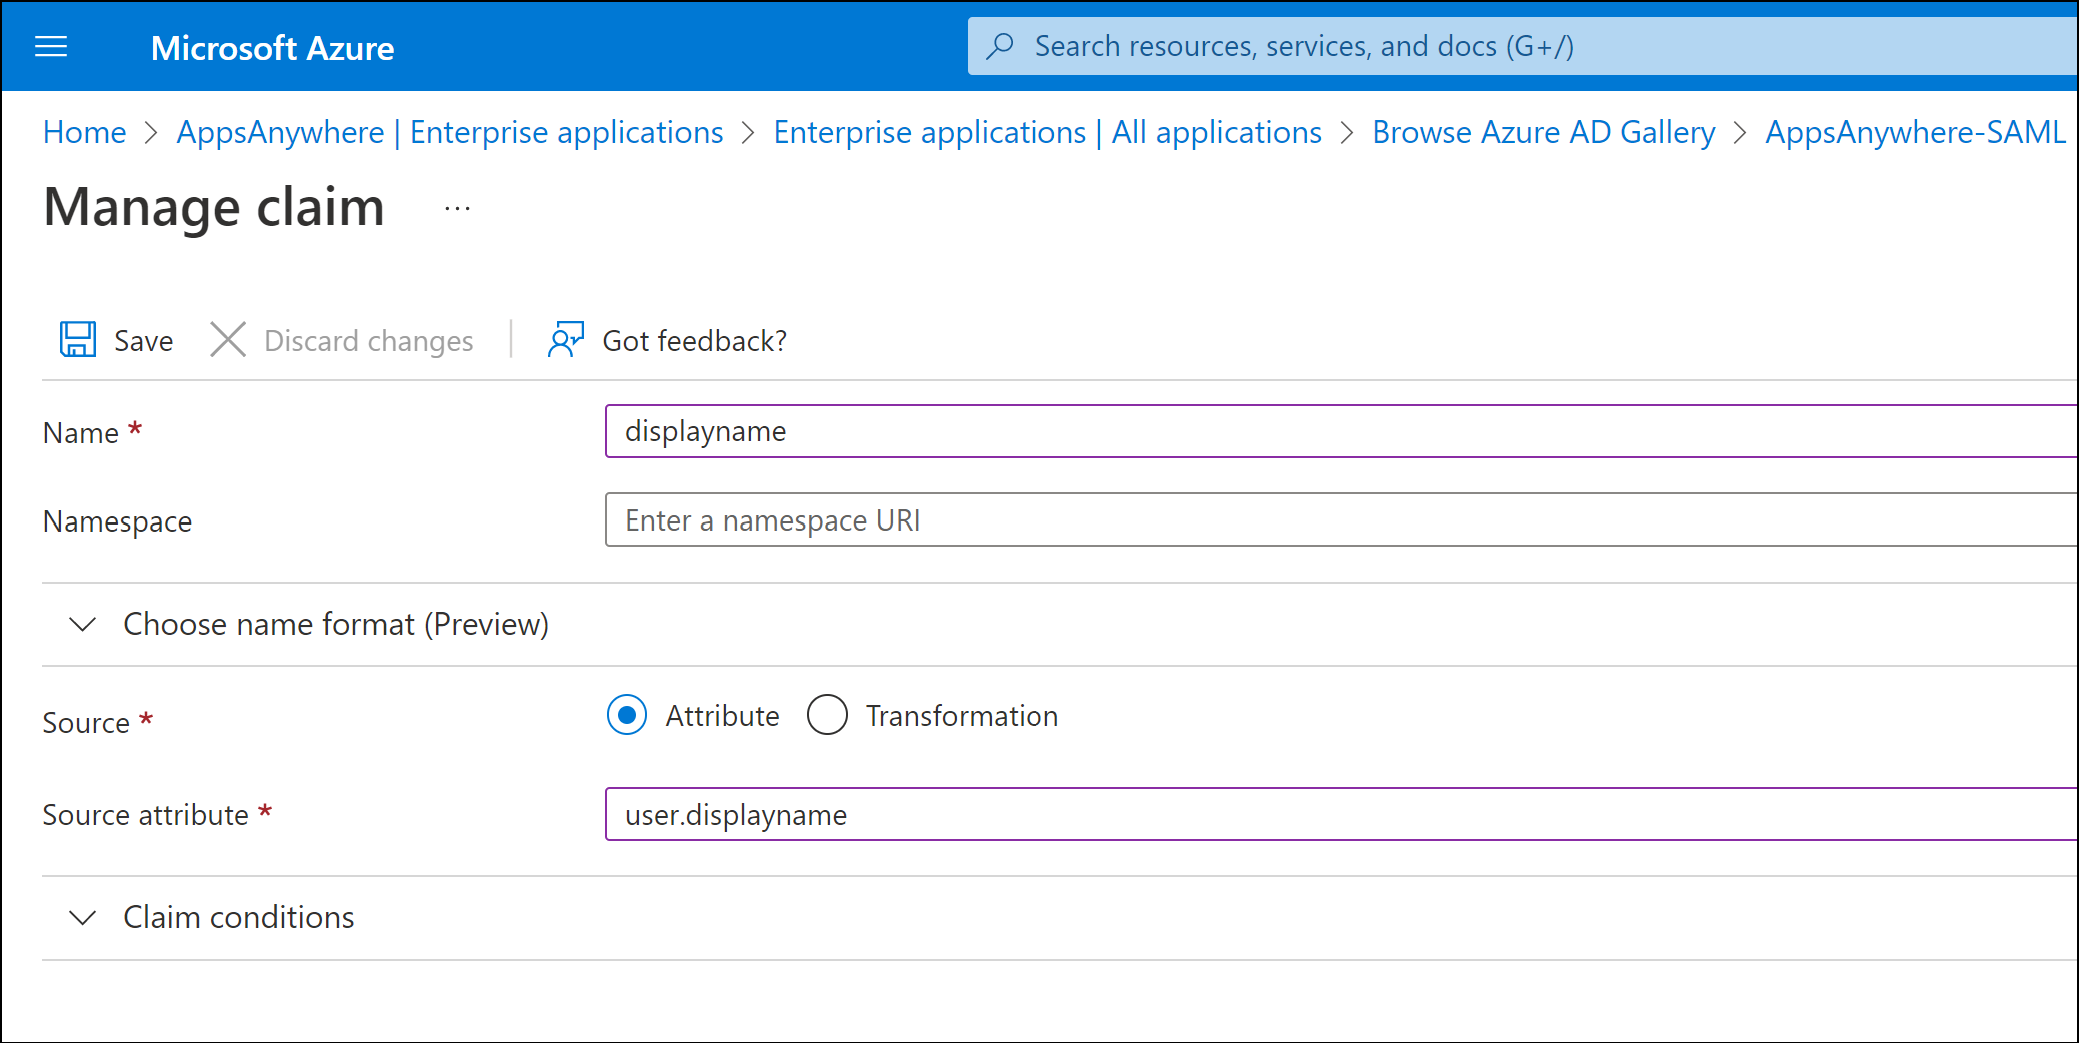
In addition to the default claims and attributes, a new claim needs to be added to pass the user’s display name property.
Click Add new claim
In the Name field enter displayname as the name of the claim that will be passed in the SAML response.
The Name value defined is a text label that is associated with the selected attribute in the SAML response. If you have chosen to use a different name, please make a note of the value as it will be required in a later stage.
Ensure the Source option is set to Attribute
In the Source attribute drop down list, select the user.displayname attribute.
Click Save
Close the User Attributes & Claims section to return to the SAML-based Sign-on page.
SAML Certificates
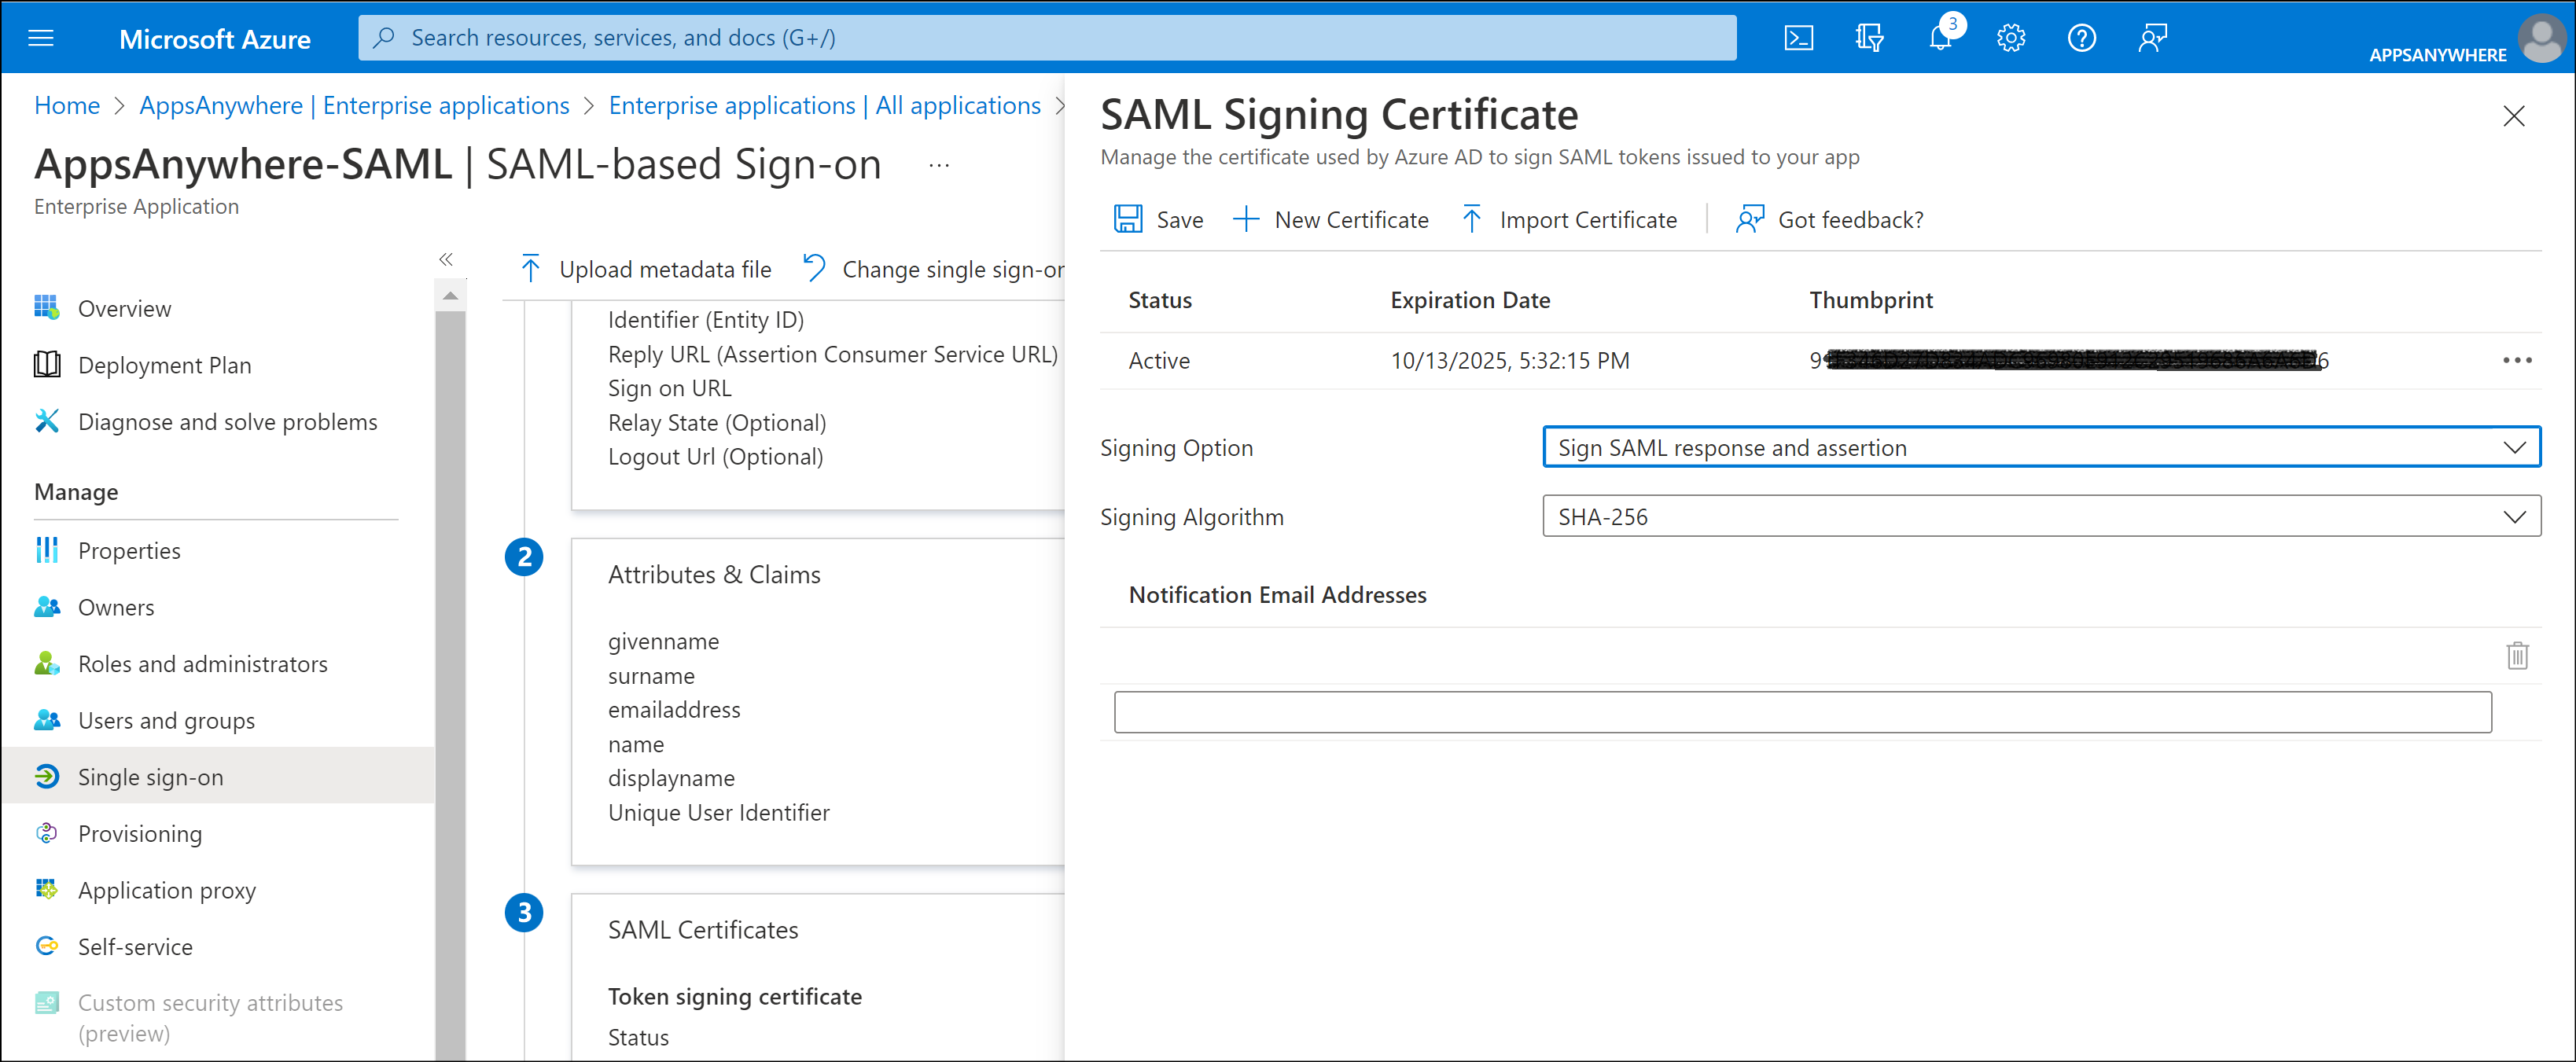
Click Edit within the SAML Certificates section.
Change the Signing Option value from the default Sign SAML assertion to Sign SAML response and assertion
Click Save.
Federation Metadata
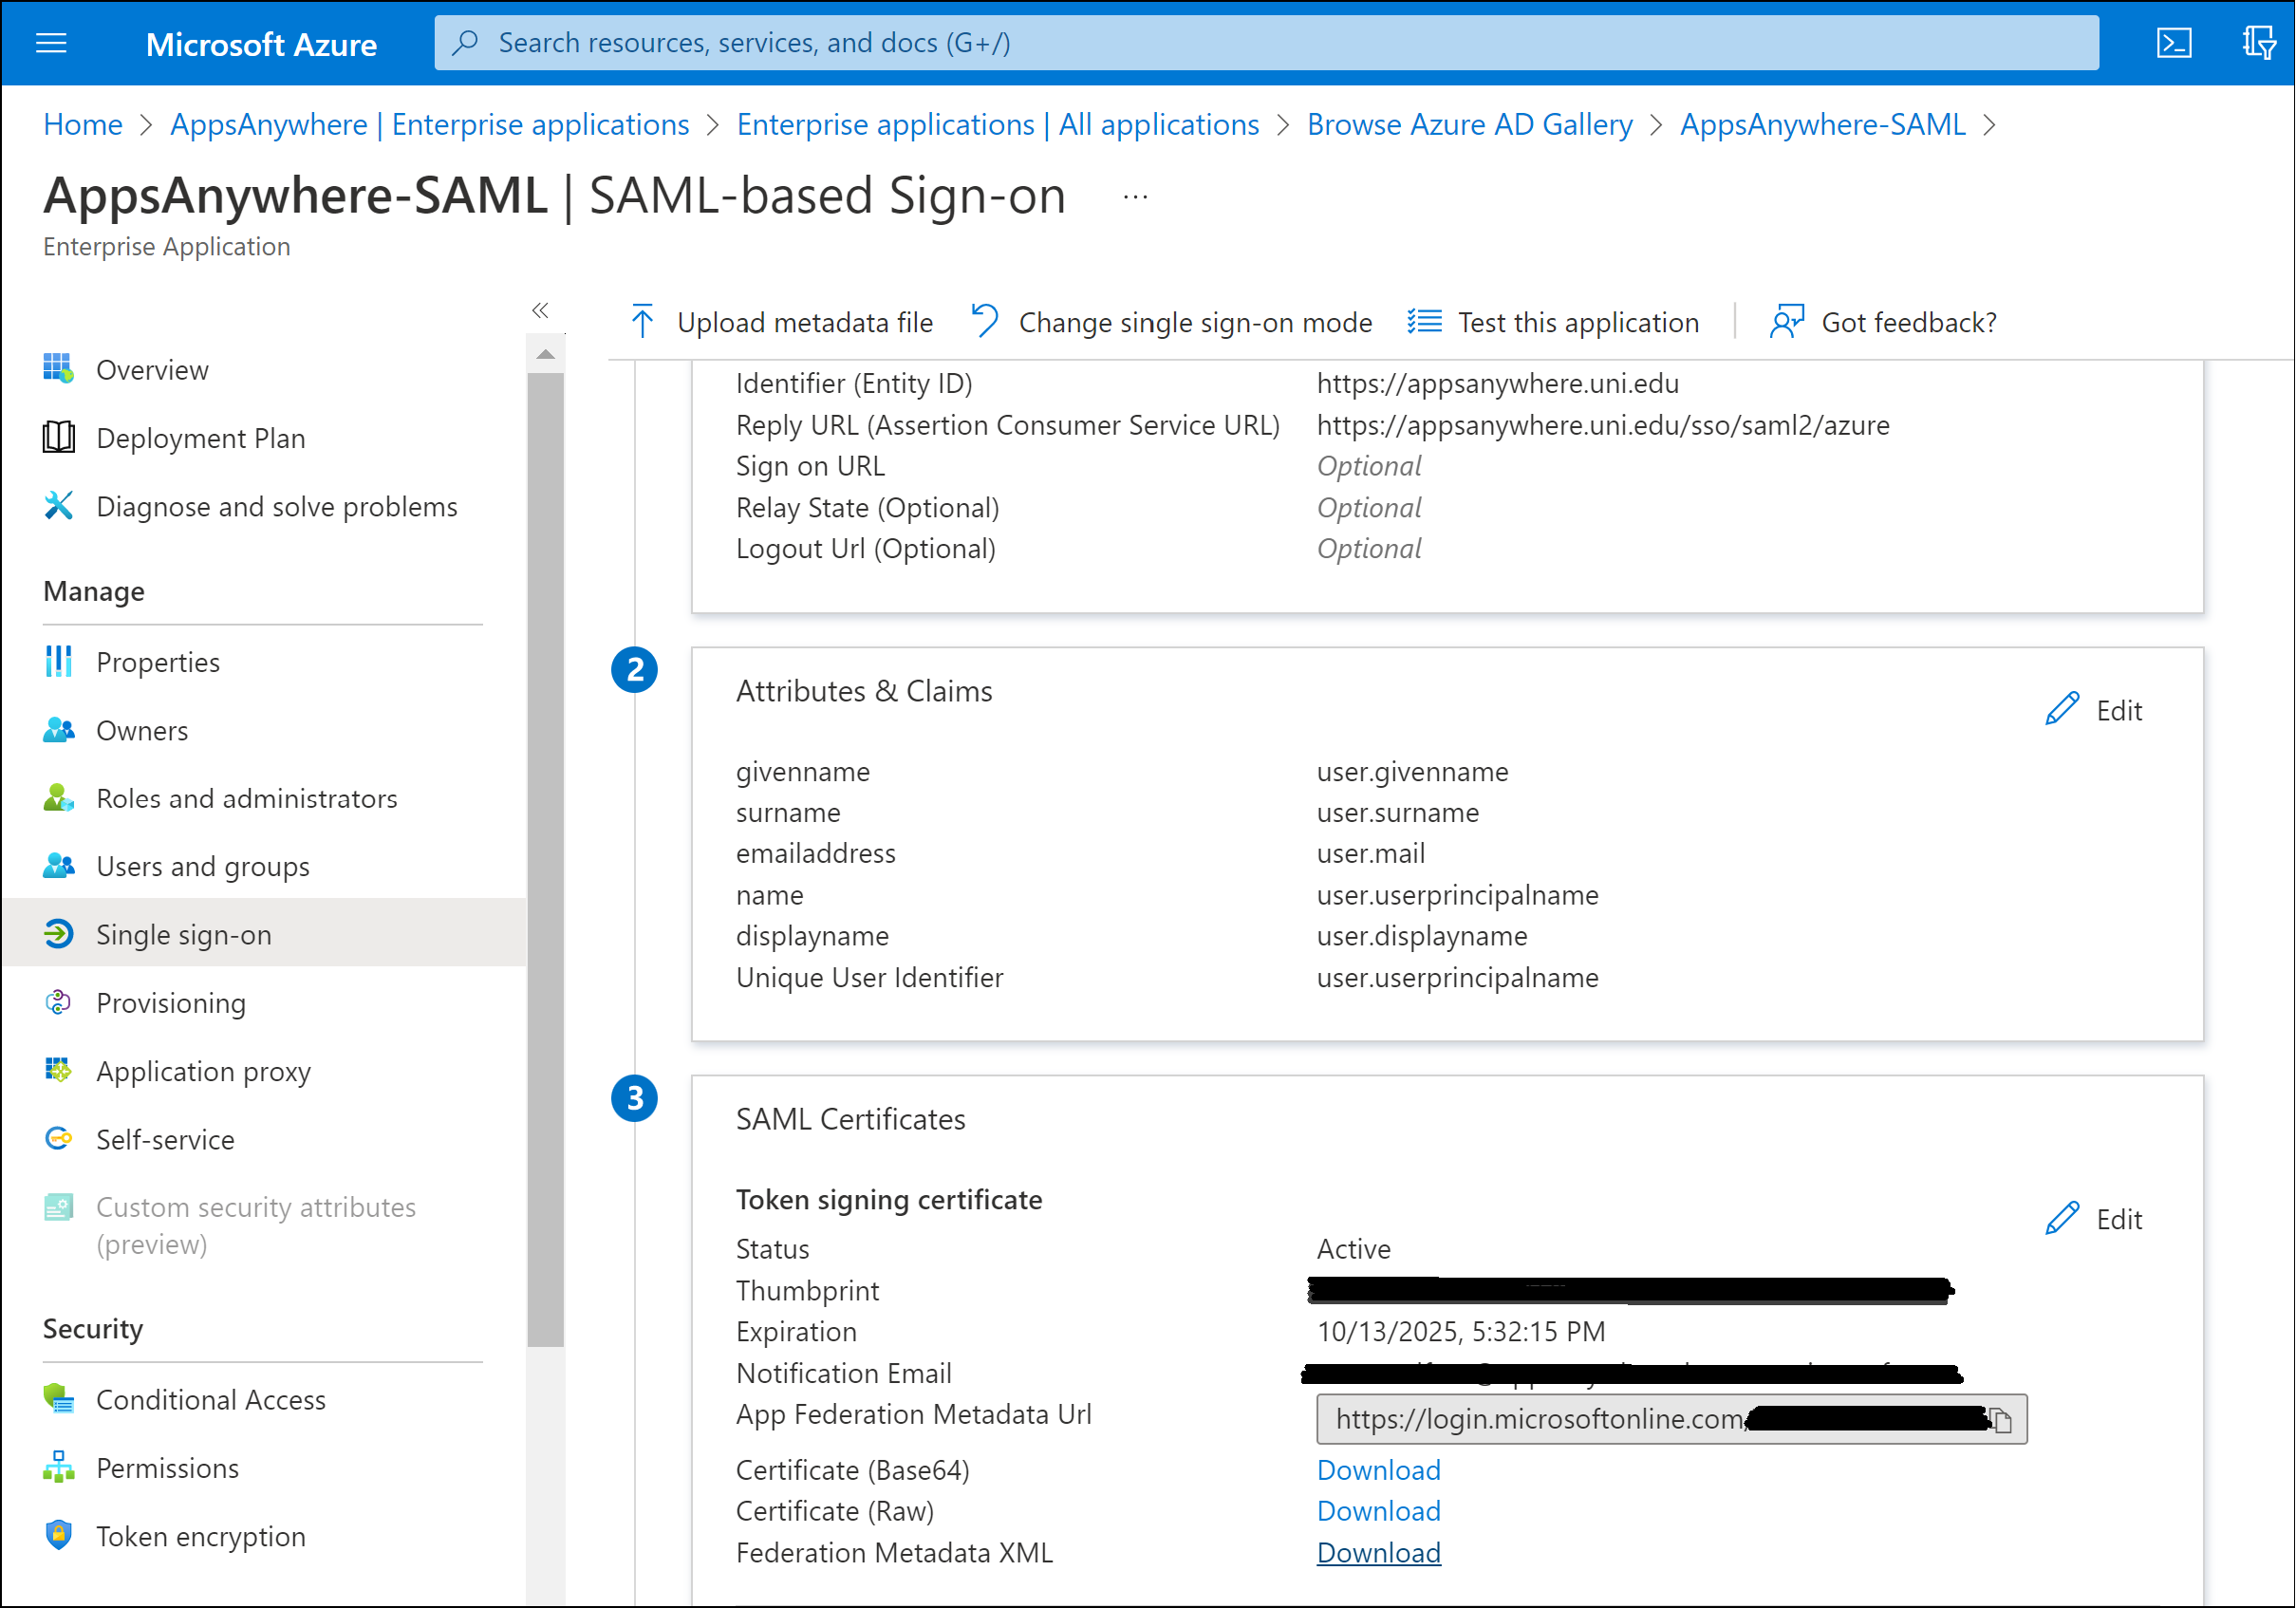
Click Download next to the Federation Metadata XML option within the SAML Certificate section.
The Federation Metadata XML file will be used to configure the identity provider options within AppsAnywhere (when you define the AppsAnywhere SAML Single Sign-On method as below).
AppsAnywhere SAML Single Sign-On Method
Log into AppsAnywhere as a System Admin user.
Navigate to the AppsAnywhere Admin section.
Select Single Sign-On from the settings menu.
Click Add New Method.
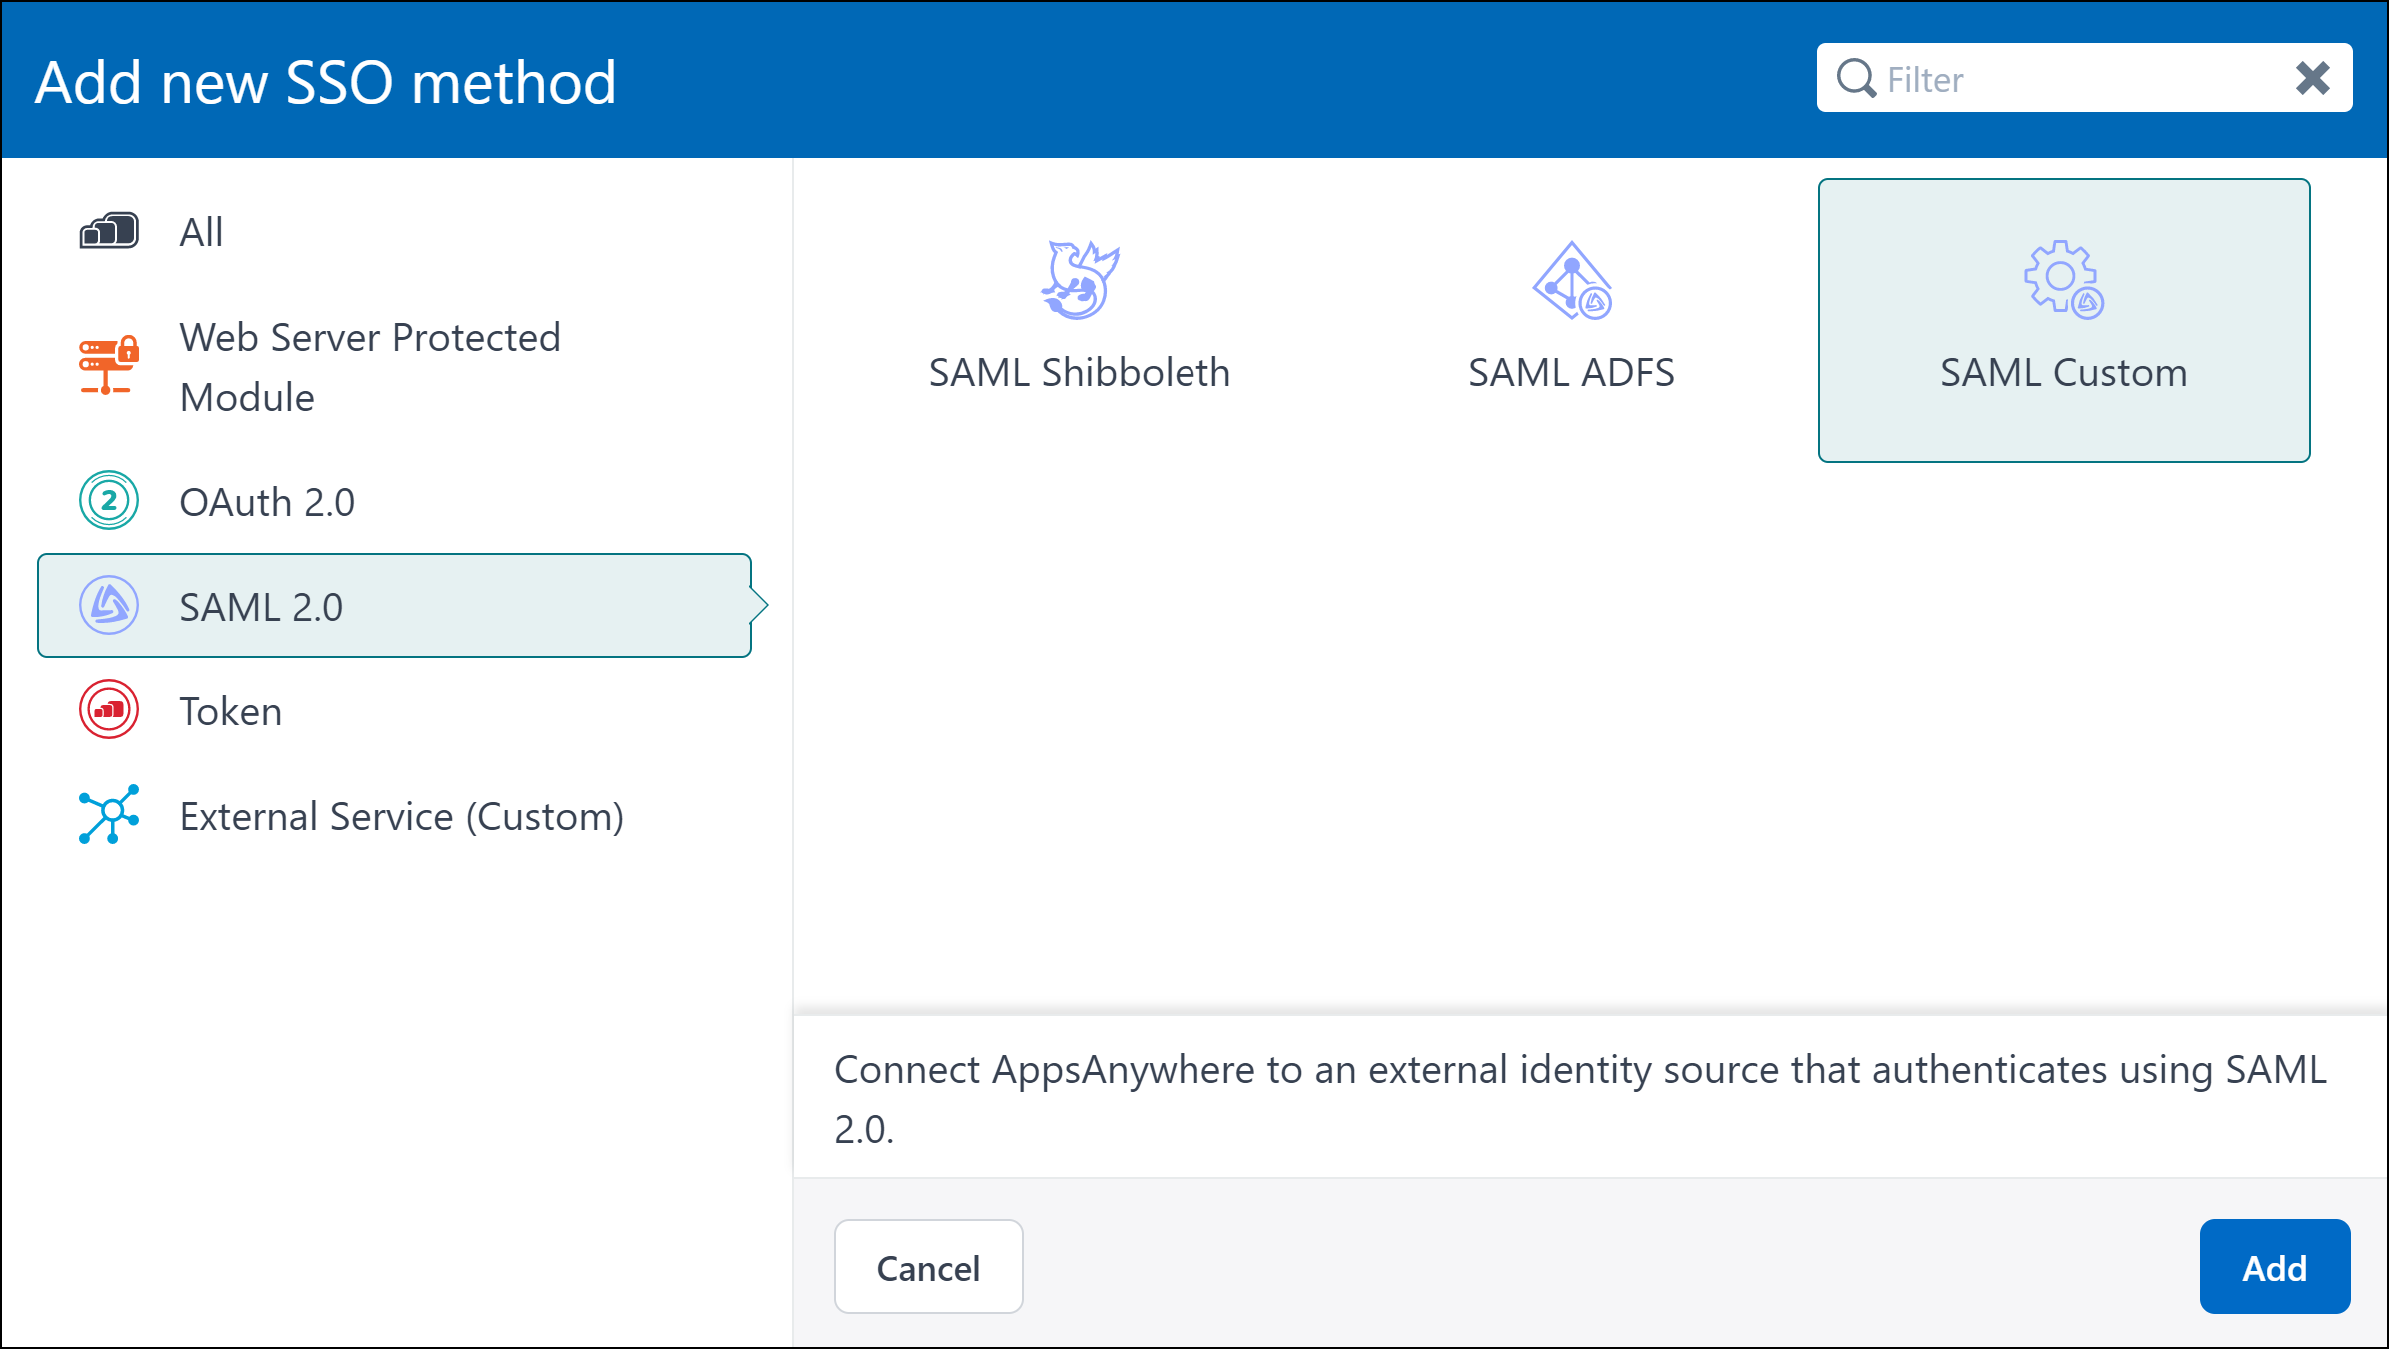
From the SAML 2.0 section select the SAML Custom option.
Click Add.
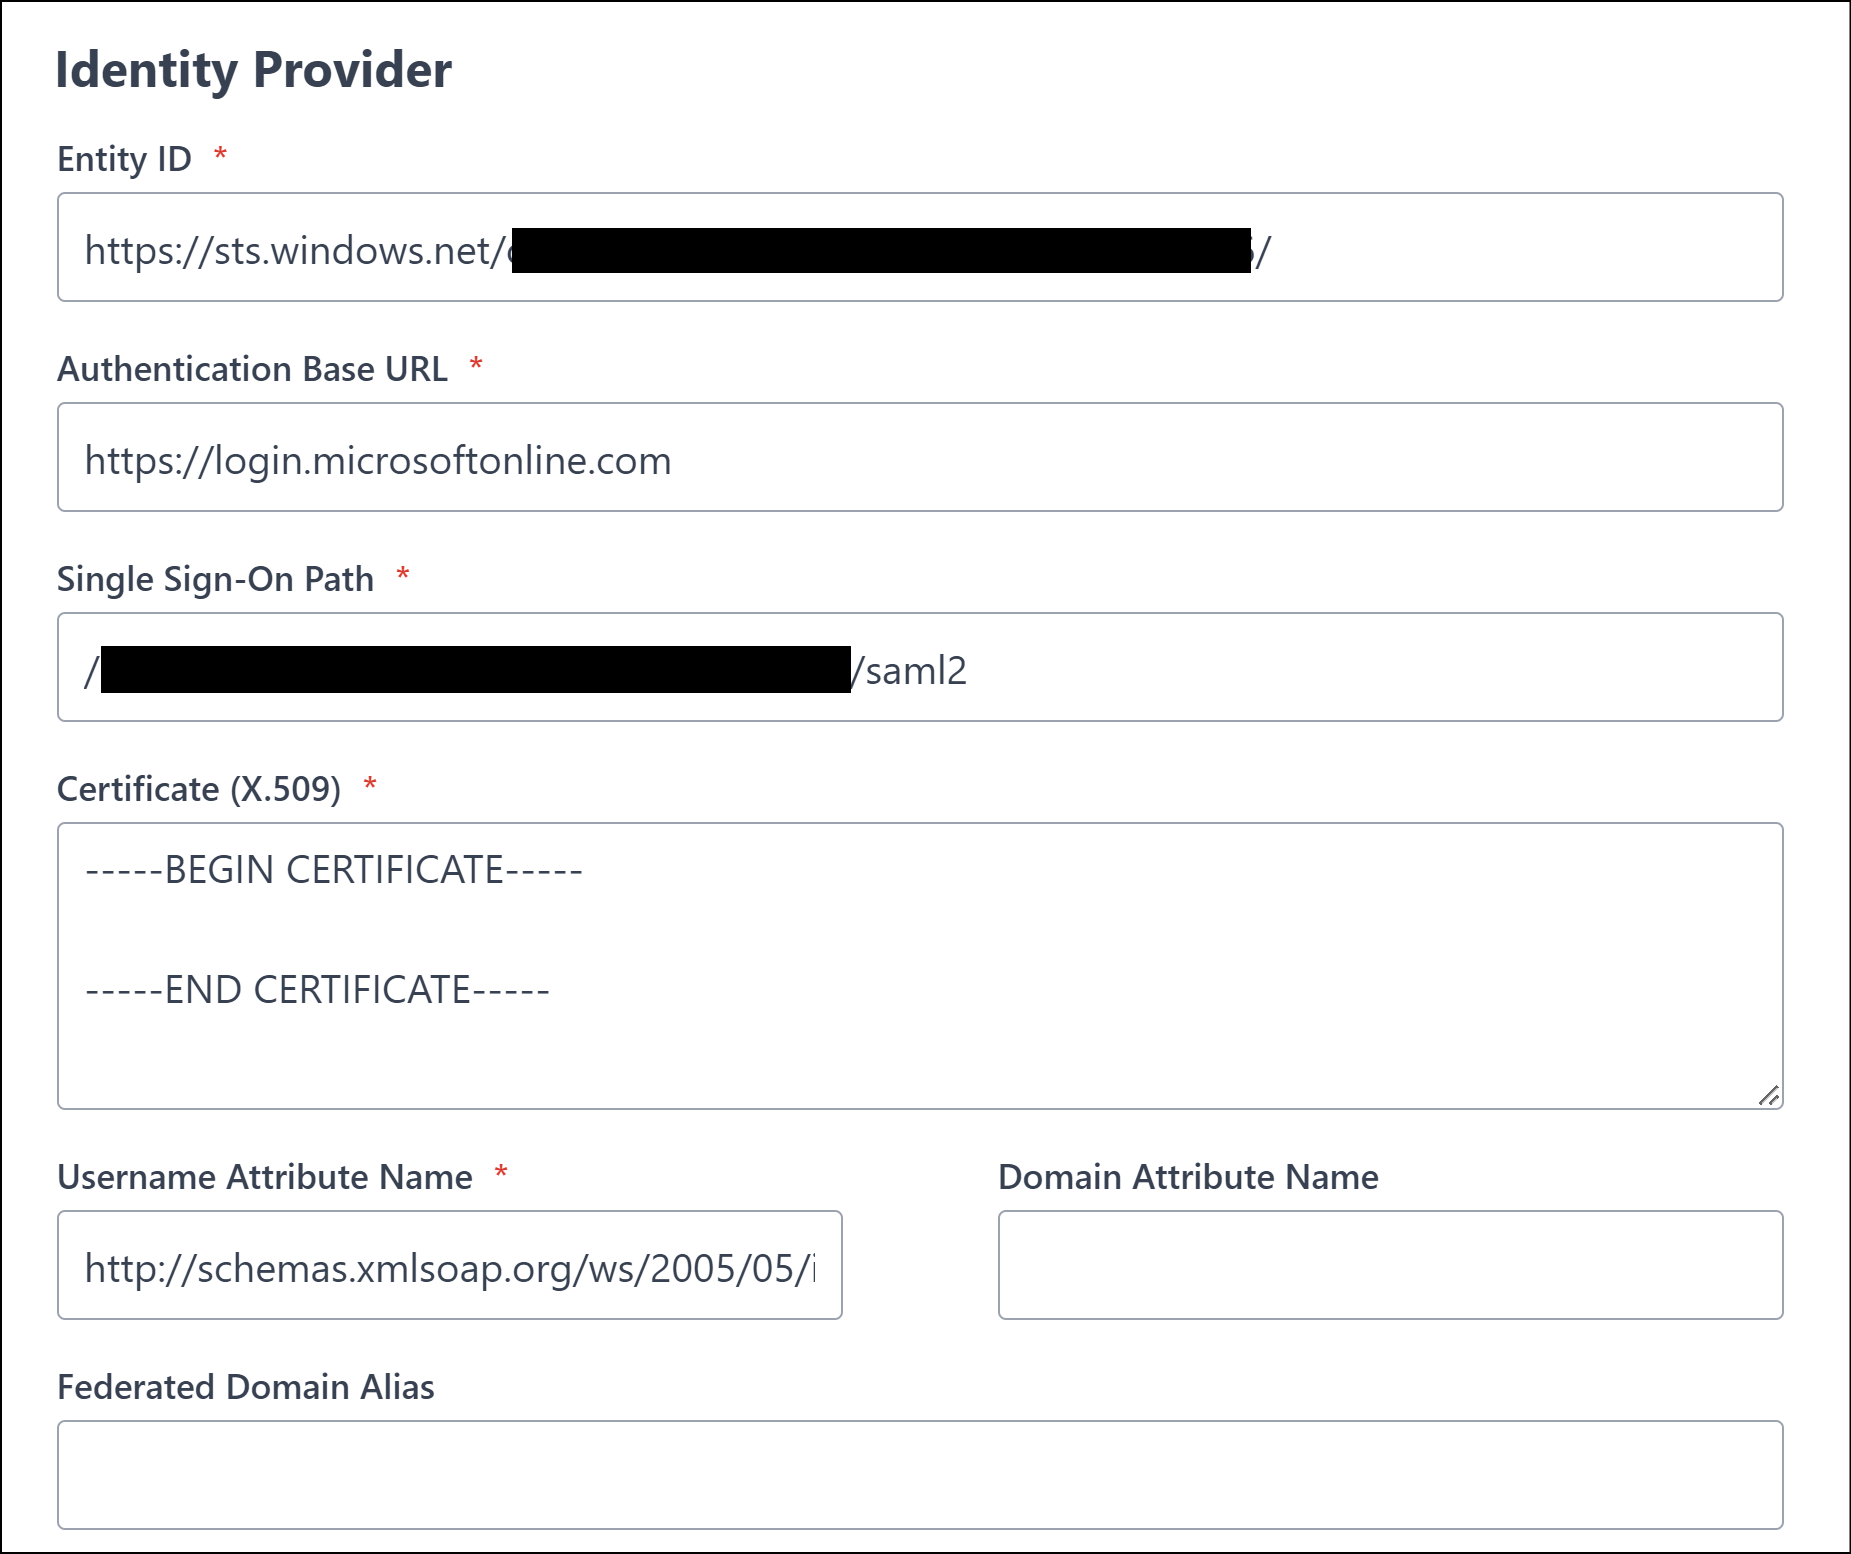
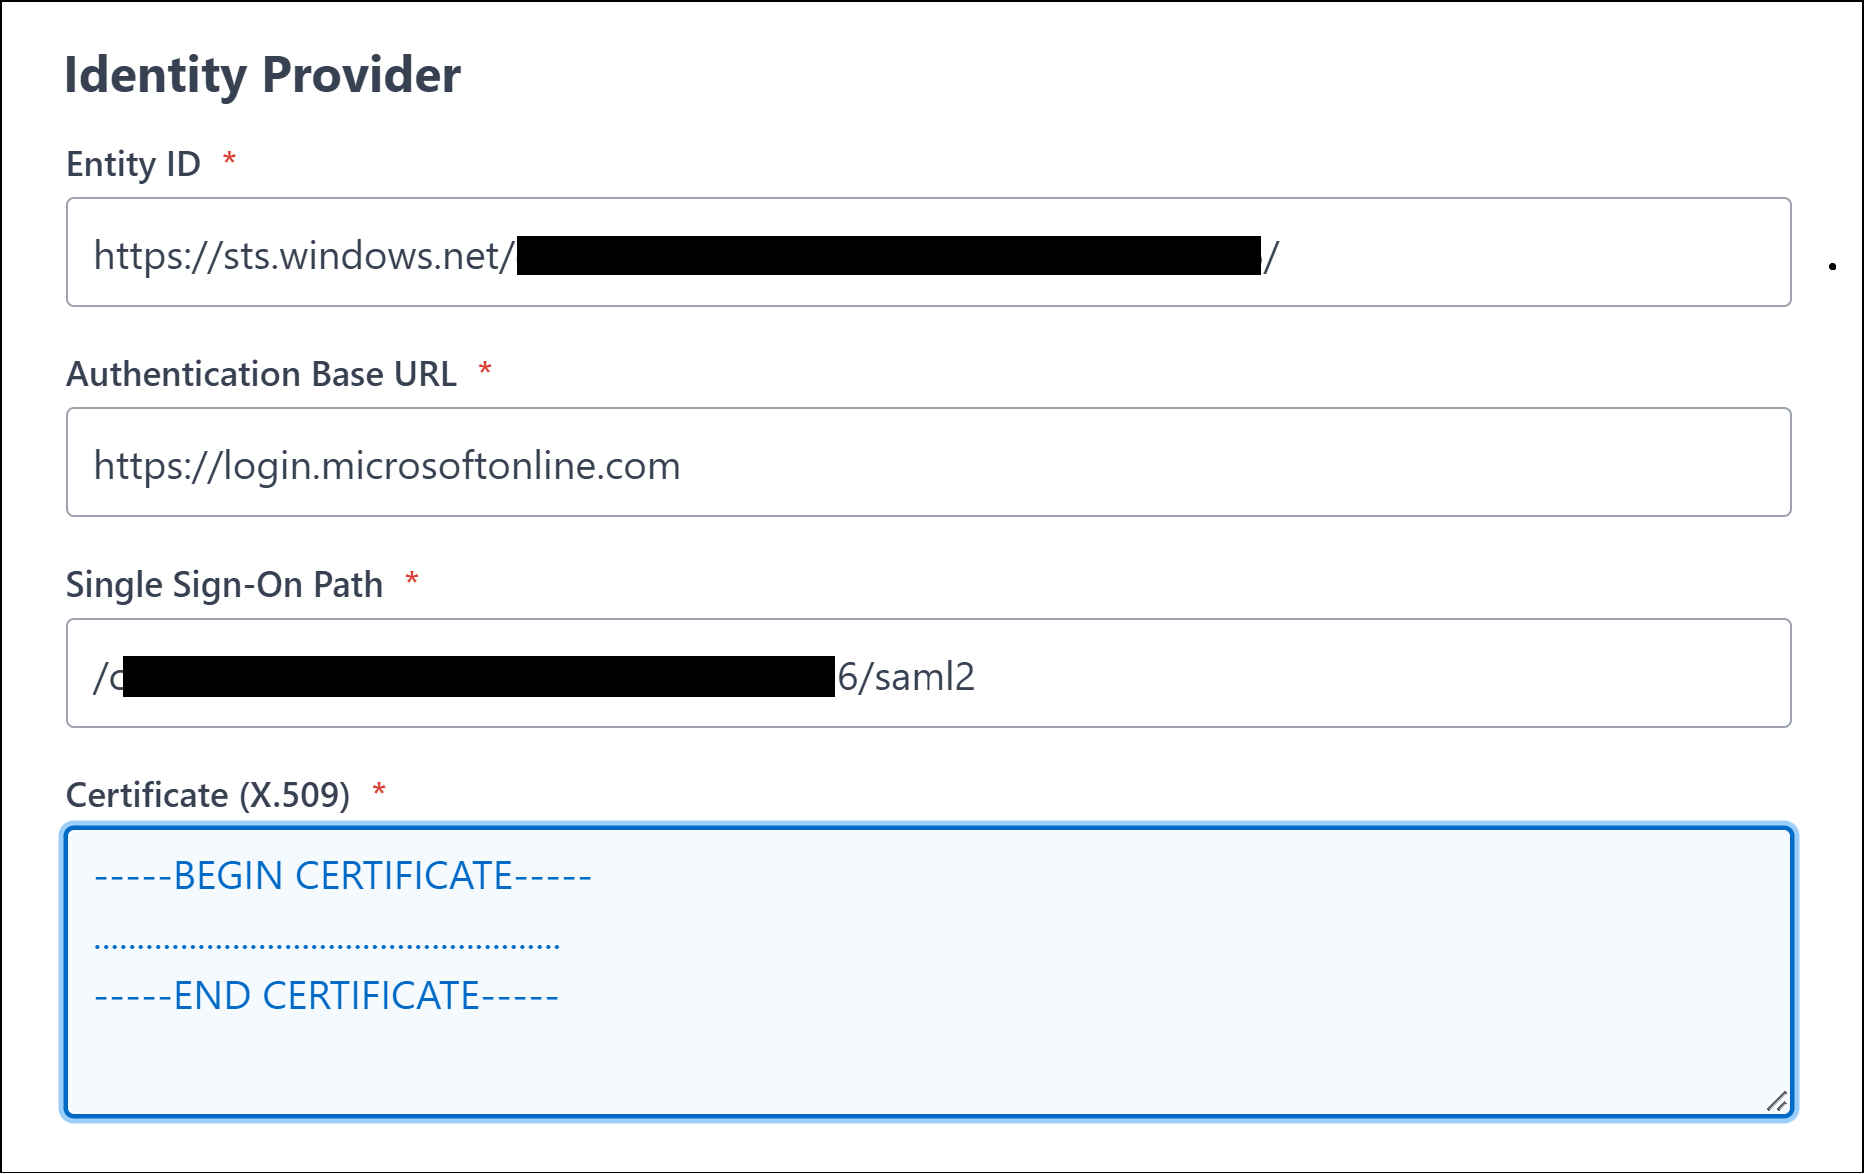
Scroll down to the Identity Provider section
Paste the Federation Metadata XML file content into the Importing MetaData field
Click Add MetaData to form button.
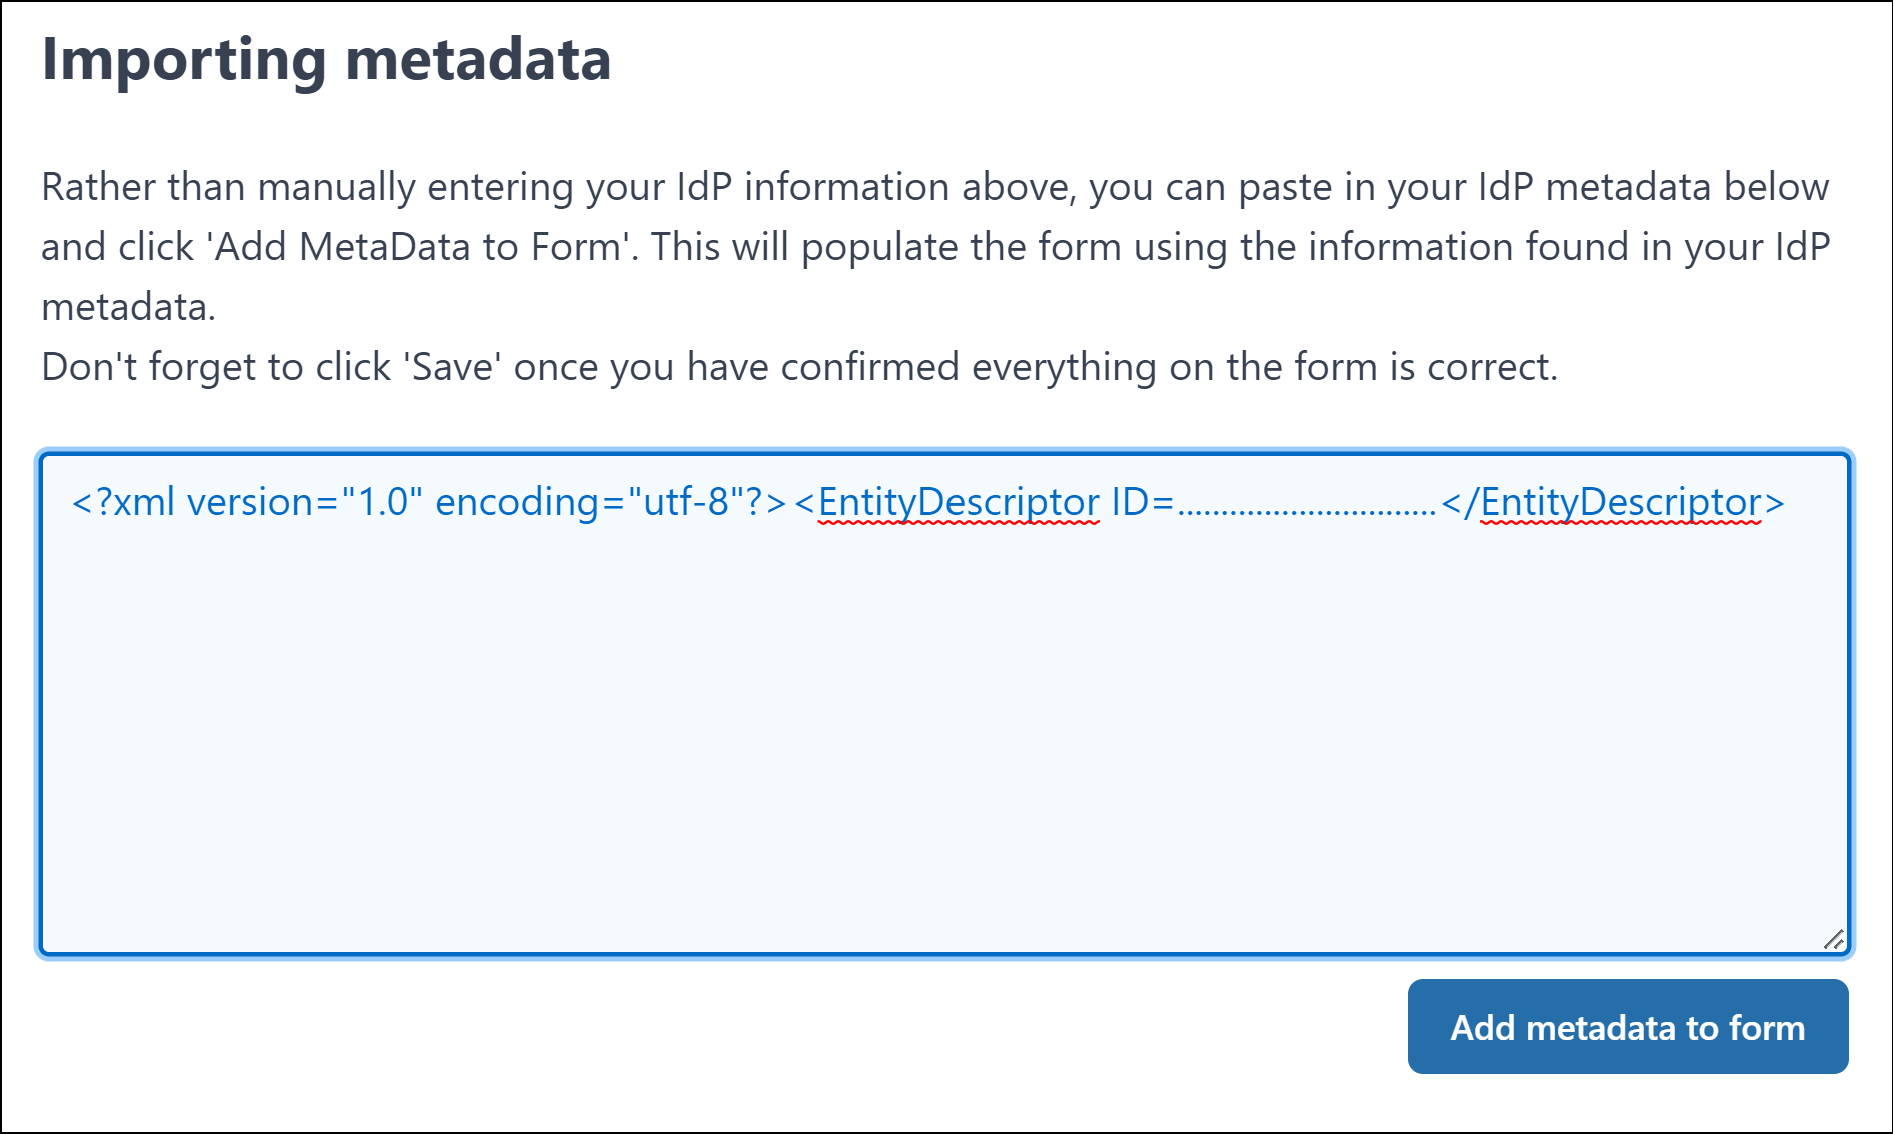
This process will populate the required values into the Identity Provider fields.
Select one of the the following sections based on the required AppsAnywhere configuration to continue.
Once complete, enable and save the SSO method.
Please refer to the SAML 2.0 Common section of the documentation for any further information.
